The Robertshaw RS8110 is a thermostat designed for controlling heating and cooling systems. This operation manual provides comprehensive instructions for its use, including thermostat operation, quick reference information, temperature adjustment, differential/swing settings, calibration, and terminal designations.
Function Description
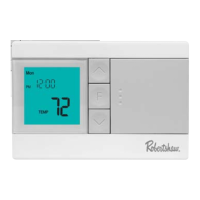
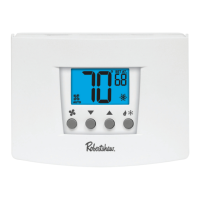
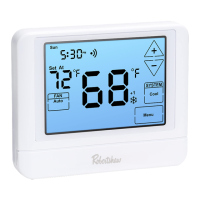
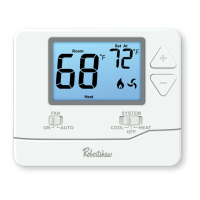
The RS8110 thermostat serves as the central control unit for your HVAC system, allowing you to manage room temperature effectively. It features an LCD screen that displays both the current room temperature and the user-selected set-point temperature. The thermostat supports both heating and cooling modes, enabling you to maintain a comfortable indoor environment year-round. It also includes a fan control, offering options for continuous operation or automatic activation with heating/cooling calls.
Usage Features
The thermostat's user interface is designed for straightforward operation. The main controls include:
- LCD Screen: This display provides real-time information about the room temperature and your desired set-point. It also shows system operation indicators, such as icons for cooling, heating, or fan activity. If these icons are flashing, it indicates a 5-minute delay for compressor protection, a safety feature to prevent damage to your HVAC system. The screen also features a low battery indicator, prompting you to replace the batteries when necessary.
- Fan Switch: This switch allows you to select between "ON" and "AUTO" fan modes. In "ON" mode, the fan runs continuously, circulating air throughout your home. In "AUTO" mode, the fan only operates when there is a call for heating or cooling, optimizing energy usage.
- System Switch: This switch controls the primary operation mode of your HVAC system. You can select "HEAT" to activate the heating mode, "COOL" to activate the cooling mode, or "OFF" to disable both heating and cooling functions. It's crucial to note a safety caution: do not switch the system to "COOL" if the temperature is below 50°F (10°C), as this can damage the air conditioning system and potentially cause personal injury.
- Temperature Set-Point Buttons: These are the "Up" (Δ) and "Down" (∇) buttons, used to adjust your desired temperature. Pressing these buttons allows you to increase or decrease the set-point temperature to your preferred level.
Adjusting the Temperature
To change the temperature, simply press the "Up" (Δ) or "Down" (∇) buttons until the desired temperature is displayed on the LCD screen.
Differential/Swing Settings
The RS8110 allows you to customize the temperature differential, also known as the swing, for both cooling and heating operations. This setting determines how much the room temperature must deviate from the set-point before the HVAC system activates.
- Cooling Differential (Swing): The factory preset for cooling is 0.5°F. This means the cooling system will turn on when the room temperature rises 0.5°F above the set-point. If you find the cooling system cycling too frequently, you can increase this differential. To adjust, select "COOL" on the system switch and hold down both the "Up" (Δ) and "Down" (∇) buttons for 3 seconds. Use the "Up" (Δ) and "Down" (∇) buttons to set the differential between 0.2°F and 2°F. After adjustment, wait approximately 15 seconds or toggle the system switch to return to normal operation.
- Heating Differential (Swing): The factory preset for heating is 0.4°F. This means the heating system will turn on when the room temperature drops 0.4°F below the set-point. If the heating system cycles too frequently, you can increase this differential. To adjust, select "HEAT" on the system switch and hold down both the "Up" (Δ) and "Down" (∇) buttons for 3 seconds. Use the "Up" (Δ) and "Down" (∇) buttons to set the differential between 0.2°F and 2°F. After adjustment, wait approximately 15 seconds or toggle the system switch to return to normal operation.
Calibration Setting
The thermostat also offers a calibration setting to fine-tune temperature readings and system delays.
- Temperature Calibration: To access the calibration setting, select "OFF" on the system switch and hold down both the "Up" (Δ) and "Down" (∇) buttons for 3 seconds. You can then use the "Up" (Δ) and "Down" (∇) buttons to adjust the displayed temperature from -4°F to +4°F, allowing you to match it with another thermometer if desired.
- Temperature Scale Selection: While in calibration mode, you can press the "Down" (∇) button to switch between Fahrenheit (F) and Celsius (C) temperature scales. Press the "Up" (Δ) button to select your preferred scale.
- Compressor Short Cycle Delay: After adjusting the temperature scale, press the "Down" (∇) button to access the compressor short cycle DELAY setting. If this setting is "ON," the compressor will not turn on for at least 3 minutes after it was last turned off. This protects the compressor from damage due to rapid cycling. Use the "Up" (Δ) and "Down" (∇) buttons to toggle this setting between "ON" and "OFF." After adjustment, wait approximately 15 seconds or toggle the system switch to return to normal operation.
Maintenance Features
The RS8110 is designed with ease of maintenance in mind, particularly regarding battery replacement.
- Easy Change Battery Door: The thermostat features an "easy change battery door" located on the lower portion of the unit. To open it, simply press the lower portion of the thermostat.
- Battery Type and Installation: The thermostat requires two AAA alkaline batteries. When installing, ensure that the positive (+) ends of the batteries align with the positive (+) battery terminals in the battery compartment.
- Low Battery Indicator: The LCD screen includes a low battery icon. When this icon appears, it is crucial to replace the two AAA batteries immediately. Failure to do so can cause your heating and cooling system to become inoperable, potentially leading to freezing or overheating issues.
Terminal Designations
The manual also provides a list of terminal designations, which are important for installation and wiring:
- RH: 24 VAC (system power supply) HEAT
- RC: 24 VAC (system power supply) COOL
- C: Common 24 VAC (system power supply)
- W: HEAT
- Y: COOL
- G: FAN
- B: REV VALVE HEAT
- O: REV VALVE COOL
These designations guide professional installers in connecting the thermostat correctly to the HVAC system, ensuring proper functionality of all heating, cooling, and fan components, as well as any reversing valves for heat pump applications.