4
Installation Instructions
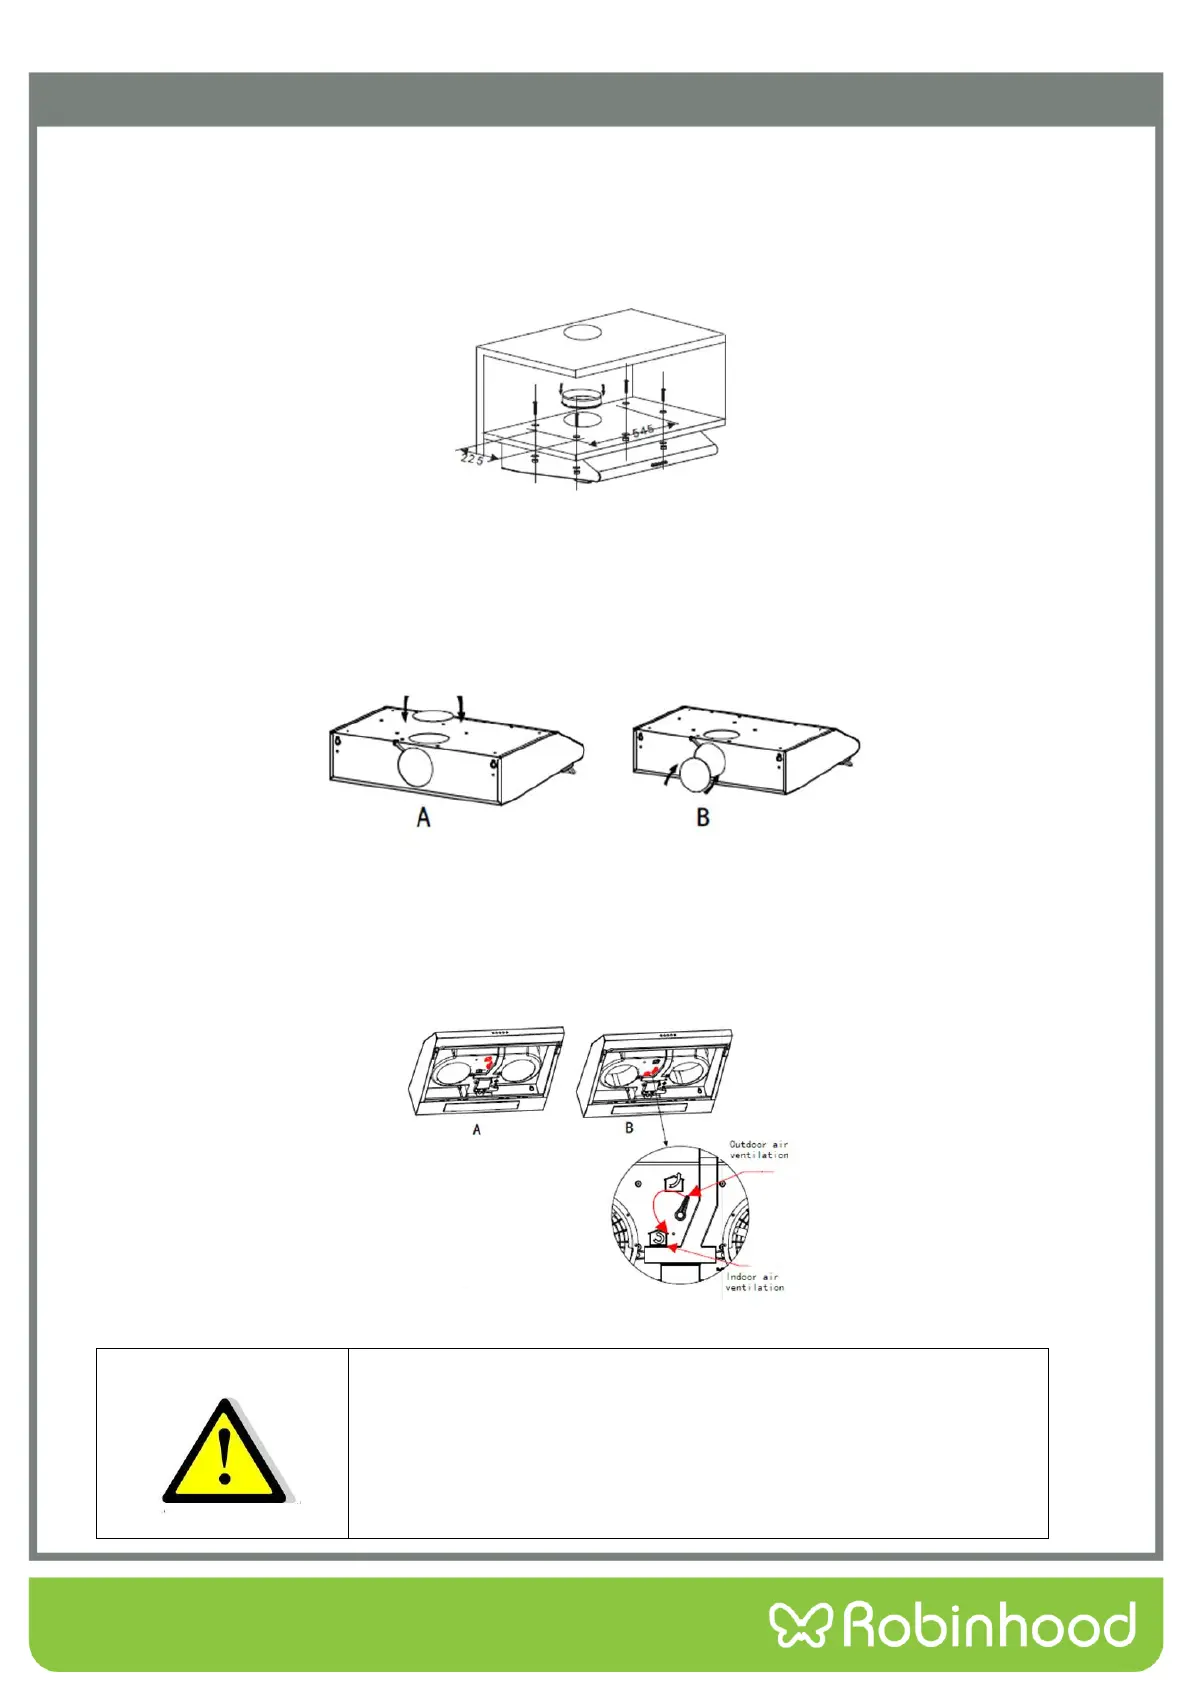
METHOD B:
1. Drill 4 holes of Ø 6mm at the bottom of the hanging cupboard.
2. Put the outlet to the cooker hood, then install the cooker hood on the bottom of the cupboard, tighten the
cooker hood with enclosed 4 screws.
3. Install the adjusted board on the bottom of the hood in order to keep out the gap between hood back and
cupboard. See below picture.
Note: There are 2 methods for ventilation, including ' horizontal ventilation' and ' vertical ventilation'. Please pay
attention to the ventilation method when installation.
Horizontal ventilation: See pic A, please use the cover to seal the outlet on the top, then the air can be vented from
back.
Vertical ventilation: See pic B, please use the cover to seal the outlet on the back, then the air can be vented from top.
AIR VENTILATION SETTING
Outdoor air ventilation: Turn the adjuster to outdoor position (pic A below), install the outlet, turn on the cooker hood,
then the air will be vented from the outside outlet.
Indoor air ventilation: Turn the adjuster to indoor position (pic B below), install the outlet cover, turn on the cooker
hood, then the air can be vented from the inside outlet.
• For safety reason, please use only the same size of fixing or mounting
screws which are recommended in this instruction manual.
• Failure to install the screws or fixing device in accordance with these
instructions may result in electrical hazards.