14
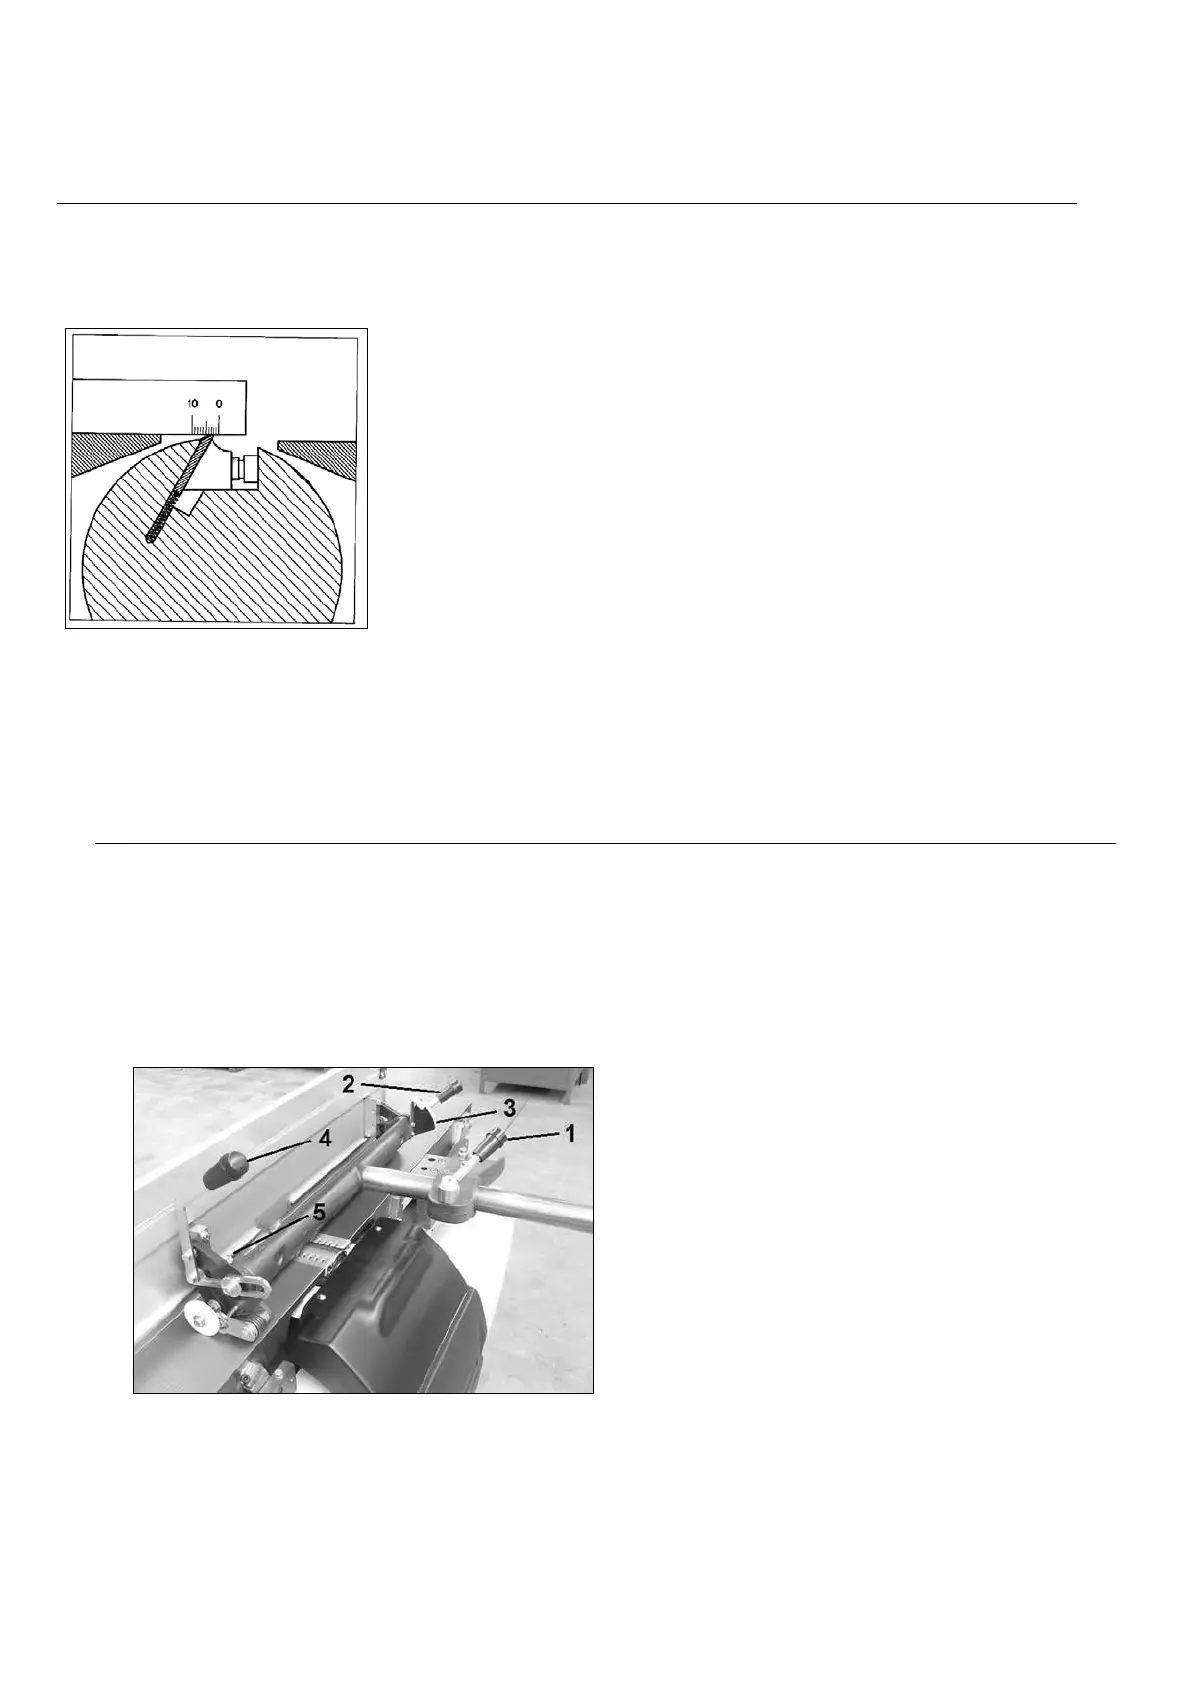
Adjustment of the planer tables (Fig.5)
Both planer tables are set at the factory and do not require readjustment.
When starting up the machine, and after changing the knives, the output table should be perfectly
aligned with the knives. To ensure this, there is a handy little tool that you can make yourself : take
a square planed hardwood bar of about 30 cm in length and put 10 marks
at 1 mm interval ( see drawing). Put one planer knive at its highest point
and put your scale with the “0” on the planer knife top. Now turn the planer
arbor one turn by hand and if the scale is moved fot not more than 2
marks, the knives are well set.
Adjusting the outfeed table to the height of the knives is doen by loosening
the locking bolt and moving the table with the lever.
Retighten the locking bolt afterwards.
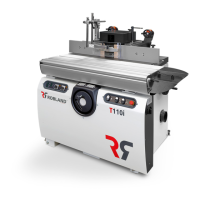
Planer fence (Fig.6)
The planer guide can be adjusted to the width of the workpiece by loosening the handle (1).
After unlocking the handle (2) and pushing the lever (3), the fence can be set at any desired angle
between 90 ° and 45 °.The desired angle can be read at the scale (4).
After setting the desired angle one needs to tighten the clamping lever (2)
firmly. The 45° stop bolt is at the bottom of the support, the 90° stop bolt at the
top planer guide support.
Fig.6