15
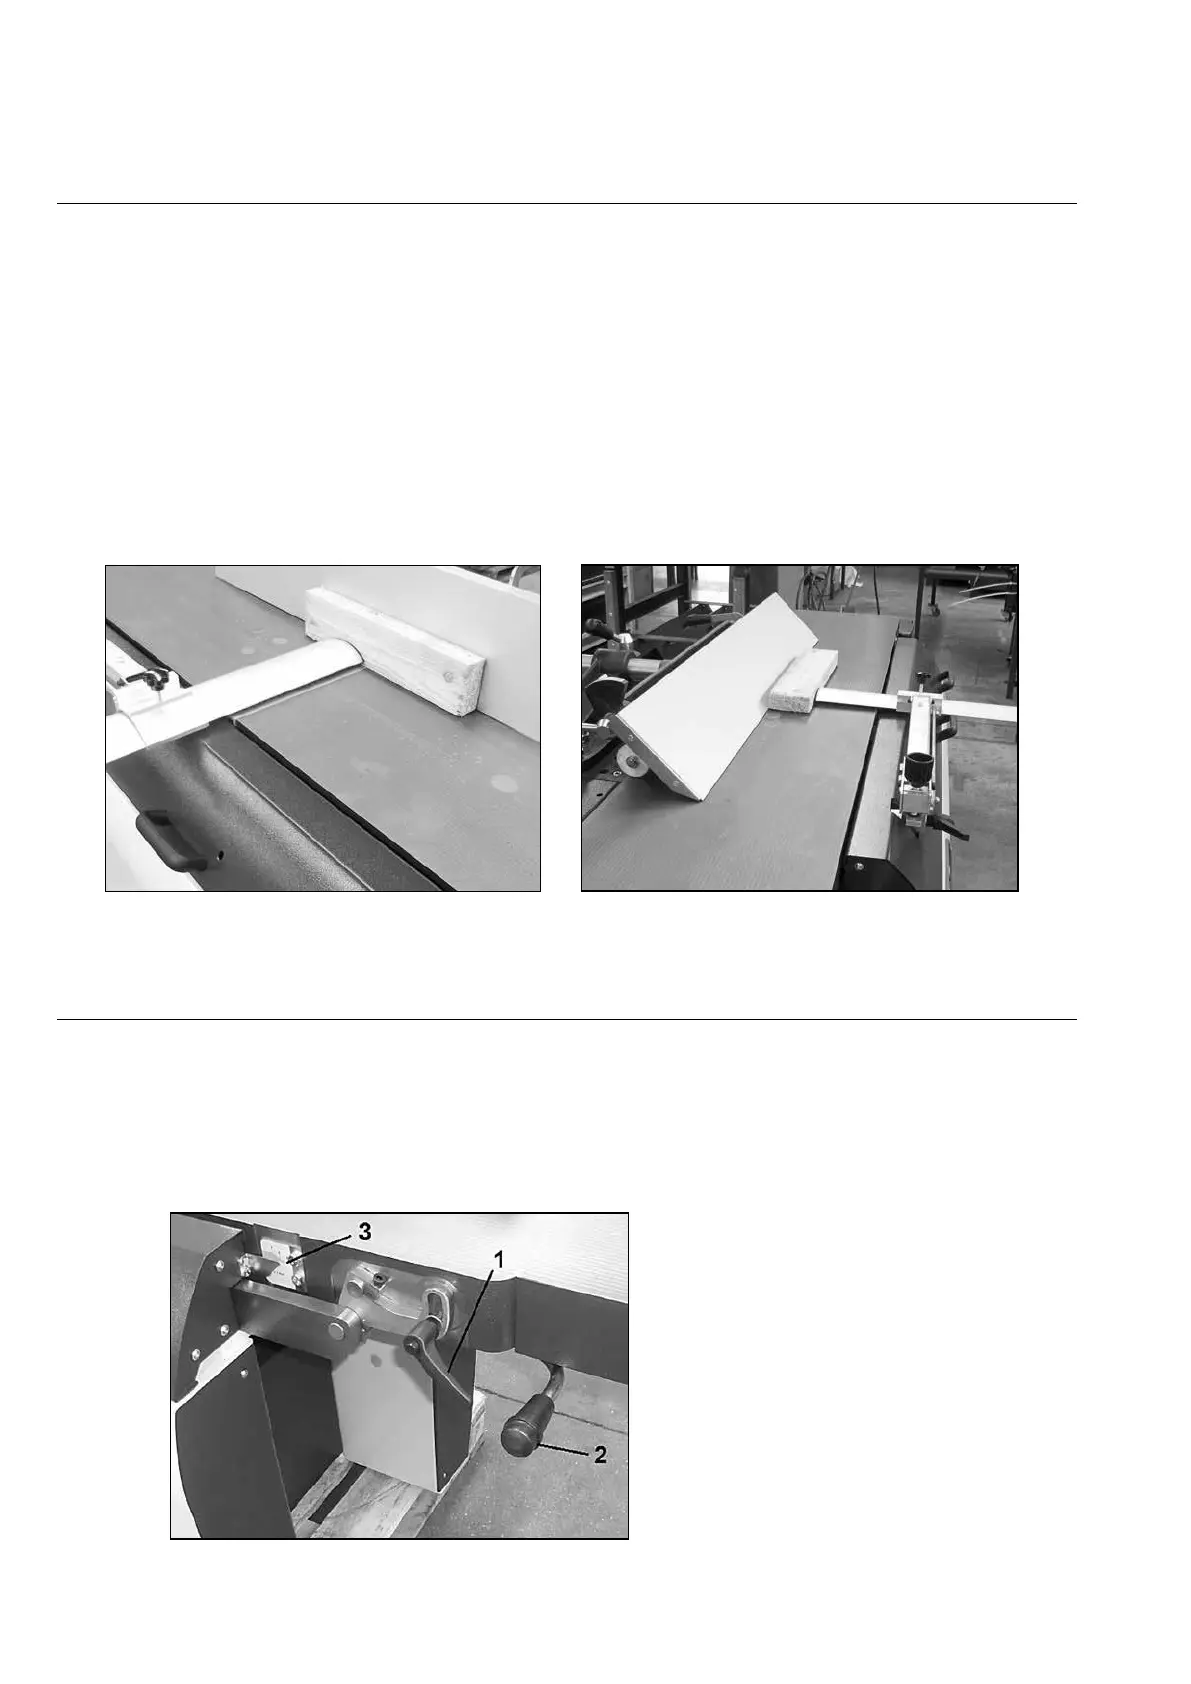
Planer guard (Fig.7-8)
The planer guard above the cutter block and the planer fence is the so-called “ bridge type “, the
adjustment according to the workpiece is done manually.
The suspension system in the security ensures that, after the pressing down of the bridge to the table
surface, the bridge will automatically spring back up to the set height.
Place the bridge always about 10 mm above the table surface, so that the pusher can still be used,
and move the bridge so far sideways that only the workpiece can pass between the planer fence and
the bridge.
When planing, set the bridge to workpiece thickness using the knob.
Make sure the planer security always is in place at all planer
operations,
and make sure that it is kept in good condition. If necessary, replace damaged parts of the
safety device.
Adjusting the planer depth cut (Fig.9)
Unlock the clamping handle (1).
By lifting up or pushing down the lever (2)
the depth of cut can be adjusted. The depth of cut can be read at the scale
(3). After setting is done, lock the clamping handle (1).
The maximum depth of cut is 6 mm.