07
Product Maintenance
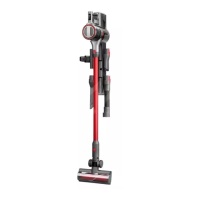
Main Unit
Use a soft and dry cloth to wipe the main
unit. Do not rinse it. Disconnect the power
before cleaning.
1. The frequency of replacement may vary
with the actual situation. If abnormal wear
occurs, replace the parts immediately.
2. If any filter or cleaning head is clogged,
the fan will stop working intermittently
several times before stopping completely.
Please promptly clean the filter and
cleaning head.
Routine Maintenance
D
Note: Do not rinse the main unit or dustbin to avoid
damaging the electrical parts inside.
*Clean every 2 months.
D1-2—Disconnect the power before
cleaning and make sure the machine
stops operating. Remove the baton
or cleaning head. Press the dustbin
opener to empty the dustbin.
D1-1—When using the multi-cyclone assembly,
empty the dustbin as soon as possible
once the dust reaches “Max”, otherwise it
will affect the vacuuming performance.
D2-1—Remove the multi-cyclone assembly.
Open the cover of the front filter and
remove the front filter.
D2-2—Wash the filter and multi-cyclone
assembly with cold water until they
are clean.
D2-3—Dry the filter and multi-cyclone
assembly for at least 24 hours to
ensure thorough drying.
D1-3—Rotate the multi-cyclone assembly in
the direction indicated in the digram
to remove it.
D1-4—Use a dry cloth or tissue to wipe
off the dust inside the dustbin and
attach the bottom cover of the
dustbin into place.
D1
Dustbin
D2
Front Filter and Multi-Cyclone
Assembly
Notes:
•
Disconnect the power before removal and be careful
not to press the power button.
•
Follow the instructions to inspect and clean the front
filter and multi-cyclone assembly periodically to ensure
product performance.
•
When cleaning fine dust or operating in Max mode,
the filter may require more frequent washing.
•
Do not put the filter in a dishwasher or washing
machine for cleaning.
•
Do not dry the filter in a tumble dryer, oven, or
microwave, nor dry it with hot air or near a fire.
Notes:
D2-4—Face the filter upwards.
D2-5—Push the no filter protection lock on
the multi-cyclone assembly into the
slot. Place the filter into the right side
of the multi-cyclone assembly and
gently push it to the left, ensuring
that the protrusion on the filter fits
into the notch on the top of the
multi-cyclone assembly.
D2-6—Close the cover of the front filter,
align the multi-cyclone assembly and
the main unit, and turn the multi-
cyclone assembly counterclockwise
to fit the parts.
D3-1—Rotate the rear filter
counterclockwise to unlock and
remove it from the main unit.
*Clean every 2 months.
D3-2—Rinse the interior of the rear filter.
Rotate the filter while washing to
ensure that all gaps in the filter can
be cleaned. Rinse repeatedly and tap
to remove as much dirt as possible.
D3-3—Dry the filter for at least 24 hours to
ensure thorough drying.
D3-4—After drying, reinstall the filter in the
main unit by aligning it to the unlock
mark and turning it clockwise until it
is locked in place.
D3
Rear Filter