Do you have a question about the Robot Coupe R2N and is the answer not in the manual?
Detailed steps for assembling the cutter bowl attachment onto the motor base.
Step-by-step guide for assembling the continuous feed attachment onto the motor base.
Guidance on using the cutter bowl for chopping, pureeing, and mixing ingredients.
Procedure for sharpening the S-blade using a stone, with safety precautions.
How to use the continuous feed attachment for slicing, grating, and julienning.
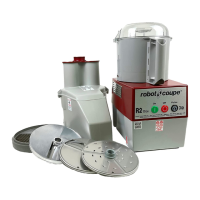
Overview of the 25 different plates available for various food processing functions.
Details on seven slicing plates, their part numbers, MM slicing, and approximate inches.
Information on eight grating plates, their part numbers, metric, and inch measurements.
Details on six julienne plates, their part numbers, metric, and inch measurements.
General cleaning procedures for the machine and its attachments.
Specific instructions for cleaning the blade assembly, including safety precautions.
Crucial warning against immersing the motor base in water to prevent damage.
Routine checks for maintaining the machine's condition and longevity.
Specific instructions for cleaning the motor base assembly carefully.
Troubleshooting steps for when the unit fails to start after assembly.
Steps to take when the machine jams during operation, including safety warnings.
Details on damages and conditions not covered by the product's limited warranty.
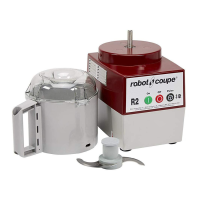
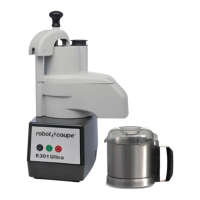
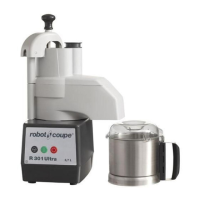
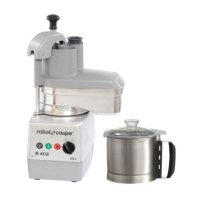
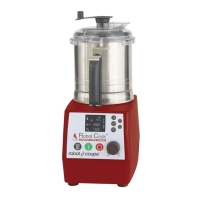
The Robot Coupe R2N and R2N Ultra are commercial food processors designed for high-speed and quality vegetable processing, as well as chopping, grinding, pureeing, mixing, or kneading using a cutter bowl. This manual provides detailed instructions for assembly, operation, and maintenance of both the continuous feed attachment and the cutter bowl attachment. It is crucial to read the manual completely, especially for first-time users, and keep it accessible for reference.
The Robot Coupe R2N and R2N Ultra perform a variety of culinary tasks. With the continuous feed attachment, the machine can slice, julienne, and shred vegetables efficiently. When equipped with the cutter bowl attachment, it excels at chopping, grinding, pureeing, mixing, or kneading various ingredients. The machine is designed for commercial use, emphasizing speed and quality in food preparation.
The food processor should be placed on a sturdy work surface at a comfortable working height, with a standard 115-volt power outlet available. Always ensure the machine is unplugged during assembly and disassembly to prevent accidental startup. The unit should only be on when processing is underway, and it's recommended to operate on a 50% duty cycle. This means the preparation time (cleaning, coring, peeling, and loading) should ideally take longer than the processing time to maximize the machine's lifespan. The machine is equipped with a manual reset thermal overload protection. If the machine overloads or runs too long under heavy load, the overload will trip. To reset, remove the bowl, reduce the product amount, and press the reset button located on the bottom of the motor base. Never leave the machine running unattended.
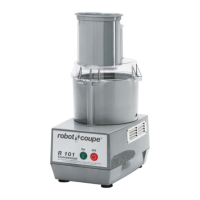
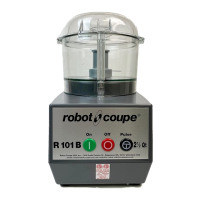
To assemble the cutter bowl, first unplug the machine. Place the bowl on the motor base with the handle slightly off-center to the left, then turn it counterclockwise to lock it in place. Position the S-blade on the motor shaft, rotating it until it falls into place, ensuring the bottom blade is just off and parallel with the bowl's bottom. Press the off button if the machine was left on. Place the lid on the bowl with the ramp off-center to the left, then turn the ramp to the right until it locks over the safety switch rod. It is critical not to operate the machine unless the lid is centered over the bowl and the ramp is locked in place over the safety switch rod. Always remove the bowl lid before attempting to remove the bowl; otherwise, the safety pin can break, preventing operation.
For chopping, fill the bowl 2/3 to 3/4 full with 1 to 2-inch portions of vegetables, meats, or cheese. Use the pulse button for quick start/stop action until the desired consistency is reached. If the motor stalls, reduce the product amount. For pureeing or fine chopping, fill the bowl 2/3 to 3/4 full with 1 to 1 1/2-inch portions. Start with pulsing to reduce size, then press the on button for continuous running. Some purees may require liquid for correct consistency. For chopping hard cheese, place uniform 1 to 1 1/2-inch cubes (up to 1 1/2 pounds) into the bowl and pulse. For powdered cheese, pulse until pea-sized, then run continuously. For chopping onions, celery, cabbage, etc., quarter vegetables into 2 to 3-inch portions, fill the bowl up to 3/4 full, and pulse until desired consistency. Avoid overfilling or continuous running, which can result in uneven cutting. For pureeing or mixing sauces and blends, place ingredients into the bowl (do not overfill), turn the unit on, and run continuously.
For continuous feed operation, always unplug the cord during assembly and disassembly. Place the continuous feed attachment on the motor base with the discharge chute facing the back. Turn the attachment slightly clockwise, then apply gentle downward pressure and turn it counterclockwise until it locks into place, ensuring it is level with the motor base. Place the plastic discharge plate on the motor shaft, rotating it until it drops fully into place and is level with and just off the bottom of the attachment. Select your desired cutting plate and place it on the discharge plate, rotating until it is fully seated. Press the off button if the machine was left on. Place the continuous feed lead on the attachment, aligning the ramp over the safety switch rod. Turn the lead slightly clockwise, then counterclockwise, locking it in place and ensuring it is aligned with the top surface of the attachment. Insert the pushers into their corresponding openings in the continuous feed lead. Do not operate the machine unless it is properly assembled and the continuous feed lead is fully seated and centered over the attachment.
The continuous feed lead, with pushers in place, protects the cutting plate. When the lead is in its closed position with the ramp over the pin, a safety switch activates, allowing the machine to be turned on/off. If the lead is not closed, the buttons will not function. Never attempt to bypass the safety switch mechanism. Always use the off and on buttons to operate the machine.
For slicing, ensure food fits the feed chute and is "squared" at both ends for consistent slices. Remove cores from cabbage or lettuce. Medium-sized heads can be cut into thirds, and rounded portions squared. Larger heads can be cut into fourths. Fill the selected feed chute, place the pusher, turn on the machine, and observe results. Consistent pressure on the pusher yields consistent output; increased pressure may result in thicker slices, while reduced pressure yields finer products. Avoid stalling the motor with too much pressure, which can damage the plate and motor. If no pressure is applied, product may bounce, leading to inconsistent results. Once the pusher is fully settled, press the off switch and reload the entry port. Do not remove the continuous feed lead while the motor is running; wait for it to stop. Do not process frozen products or anything other than food products in the feed chute.
Proper cleaning is a crucial preventive maintenance measure. High acid food content can harm electrical parts if allowed to seep into the housing. Clean the machine after each operational use. Always unplug the machine before cleaning. Do not immerse the motor base assembly in water.
For attachments (bowl, blade, lid, continuous feed attachment, continuous feed lead, pushers, and plates), remove and disassemble all parts. These parts are dishwasher safe or can be washed in a three-tank pot sink. Pre-rinse to remove bulk food. A stiff bristle brush or power sprayer can help remove food from crevices. Use an industry-standard wash, rinse, and sanitization cycle, then air dry. Note that high temperatures in dish machines can shorten the life of plastic and rubber parts; hand washing is recommended for longevity.
For the blade assembly, remove the cap by pulling it up and slightly to the side. The cap is held by small plastic clips. If difficult to remove, use a small rod or screwdriver to gently knock it out from the bottom. Clean the blade according to health department regulations, pre-washing with a power head sprayer and using a small round brush to remove residue. For dishwashing, remove the cap and place the blade flat on a wash tray or in a small parts holder. For pot sink cleaning, remove the cap and wash each item separately, using a sanitization sink with at least 200 PPM chlorine solution. A small brush helps remove food particles from around the blade and inside the hub. Air dry parts flat on a drying tray. The blade assembly can withstand autoclaving at temperatures below 210 degrees C, though this may reduce its lifespan compared to other sanitizing methods.
For the motor base, unplug the unit. Sponge with a lightly soaked (not dripping) cloth in mild detergent, ensuring water does not penetrate the shaft seal or switches. Clean around the shaft seal with a small brush, removing all food. Rinse the motor base with a lightly dampened cloth, then with a sanitizing solution, and dry with a soft cloth, removing all liquids from seal areas.
Handle the machine with care to prevent damage. Periodically examine the seal around the motor shaft to ensure it is maintained against liquids. The seal should last a year or more with proper care but should be replaced if wear or erosion is noted, or at least once a year by an authorized repair agency. Blades should be kept sharp; dull blades or plates should be sharpened or replaced.
If the unit does not start when assembled correctly, check the plug and try another outlet. Ensure the bowl lid or continuous feed lead is in the proper position with the ramp fully pushed to the right, engaging the safety mechanism. Check the safety switch pin, which can break if the attachment cover is not removed before the attachment.
If the continuous feed lead does not fit flush, check if the processing plate is in its proper position and if the rim of the plate is level with the upper edge of the motor base.
If the unit stops during processing, turn it off, unplug, remove the continuous feed lead and cutting plate, remove processed product, and reassemble. If it still doesn't operate, check the outlet for current (breaker or fuse), try again, or call a local authorized service agency.
If the unit sparks or smokes, turn it off, unplug it, and call a local authorized service agency.
If the unit makes a grinding noise, turn it off, disassemble, and check if the continuous feed lead and processing plate are rubbing. This usually indicates the processing plate was not fully seated or food particles are inside the stem of the processing plate. Reassemble, ensuring the plate is fully seated and no food particles are on the motor shaft. If the noise persists, assemble without the plate and turn it on; if no noise, the plate may be bent or warped. Try another plate. If noise continues, call a local factory authorized service agency.
If cucumbers come out with torn skins or seeds knocked out, the cutting plate is dull and needs to be changed. If carrots are watery after grating, the grating plate is dull and should be replaced. If cheese forms balls instead of shreds, it may be warm cheese or a dull grating plate, which should be replaced.
If the machine jams during processing, turn it off and unplug. Remove the continuous feed lead and product remnants. Wear cut-resistant gloves and try to turn the plate manually counterclockwise. If the plate slips, reassemble and continue. If jamming persists or is too tight to loosen by hand, contact a service agency. Ensure the motor shaft is clean and the plate is fully seated before reassembling. Always keep the machine unplugged when cleaning or servicing.
| Power | 550 W |
|---|---|
| Speed | 2800 rpm |
| Weight | 6.5 kg |
| Dimensions | 230 x 180 x 320 mm |
| Voltage | 230 V |
| Phase | 1 |
| Bowl Material | Polycarbonate |
| Motor Power | 550 W |