EasyManua.ls Logo

Rockville dB11 - User Manual

Rockville dB11
20 pages
Print Icon
To Next Page IconTo Next Page
Loading...
Missing items? If you ordered a bundle that includes more than one product and you are missing part of your bundle then it just means your
order shipped from two different warehouses. You will receive the remaining items very soon. If you have any concerns or inquiries, feel free to
call our customer support center at 646-758-0144, Monday through Thursday, 9am to 10pm EST, and Fridays, 9am to 3pm EST.
WHO READS MANUALS?
dB10/dB11
CLASS D MINI AMPLIFIERS
OWNER’S MANUAL
Instead, go to vimeo.com/showcase/8353919 (dB10) or
vimeo.com/showcase/8353919 (dB11) , or scan the QR
codes and watch short videos that show you how to set
these items up and how to use them.
If you prefer written instructions, please read ahead!
With Rockville you get many options.
dB10
dB11

Questions and Answers

  • J
    John SharpAug 14, 2025
    Why does my Rockville dB11 go into protect mode?
    • B
      Brandi Jackson MDAug 14, 2025
      The Rockville Amplifier might enter protect mode due to several reasons. It could be due to a loose power or ground wire. Ensure these are tightly fastened. Also, verify that the positive and negative wires are correctly connected. Check your subwoofers are compatible and correctly wired. Inspect all speaker connections to ensure no wires are touching, and confirm that the speaker wires are connected to the correct terminals. Be sure to use the proper gauge wires. Disconnecting the speakers can help isolate the issue to the power, ground, or remote wire. If replacing the RCA cables causes the light to turn off, this will fix the problem. Finally, identify and replace any blown speakers and replace speakers with ones of the proper impedance.
  • D
    Dr. Nicholas SmithAug 17, 2025
    What to do if my Rockville dB11 Amplifier won’t power on?
    • J
      johnsonandreAug 17, 2025
      If your Rockville Amplifier isn't powering on, start by checking the external fuse to ensure it's properly seated and making contact. Replace the fuse if it's blown, but never use a higher value fuse. Ensure the power wire connection to the ring terminal is secure and free from corrosion; clean with a wire brush if necessary. Confirm the positive and negative wires are correctly connected and secure. Also, check the remote turn-on wire is securely connected to both the amplifier and the receiver. Connect the power wire to the +12V terminal of the amp, not the ground. Finally, verify all connections are tight.
  • K
    Kyle BrownAug 20, 2025
    How to fix distortion, background noise, crackling, or hissing in Rockville dB11 speakers?
    • S
      Stephanie JohnsonAug 20, 2025
      To address distortion, background noise, crackling, or hissing in your Rockville Amplifier speakers, start by running the RCA cable separately from your power cable. Check and tighten your ground connection. For engine noise, consider installing a ground loop isolator on the receiver’s power lead. To properly set your gain, play music and set the receiver volume to 75% – 80% of the max. Replace the RCA cables if needed, and use high-quality insulated speaker wire made for vehicle applications.
  • B
    bclarkAug 25, 2025
    What to do if one channel on the Rockville dB11 Amplifier isn’t working?
    • S
      samuelfloresAug 25, 2025
      If one channel on your Rockville Amplifier isn’t working, test with a spare RCA cable. Ensure the amplifier is plugged into the red and white pre-amp output. Enable front, rear, and sub preamp outputs. Check that the speaker wire is securely tightened into the speaker and amplifier terminals. Make sure the positive speaker wire is connected to the positive terminal on both the speaker and amp, and the negative to the negative. Also, verify the amplifier's gain is turned up.
  • K
    Kathryn YoderAug 27, 2025
    Why is my Rockville dB11 clipping?
    • S
      Shelley WilliamsAug 27, 2025
      Amplifier clipping in your Rockville system can occur for several reasons. It may be that your speakers or subwoofers are too powerful for the amplifier; check compatibility and replace if necessary. Ensure the speakers/subs are wired at the correct impedance. To properly set your gain, turn your receiver volume to 75% of the max, and then slowly turn your gain up. Check your ground connection and make sure that the cable is securely tightened. Determine the proper wire gauge necessary and replace existing wires. Lower one or two of those devices to stop the amp from clipping.
  • M
    matthew43Aug 30, 2025
    What to do if my Rockville Amplifier keeps blowing fuses?
    • M
      Ms. Jacqueline BranchAug 30, 2025
      If your Rockville Amp keeps blowing fuses, insert a good, properly rated fuse with your head unit—and amplifier—turned off. If the fuse blows immediately, there might be a short in the power cable between the main fuse and the distribution block. If both sides of the main fuse have power, and one side of the distribution block has power, but the other side of that fuse is dead, then you’re either dealing with a shorted power wire or an internal amplifier fault. If it does, then the problem is in the power wire, and replacing it will most certainly fix your problem. If the fuse blows when the amp is turned up, rewire to achieve proper impedance, or replace the subwoofers with compatible ones.
  • S
    Sandra LuceroSep 3, 2025
    Why is the sound too low on my Rockville dB11 Amplifier?
    • E
      Emily SimmonsSep 3, 2025
      Low sound from your Rockville Amplifier can result from wiring at too high of an impedance; properly wire your speakers/subs to the amplifier. Check the gain level on the amp and increase it if needed. Replace power and ground wires that are too thin. Ensure the positive and negative speaker wires are not reversed. You may need to filter out more high frequencies. Navigate to the audio settings, and search for subwoofer level controls. If this is the case, consider upgrading to a more powerful amplifier.
  • A
    Ann BryantSep 6, 2025
    Why does my Rockville dB11 Amplifier get very hot?
    • C
      Carl RitterSep 6, 2025
      A Rockville Amplifier might overheat if the impedance is very low or if the subwoofer requires more power than the amp can provide. Ensure the amp runs at the proper impedance and use compatible subwoofers. Also, check and tighten the ground connection. Ensure the amplifier has proper ventilation.
  • N
    Nicholas GarciaSep 9, 2025
    Why doesn't my Rockville Amp or powered sub turn off with the vehicle?
    • M
      Maria MccallSep 9, 2025
      If your Rockville Amp or powered sub doesn't turn off with the vehicle, it might be because the remote turn-on wire is connected to a constant 12V power wire. Plug the amplifier’s remote turn-on wire into the proper remote turn-on terminal of your receiver’s wire harness. Also, ensure the remote turn-on wire is not touching the power wire when inserted into the amplifier terminal.

Summary

Introduction

Important Safety Instructions

Essential safety guidelines and warnings for using the amplifier.

Installation

Installation Basics

Fundamental steps and precautions before beginning amplifier installation.

Mounting the Amplifier

Guidance on securely mounting the amplifier unit in the vehicle.

Wiring

Wire Connections

Detailed instructions for connecting power, ground, and remote turn-on wires.

Wire Stripping Guide

Settings

Adjusting the System

Step-by-step guide to setting amplifier gain, crossover, and EQ.

Audio Preamp Input

Using RCA cables for audio signal input to the amplifier.

Low Pass Crossover

Adjusting the low-pass filter for subwoofer frequency response.

Subsonic High Pass Filter

Using the subsonic filter to protect subwoofers from low frequencies.

Phase Shift Control

Synchronizing subwoofer phase with other vehicle speakers.

Enclosure Tuning and Subsonic Filters

Sealed Enclosures

Tuning considerations for sealed subwoofer enclosures.

Ported Enclosures

Tuning ported enclosures and setting the subsonic filter.

Input Configurations

RCA Inputs

Connecting audio source via RCA cables.

High Level Inputs

Using speaker-level inputs with auto-turn-on feature.

Output Configurations (dB10)

dB10: One Woofer

Wiring diagram for connecting a single subwoofer to the dB10 amplifier.

dB10: Two Woofers

Wiring diagrams for connecting two subwoofers to the dB10 amplifier.

Output Configurations (dB11)

dB11: One Woofer

Wiring diagram for connecting a single subwoofer to the dB11 amplifier.

dB11: Two Woofers

Wiring diagrams for connecting two subwoofers to the dB11 amplifier.

Features and Protection

Bass Equalization Circuitry

Description of the bass boost equalization circuit and its usage.

Power and Protection Circuitry

Details on amplifier protection systems and status LEDs.

Features and Specifications

Mute Circuit

Explanation of the anti-thump mute and delay circuit.

Specifications (dB10)

Technical specifications for the Rockville dB10 amplifier.

Specifications (dB11)

Technical specifications for the Rockville dB11 amplifier.

Troubleshooting

Amp Goes Into Protect Mode

Common causes and solutions for the amplifier entering protect mode.

Troubleshooting (Continued)

Amp Wont Power On

Diagnosing and fixing issues where the amplifier does not power on.

Power But No Sound

Troubleshooting steps for when the amplifier powers on but produces no sound.

Troubleshooting (Continued)

Power But No Sound (Continued)

Further diagnosis for no sound issues and amplifier clipping.

Amp is Clipping

Identifying and resolving audio distortion (clipping) in the amplifier.

Troubleshooting (Continued)

Amp is Clipping (Continued)

Advanced troubleshooting for amplifier clipping and signal noise.

Distortion, Noise, Crackling, or Hissing

Diagnosing and eliminating unwanted audio noise and distortion.

Troubleshooting (Continued)

Distortion, Noise, Crackling, or Hissing (Continued)

Further solutions for audio noise and low sound output.

Sound is Too Low

Addressing issues of low audio output volume from the amplifier.

Amp Keeps Blowing Fuses

Troubleshooting recurring main fuse blowing issues.

Troubleshooting (Continued)

Amp Keeps Blowing Fuses (Continued)

Diagnosing main and internal fuse blowing causes.

Amp Gets Very Hot

Identifying reasons for amplifier overheating and solutions.

Troubleshooting (Continued)

Amp or Powered Sub Does Not Turn Off

Resolving issues where the amplifier fails to turn off with the vehicle.

One Channel on the Amp Isnt Working

Troubleshooting a single amplifier channel that is not producing sound.

Overview

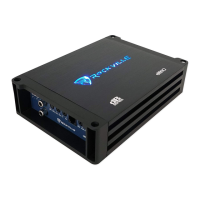
The Rockville dB10/dB11 Class D Mini Amplifiers are designed to enhance your car audio system by providing powerful and clear sound. These amplifiers are compact, making them suitable for installations where space is limited. The manual emphasizes the importance of proper installation and wiring to ensure optimal performance and safety.

Function Description

The dB10/dB11 amplifiers are Class D monoblock amplifiers, meaning they are designed to power subwoofers. Class D amplifiers are known for their high efficiency, which translates to less heat generation and more power output for their size. This efficiency also contributes to a longer lifespan for the amplifier. The amplifiers feature various controls to fine-tune the audio output, including gain, crossover, and bass equalization, allowing users to customize the sound to their preferences and match it with their specific subwoofer setup.

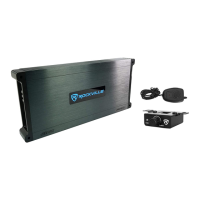
The amplifiers can accept both low-level (RCA) and high-level (speaker wire) inputs, offering flexibility in connecting to different car audio systems. High-level inputs are particularly useful when the head unit does not have RCA outputs, allowing the amplifier to be integrated into a factory or aftermarket system without requiring additional converters. The auto-start smart turn-on feature for high-level inputs simplifies installation by automatically turning the amplifier on when it detects an audio signal, eliminating the need for a remote turn-on wire.

Usage Features

Proper installation is crucial for the performance and longevity of the dB10/dB11 amplifiers. The manual provides detailed instructions for mounting the amplifier, emphasizing the importance of securing it to a solid surface and ensuring adequate ventilation to prevent overheating. It also highlights the need for proper wiring, including the correct gauge of power, ground, and speaker wires, to minimize voltage drops and ensure stable operation. The manual includes a warning about stripping wires to the minimum required length to prevent short circuits.

The amplifiers are designed to operate with specific impedance loads. The dB10 is a 4-ohm stable amplifier, while the dB11 is a 2-ohm stable amplifier. It is critical to match the subwoofer's impedance to the amplifier's stable operating impedance to prevent damage to the amplifier. The manual provides various wiring configurations for one or two subwoofers, illustrating how to connect them in series or parallel to achieve the desired impedance load. Incorrect impedance matching can lead to overheating and damage to the amplifier.

Adjusting the settings on the amplifier, such as gain, crossover, and bass equalization, is essential for optimizing sound quality. The gain control should be set to match the output voltage of the head unit, ensuring that the amplifier receives a clean signal without clipping. The low-pass filter (LPF) is used to send only low frequencies to the subwoofer, preventing it from playing higher frequencies that it is not designed for. The subsonic filter helps to protect the subwoofer from playing frequencies below its resonant frequency, which can cause damage. The phase shift control allows users to align the subwoofer's output with the main speakers, improving overall sound coherence.

Maintenance Features

The dB10/dB11 amplifiers are designed for durability, but proper maintenance practices can extend their lifespan and ensure consistent performance. The manual stresses the importance of periodically checking all power and ground connections to ensure they are secure and free from corrosion. Loose connections can lead to voltage drops, overheating, and intermittent operation.

Preventing overheating is a key aspect of maintenance. The Class D design inherently generates less heat, but ensuring adequate airflow around the amplifier is still important, especially during prolonged use or in hot environments. Mounting the amplifier in a location with good ventilation helps dissipate heat effectively. If the amplifier overheats, its thermal protection circuit will activate, temporarily shutting down the unit to prevent damage.

Troubleshooting common issues is also covered in the manual. Problems such as the amplifier not turning on, blowing fuses, clipping, or producing distorted sound can often be resolved by checking wiring connections, input signals, and amplifier settings. For instance, if the amplifier is clipping, it indicates that the input signal is too high or the gain is set too high, requiring adjustment to prevent damage to both the amplifier and speakers. If the amplifier keeps blowing fuses, it could indicate a short circuit in the wiring or an internal amplifier fault, requiring professional inspection.

The manual also advises against using undersized power or ground wires, as this can lead to voltage drops and reduced performance. Using the recommended wire gauges ensures that the amplifier receives sufficient power to operate efficiently. Regular inspection of the speaker wires for fraying or damage is also recommended to prevent short circuits and maintain sound quality.

In summary, the Rockville dB10/dB11 Class D Mini Amplifiers are powerful and efficient devices designed to enhance your car's audio system. By following the detailed installation, usage, and maintenance guidelines provided in the manual, users can ensure optimal performance, longevity, and a high-quality audio experience.

Rockville dB11 Specifications

General IconGeneral
S/N Ratio>90dB
LPL (Low Pass Filter)50Hz - 250Hz
Low Pass Filter50Hz - 250Hz
Input Sensitivity0.2V - 6V
Bass Boost0-18dB @ 45Hz
Phase Shift0-180 Degrees

Related product manuals