6 Rockwell Automation Publication 1756-IN048D-EN-P - March 2021
GuardLogix 5580 Controllers Installation Instructions
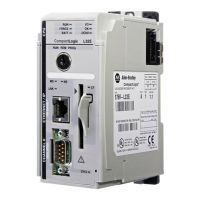
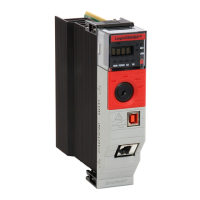
Connectors and Status Indicators
Install the Controller
Added Plug Attention Statement
Before you install the controller, make sure to see these ControlLogix® Chassis and
Power Supply Installation Instructions:
• ControlLogix Chassis Installation Instructions, publication 1756-IN621
• ControlLogix Power Supply Installation Instructions, publication 1756-IN619
• ControlLogix Redundant Power Supply Installation Instructions, publication
1756-IN620
When installing a GuardLogix controller, you can do the following:
• Place the controller in any slot. For SIL 3/PLe applications, install the
safety partner in the slot immediately to the right of the primary controller.
• Use multiple controllers in the same chassis.
You can install or remove a GuardLogix controller while chassis power is on and
the system is operating.
1. Align the circuit board with the top and bottom guides in the chassis.
2. Slide the module into the chassis until it snaps into place.
3. Verify that the controller is flush with the power supply or other installed
modules.
4. For SIL 3/PLe applications, repeat steps 1...3 to install the safety partner in
the slot immediately to the right of the primary controller.
ATTENTION: If you are using the controller to in a SIL 2/PLd
application, you must use a Series C chassis.
NOTE: If operating above +55 °C (+131 °F) in a SIL 2/PLd
application, modules greater than 6.2 W shall not be
installed in slots adjacent to the controller.
ATTENTION: If you are using the controller in a SIL3/PLe
application, you can use a Series B chassis (derating to
+50 °C [+122 °F]) or Series C chassis with no restrictions.
WARNING: When you insert or remove the module while
backplane power is on, an electrical arc can occur. This could
cause an explosion in hazardous location installations. Be sure
that power is removed or the area is nonhazardous before
proceeding. Repeated electrical arcing causes excessive wear
to contacts on both the module and its mating connector. Worn
contacts may create electrical resistance that can affect
module operation.
ATTENTION: The GuardLogix 5580 controllers that are listed
on page 1 of this document that end with a ‘K’ or are shipped
with port protection plugs installed to provide a layer of
protection from corrosive atmospheres. Port plugs must
remain installed in unused ports at all times during storage
and operation for the product to meet its corrosive
atmosphere rating. If temporary access is required, plugs
can be removed, and should be reinserted after temporary
access is complete.
1
5
3
7
2
Item Description
1
4-character display
2
Status Indicators
3
Mode switch (Remote, Run, Program)
4
SD card slot and Reset Button behind the door
5
USB Port
6
Ethernet Port
7
Ethernet Status Indicators
8
Safety Partner Reset Button
6
4
1
8
2
ATTENTION: This equipment is sensitive to electrostatic
discharge, which can cause internal damage and affect
normal operation.
Follow these guidelines when you handle this equipment:
• Touch a grounded object to discharge potential static.
• Wear an approved grounding wriststrap.
• Do not touch connectors or pins on component boards.
• Do not touch circuit components inside the equipment.
• Use a static-safe workstation, if available.
• Store the equipment in appropriate static-safe packaging
when not in use.
Top Circuit
Board Aligned
Bottom Circuit Board Aligned
 Loading...