Rockwell Automation Publication 1756-IN048D-EN-P - March 2021 7
GuardLogix 5580 Controllers Installation Instructions
Install the SD Card
If the SD card is not already installed in the controller, then complete these steps to
install the SD card.
1. Verify that the SD card is locked or unlocked according to your preference.
For more information about the lock/unlock memory settings, see the
ControlLogix 5580 and GuardLogix 5580 Controllers User Manual,
publication 1756-UM543
.
2. Remove the key.
3. To access the SD card slot, open the door on the controller key panel.
4. Position the SD card so that the contact end goes into the controller, with
the contacts on the right and the label on the left. The beveled corner is on
top.
5. Insert the SD card into the card slot and gently press the card until it clicks
into place.
6. The card slides in easily, if it is oriented correctly. You can insert the card
only one way.
7. Close the door.
8. Reinsert the key, if desired.
Connect to an EtherNet/IP Network
If you are connecting the controller directly to an EtherNet/IP network, then
connect an RJ45 cable to the Ethernet port on the controller.
Confirm Installation
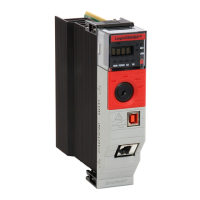
After you insert the controller into the chassis and apply power, the 4-character
display and status indicators provide information about the controller.
See the ControlLogix 5580 and GuardLogix 5580 Controllers User Manual,
publication 1756-UM543
, for information on how to interpret the 4-character
display messages and the status indicators.
WARNING: When you insert or remove the SD memory card
while power is on, an electrical arc can occur. This could cause
an explosion in hazardous location installations. Be sure that
power is removed or the area is nonhazardous before
proceeding.
WAR NIN G: If you connect or disconnect the communications
cable with power applied to this module or any device
on the network, an electrical arc can occur. This could
cause an explosion in hazardous location installations.
Be sure that power is removed or the area is nonhazardous
before proceeding.
ATTENTION: 10 Mbps Ethernet automatic negotiations
are functional. However, 10 Mbps Ethernet connections
are not fully supported or intended for normal use. Use 10
Mbps Ethernet connections only if necessary during
temporary setup.
 Loading...
