Do you have a question about the Roland CX-400 and is the answer not in the manual?
Identifies components visible from the front of the cutting machine.
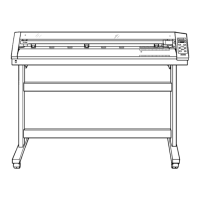
Identifies components visible from the rear of the cutting machine.
Details the function of each key and the display on the control panel.
Provides instructions and precautions for setting up the unit on a stand.
Explains how to connect the unit to a power source and computer via cables.
Instructs on how to power on the unit using the switch.
Guides on installing the necessary software driver from the CD-ROM.
Details the procedure and precautions for loading roll material onto the machine.
Provides step-by-step instructions for installing a cutting blade into the holder.
Guides on adjusting blade force and cutting speed for optimal results.
Explains how to set the starting point for cutting operations.
Covers the process of initiating a cutting job after setup.
Details the steps to follow after a cutting job is finished.
Guides on fine-tuning various cutting parameters for specific materials.
Guides on adjusting the blade extension for precise cutting.
Explains how to adjust the blade offset for accurate cuts.
Details how to adjust the upward movement speed of the tool carriage.
Allows selection between speed and quality priorities for cutting.
Describes how the origin point is set based on material selection.
Explains how to rotate cutting coordinates by 90 degrees.
Provides instructions for performing long cutting jobs, including material handling.
Details the process of loading flat materials.
Explains how to create multiple copies of the same cut data.
Guides on using the front-loading feature, including installing the hanger and loading material.
Provides steps to enable the overcut feature for sharp corners.
Details how to save and recall cutting condition presets.
Explains how to set crop marks for accurate cutting around printed graphics.
Lists recommended cutting conditions and blade lifespan for various materials.
Discusses handling special materials like stencils and those with sprocket holes.
Explains the functions of direct keys and menu mode operations.
Provides a visual flowchart of the machine's menu structure and operations.
Lists all control keys and their corresponding functions, ranges, and defaults.
Provides instructions for cleaning various parts of the machine.
Lists consumable parts like blades and blade holders and when to replace them.
Details the procedure for replacing the separating knife.
Explains how to perform a self-test to verify machine operation.
Offers troubleshooting advice for common operational issues and error messages.
Lists and explains common error messages displayed by the unit.
Provides detailed technical specifications for the CX-500, CX-400, and CX-300 models.
Details the parallel and USB interface specifications and pinouts.
Lists supported instructions for different operational modes.