4
Making fine adjustments to the location at
which a sample starts/ends
When you arrange samples in a sequence track to create a song, you will sometimes
need to make fine adjustments to the sample's start/loop points, or to its length. By
using the {Preview function} or {Scrub function}, you can make precise and detailed
adjustments while listening to the sound.
Specifying a point while you listen to the sound
before and after it—Preview
The preview button [TO] means “To Now” (to the point). Each time you press [TO],
a brief region of sound (one second) ending at that point will be played. By turning
the TIME/VALUE dial to move the point back and forth while listening to this
sound, you can easily make accurate adjustments to the point.
When you press the preview button [FROM], the preview function will play “From
Now” (from the point), allowing you to hear a brief region of sound (one second)
beginning at that point.
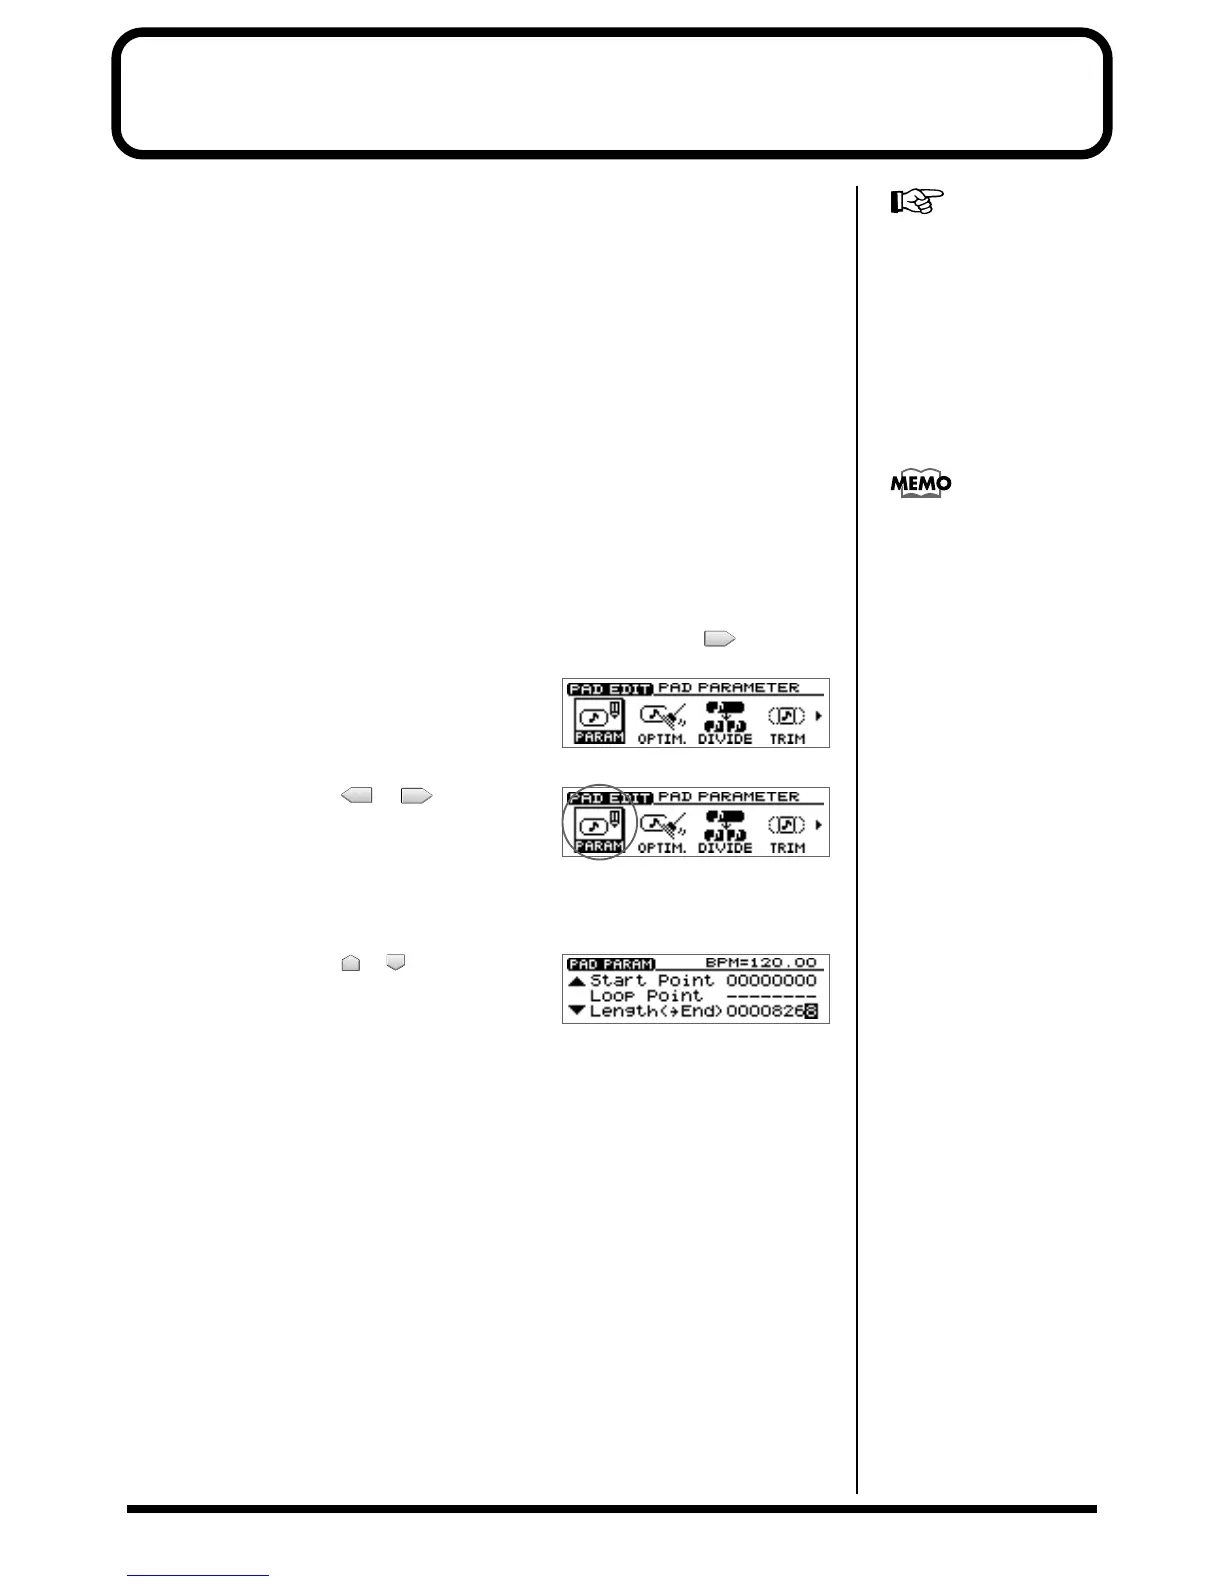
1. Press PAD RECORDING [TEMPO MATCH] twice.
Alternatively, press [TEMPO MATCH] and then press CURSOR [ ].
fig.31-03
The Pad Edit menu are displayed as icons.
fig.33-07
2. Press CURSOR [ ] [ ] to select the
Pad Parameter icon.
3. Press [YES/ENTER].
The Pad Parameter screen appears.
fig.33-08
4. Press CURSOR [ ] [ ] to move the
cursor to the point “Start Point,” “Loop
Point,” or “Length(→End)” you want to
adjust.
5. Press PREVIEW [TO] or [FROM] to play back the sound as described below.
[TO]: Playback once from one second before the current point to the current
point.
[FROM]: Playback once from the current location to one second after the
current location.
6. While listening to the sound, turn the TIME/VALUE dial to make fine
adjustments to the current point.
7. Press [DISPLAY] to return to the Basic screen.
For details on the Start/Loop
point and Length, refer to
“What are the Start/Loop
point and Length” (Owner’s
Manual; p. 78).
The sample waveform will not
e displayed for PREVIEW
[TO] [FROM] operations.
 Loading...