16
Jul. 2015 JD-XA
Disassembly Procedure
1. Place the unit so that the Bottom Case is upward.
* Be careful not to apply undue force to knobs or others parts.
2. Remove screws d (x 4) and e (x 15) in View 3 (Plain View (p. 10)).
3. Place the unit so that the keyboard and the Top Case are upward.
* When inverting the unit, catch the both side of it and be careful not to leave the
Bottom Case and the Top Case each other.
4. Lift the Top Case from the rear side slightly.
5. Disconnect the wiring (x 1) and the flat cables (x 2).
6. Lift the rear side more, and detach the Top Case carefully so that it does
not hook the keyboard.
Important Notes on
Assembly
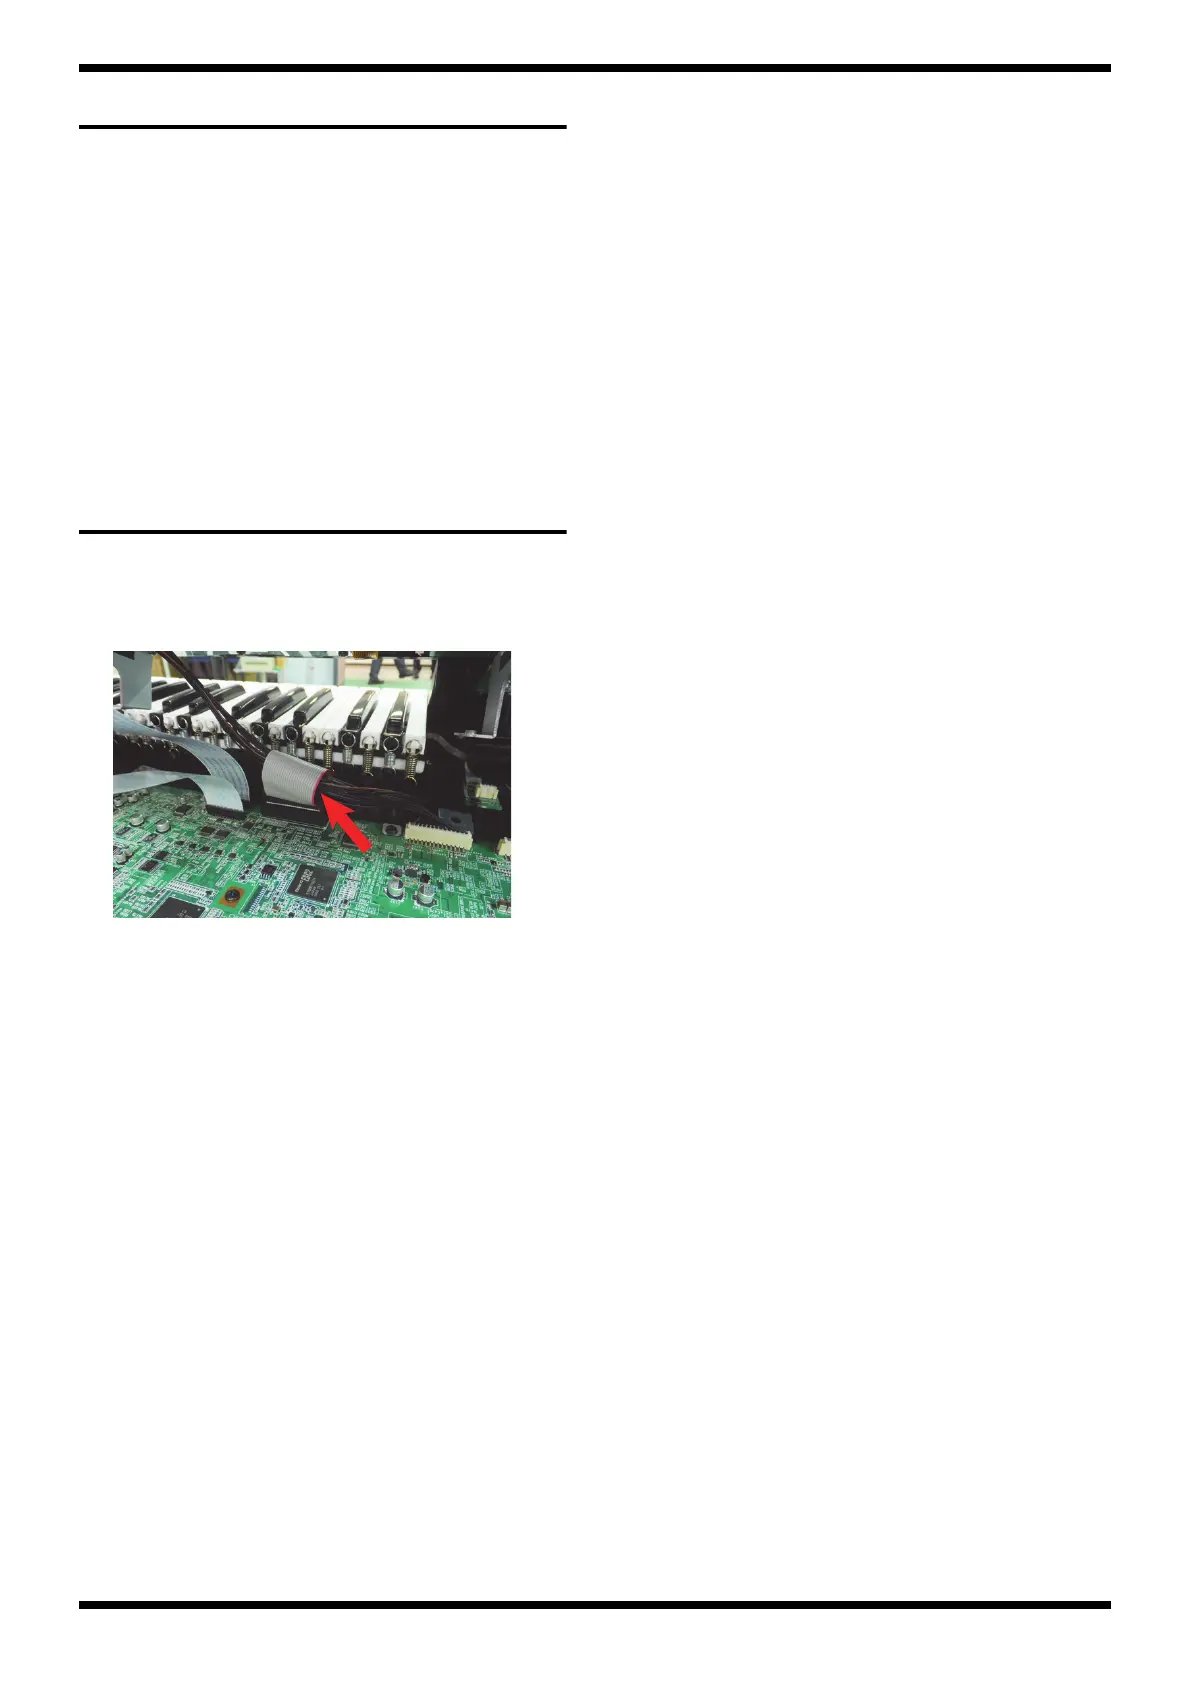
Arranging the Wiring
Pass the wiring which connects the Main Board to the Panel L Board
under the wiring which connects the Main Board to the keyboard.
fig.kumitate-1.eps
Screws for Bottom Case
Length of the two kinds of screws securing the Bottom Case (d and e in
View 3) are the same, but types are different. Be careful not to make a
mistake in attaching them.

 Loading...