Introduction
Getting Acquainted with the JD-Xi
Controller section
The controller section is what you use for
performing.
For example, a performer’s actions such as
“playing the keyboard” are sent to the sound
generator section, causing it to produce
sound.
The controller section of the JD-Xi consists of
the keyboard, the pitch bend and modulation
wheels, and the panel buttons and knobs.
Sound generator section
The sound generator section creates the
sound.
In response to the performance data sent
from the controller section, this section
electrically generates the waveform that
is the basis of the sound, and modies the
brightness and loudness to produce an
incredible diversity of sounds.
The JD-Xi’s sound generator section lets you
use the panel knobs and buttons to instantly
change various aspects of the sound, such
as its waveform and pitch, brightness, and
loudness.
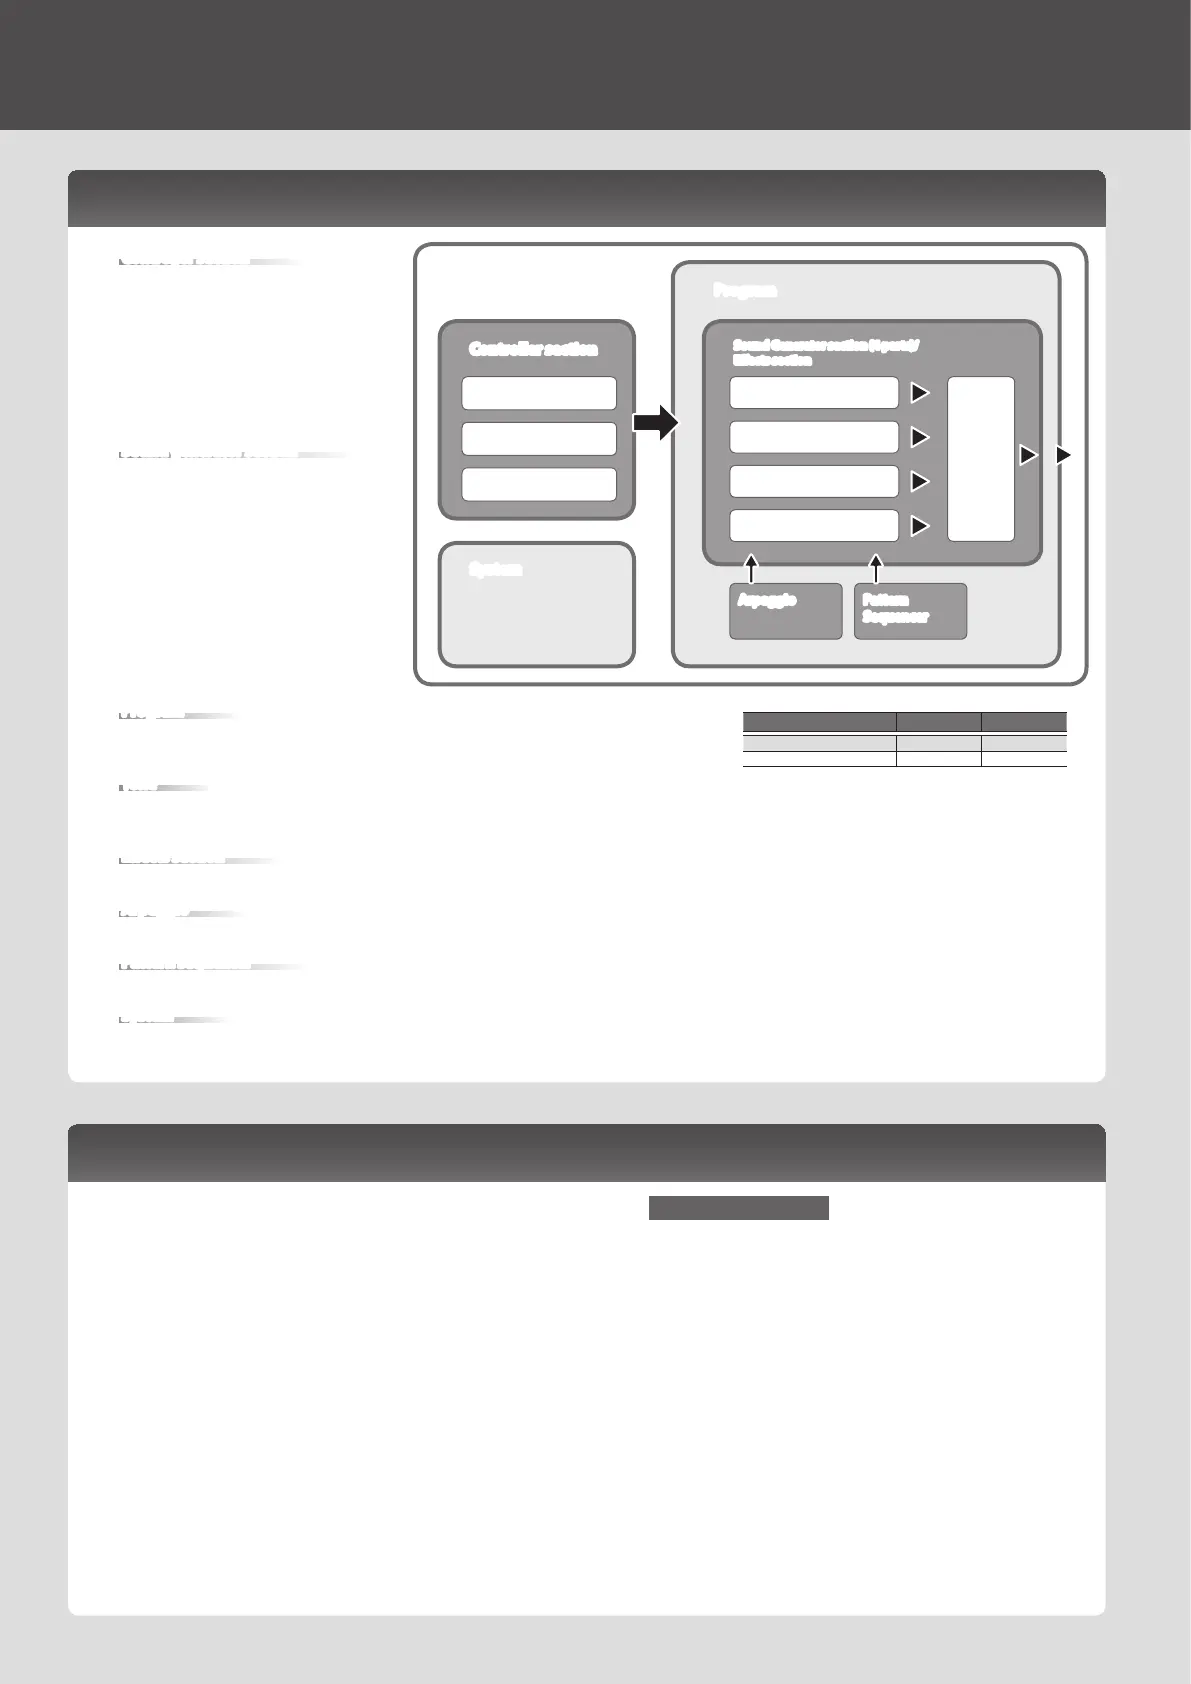
Program
A program consists of four parts: Digital Synth 1, Digital Synth 2, Drums, and Analog Synth.
A program you edited can be saved as a user program (64 programs in each bank E–H).
Tone
You can select one tone for each part.
* For an analog synth tone, the oscillator, sub-oscillator, and lter sections consist of analog circuits.
Eects section
The JD-Xi contains four eect units. Eect settings are saved within each program (p. 9).
Arpeggio
This function automatically plays an arpeggio according to the keys that you hold down. Arpeggio settings are saved within each program (p. 6).
Pattern sequencer
This function lets you perform while patterns of several measures play back. You can also create your own original patterns and save them in a program (p. 10).
System
This area stores system parameter settings that determine how the JD-Xi operates (p. 12).
JD-Xi
Program
Controller section
System
Keyboard
Knob
Wheel
Sound Generator section (4 parts)/
Eects section
Digital Synth 1 part
Drums part
Digital Synth 2 part
Analog Synth part
Eects
Arpeggio Pattern
Sequencer
Turning On/O the Power
* Once everything is properly connected (p. 3), be sure to follow the
procedure below to turn on their power. If you turn on equipment
in the wrong order, you risk causing malfunction or equipment
failure.
* Before turning the unit on/o, always be sure to turn the volume
down. Even with the volume turned down, you might hear some
sound when switching the unit on/o. However, this is normal and
does not indicate a malfunction.
1. Before turning on the JD-Xi’s power, consider these two questions:
5 Are your speakers or headphones connected correctly?
5 Is the connected equipment powered-o?
2. Turn the [Master Volume] knob on the top panel all the way to the
left.
3. Turn on the [POWER] switch located on the rear panel of the JD-Xi.
* This unit is equipped with a protection circuit. A brief interval
(a few seconds) after turning the unit on is required before it will
operate normally.
4. Switch on power to the connected equipment, and raise the
volume to an appropriate level.
Turning O the Power
1. Before turning o the power, consider these two questions:
5 Have you minimized the volume of the connected equipment?
5 Have you saved any sounds or patterns that you created?
2. Turn o the power for all connected audio devices.
3. Turn o the [POWER] switch of the JD-Xi.
Program Bank Number
Preset program A–D 01–64
User program E–H 01–64
4

 Loading...