14
The TRACK SETTING Screen
Beyond using the faders to set your track playback levels, there are lots
of other ways to customize their sound. This all takes place on the TRACK
SETTING screen. To get there:
1 If you’re not already on the RECORDER VIEW screen, press the
RECORDER VIEW button so that you are.
2 Press 4 (TRK SET) to display the TRACK SETTING screen.
The TRACK SETTING screen is actually a set of screens. To see them,
repeatedly press the 6 button. (You can press 5 to return back up through
the screens, or press EXIT to leave them altogether.)
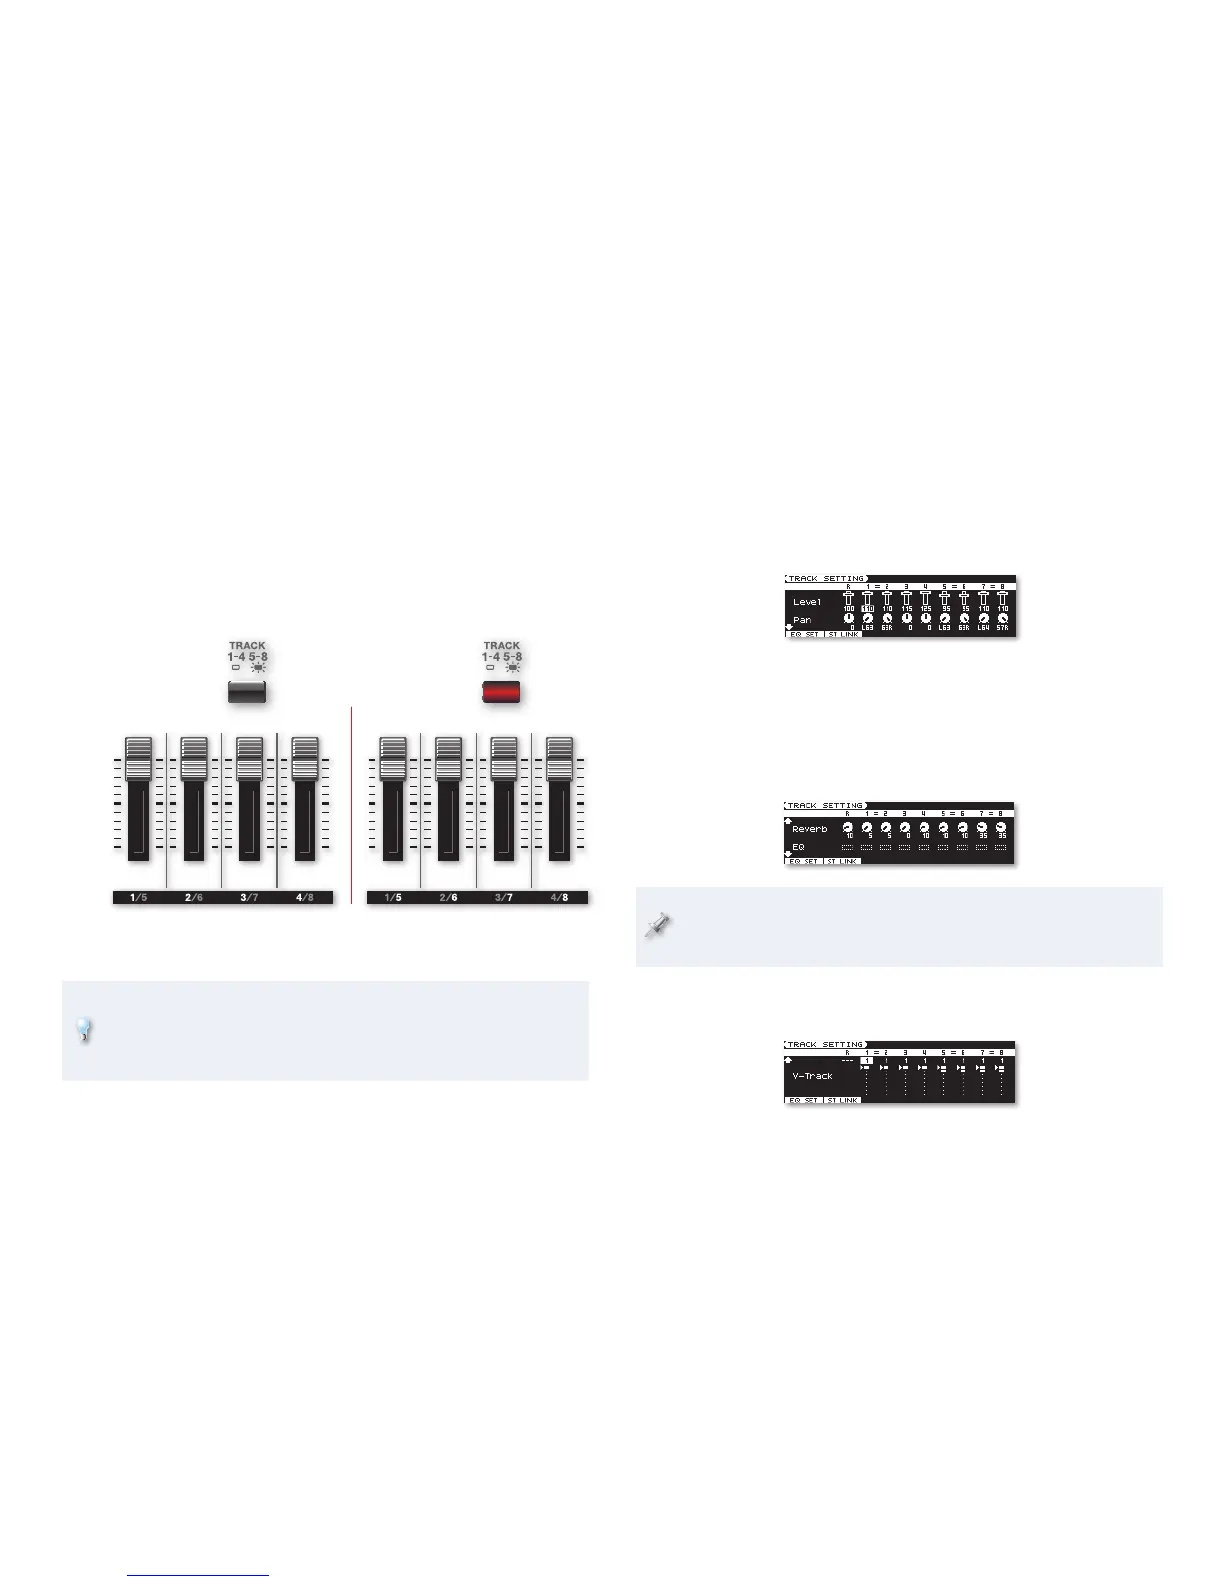
In addition to the first TRACK SETTING screen shown above—on which you
can set each track’s level and stereo panning in the main JUNO-Gi mix—
there’s a screen on which you can set tracks’ Reverb and EQ:
The JUNO-Gi provides extensive EQ for each track, as explained on
Page 89 in the Owner’s Manual. “EQ” is short for “equalization,” which
is a process for changing the tonal qualities of a track.
There’s also a screen on which you can select V-Tracks for recording or
playback.
A white rectangular box for a V-Track shows that it’s been recorded
on. An arrow points to the V-Track each playback track is currently
set to use, and its number appears beneath the playback track’s
number onscreen.
Mixing Your Eight Playback Tracks, 4-By-4
There are four physical faders in the digital recorder for
hands-on control of the recorder’s eight tracks. Press the
TRACK 1-4/5-8 button to select the four tracks you want to control at any
given time. When the TRACK 1-4/5-8 button is
• unlit—the faders control Tracks 1-4.
• lit—the faders control Tracks 5-8.
As “Gonna Want It” plays, have yourself some fun remixing by moving the
faders. Here’s what you’ll find on each fader.
Chord
Guitar
Wakka
Guitar
Synth
Bass
+ Octave
Lead
Vocal
Drums
in stereo
(L R) Synths
in stereo
(L R)
When: When:
You can also silence, or “mute,” any track the faders are currently
controlling by pressing the button just beneath its fader so its green
light flashes—when a recorded track is muted, its button flashes green.
To un-mute a track, press the button again so it lights solidly.
When you’re done mixing, turn all of the tracks except Tracks 7 and 8 all the
way down for our next section in this booklet, and then press STOP and 9.
Press TRACK 1-4/5-8 so it’s not lit as well.

 Loading...


