9
Using the Scene Function (SCENE)
When you turn on the power, the first screen that appears is the SCENE
TOP screen.
Here you can switch between scenes when playing.
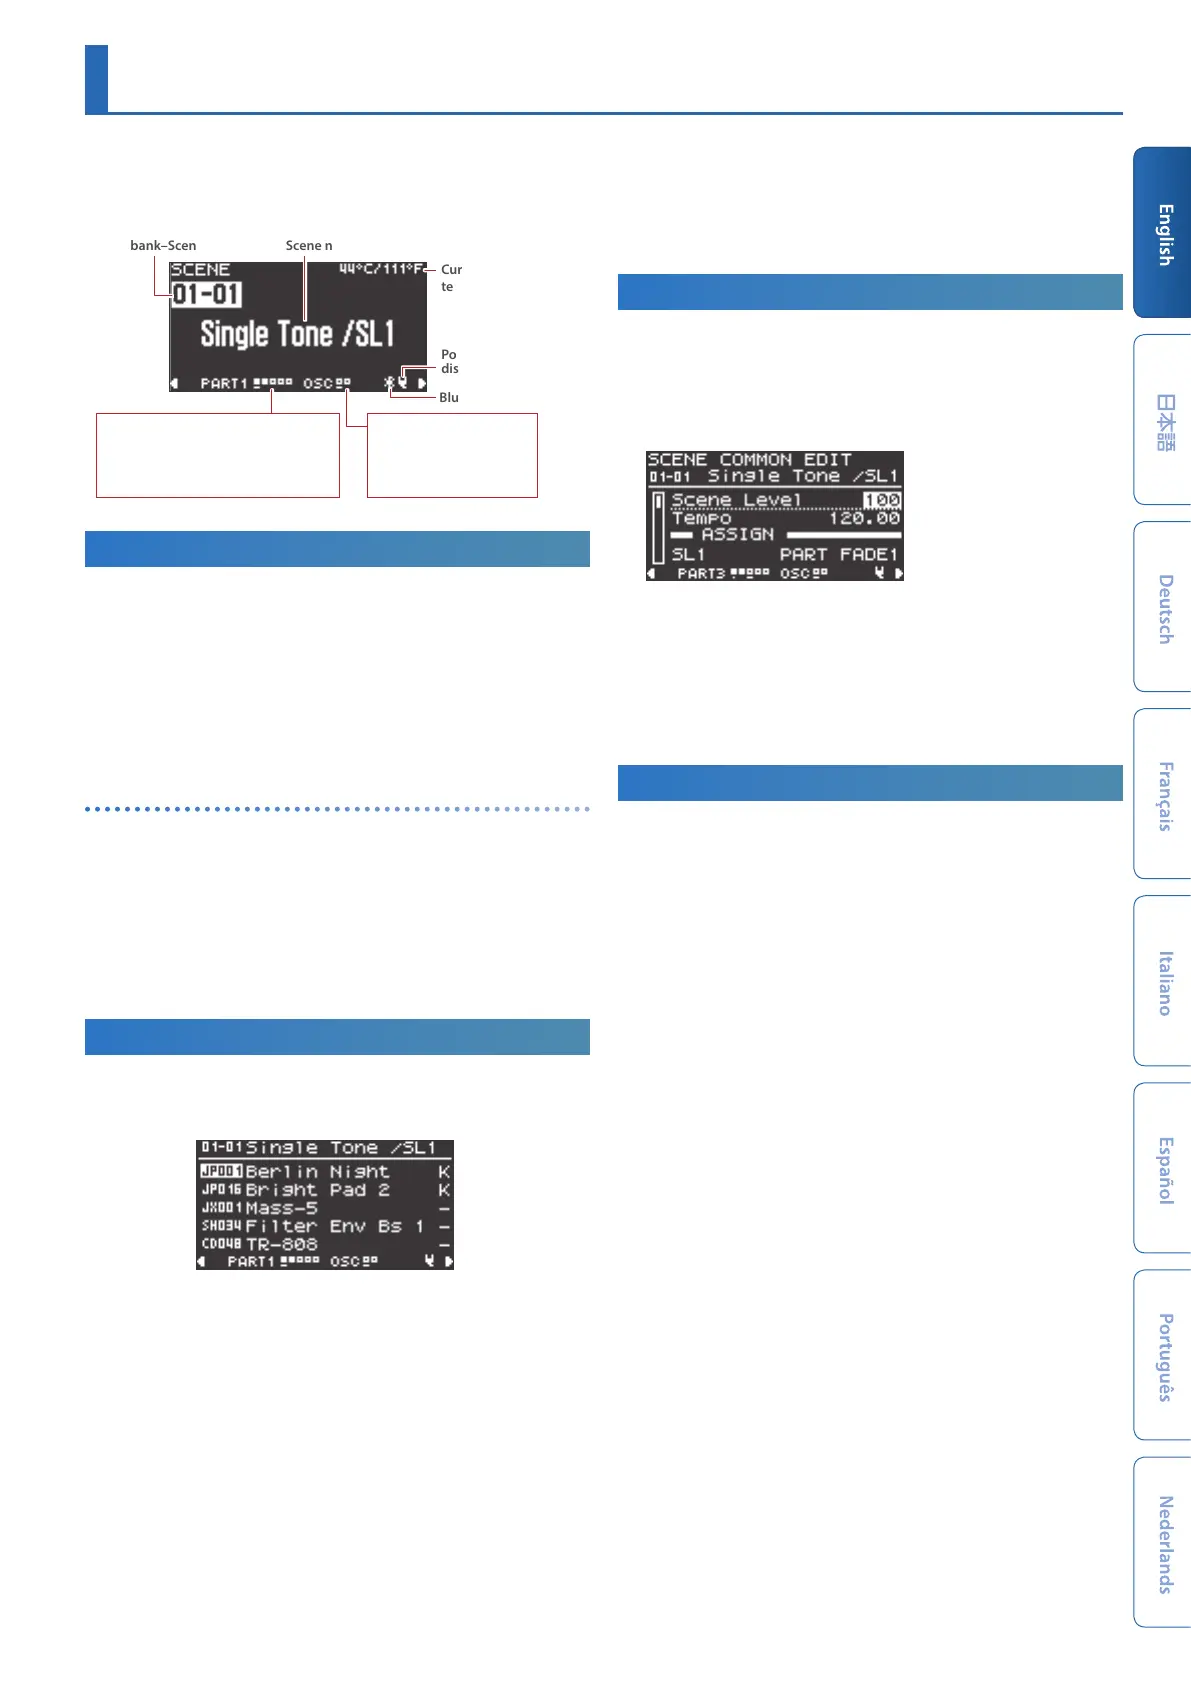
Current internal
temperature
Scene bank–Scene number
Scene name
Power cord connected/
disconnected
Bluetooth Sw
9
:
Key Sw is ON
+: Arpeggio part
8
: Key Sw is OFF
-
: Current part
_
: Part Sw is OFF
5
: Being edited
simultaneously
9
:
PARTIAL Sw is ON
8
: PARTIAL Sw is OFF
–
: Being edited
Recalling a Scene
1. Press the [SCENE] button to access the SCENE TOP screen.
* The SCENE TOP screen is the first screen that appears when you turn on
the power.
* When the [PART] button is lit, press the [PART] button to return to the
SCENE TOP screen.
2. Use the [1]–[16] buttons to select a scene.
* If the SYSTEM parameter SCENE LOCK is “ON,” a confirmation screen
appears when you switch scenes.
Switching between scene banks and recalling scenes
1. Hold down the [SHIFT] button and press the [1]–[16]
buttons to select a scene bank.
2. Use the [1]–[16] buttons to select a scene.
* To recall a different scene bank than the one that’s currently selected,
select the scene bank and then press the [1]–[16] buttons.
* You can also use the [1] and [2] knobs to switch scenes. The scene changes
at the same time you turn the knob.
Showing the Part Setting Status List
1. On the SCENE TOP screen, press the [PART] button to enter
part select mode.
PART 1
&
Scene
&
PART 2
&
PART 4
&
PART 5
&
PART 3
&
You can make the following settings in part select mode.
Current part settings
Use the [1]–[5] buttons to make the settings.
* For the part that’s set as the current part, you can use the panel knobs
to edit the tone.
On/off settings for each part
Press the [6]–[10] buttons to switch the parts on/off.
Tone switches for each part
Move the cursor to the part to switch, and use the [2] knob to make
the setting.
Switching between scenes
Move the cursor to the scene, and use the [2] knob to make the
setting.
2. Press the [PART] button to return to the SCENE TOP screen.
Scene Edit
Here’s how to edit the scene parameters.
1. Press the [SCENE] button to access the top screen.
2. Press the PAGE [>] button to move to the SCENE COMMON
EDIT screen.
3. Use the [1] knob to select a parameter, and use the [2] knob
to edit the value.
4. When you’re finished editing, press the [EXIT] button to
return to the top screen.
Save the scene after you’ve finished editing.
&
“Saving a Scene” (p. 9)
Saving a Scene
The edits that you make to a part or tone, or the data that you record,
are temporary. They are lost when you turn off the power, or when
you select another scene or tone. If you want to keep the result of your
editing or recording, you must save it to a scene.
* If you want to save a tone individually, use the tone write operation (p. 14).
1. Hold down the [SCENE] button and press the [WRITE]
button.
The WRITE MENU screen appears.
2. Use the [1] knob or [2] knob to select “SCENE,” and then
press the [ENTER] button.
3. Use the [1] knob or [2] knob to select the save-destination,
and then press the [ENTER] button.
If you want to rename the scene that’s being saved, use the PAGE
[<] [>] buttons to move the cursor and use the [2] knob to specify
characters.
4. Press the [ENTER] button.
A confirmation message appears.
If you decide to cancel, press the [EXIT] button.
5. To execute, press the [ENTER] button.

 Loading...


