EasyManua.ls Logo

Roland KR-5 User Manual

Roland KR-5
200 pages
To Next Page IconTo Next Page
Page #1 background imageLoading...
Page #1 background image
/
44
33
22
11
Owner’s Manual
02904667 ’04-7-AN
Owner’s Manual
To resize thickness, move all items on the front cover
and center registration marks to left or right
Before using this unit, carefully read the sections entitled: “IMPORTANT SAFETY
INSTRUCTIONS” (p. 2), “USING THE UNIT SAFELY” (p. 3), and “IMPORTANT NOTES” (p.
5). These sections provide important information concerning the proper operation of the
unit. Additionally, in order to feel assured that you have gained a good grasp of every
feature provided by your new unit, Owner’s Manual should be read in its entirety. The
manual should be saved and kept on hand as a convenient reference
Copyright © 2002 ROLAND CORPORATION
All rights reserved. No part of this publication may be reproduced in any form without
the written permission of ROLAND CORPORATION.
Contents
No. Name Qty.
1
Instrument 1
2 Manual Set 1
3 AC Cord Set 1
4 Collection of Printed Music 1
This owner’s manual is printed on recycled paper.
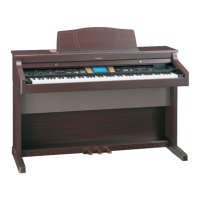
Table of Contents

Other manuals for Roland KR-5

Questions and Answers:

Roland KR-5 Specifications

General IconGeneral
TypeDigital Piano
Number of Keys88
EffectsReverb, Chorus
DisplayLCD
ConnectionsOutput (L/Mono, R), Input (L/Mono, R), MIDI

Summary

IMPORTANT SAFETY INSTRUCTIONS

USING THE UNIT SAFELY

Before You Start Playing

Connect the Pedal Cable

Connect the pedal cable to the rear panel pedal connector.

Connect the Speaker Cable (KR-7)

Connect the speaker cable from the speaker box to the rear panel speaker connector.

Connect the Power Cord

Connect the power cable to the bottom panel AC inlet and plug into an outlet.

IMPORTANT NOTES

Introduction

Panel Descriptions

Chapter 1 Performance

Playing the Keyboard Like a Piano (One-Touch Piano)

Instructions on how to activate the one-touch piano preset for optimal piano performance.

Chapter 2 Automatic Accompaniment

Performing Using Automatic Accompaniment (One-Touch Arranger)

Steps to set up and use the one-touch arranger for automatic accompaniment.

Chapter 3 Song Playback and Practice Functions

Playing a Song

Guide to selecting and playing internal songs or songs from floppy disks.

Displaying the Score

How to display musical scores for songs and check played notes.

Practicing Songs with the Practice Function (KR-7)

Details on using the practice function for segment repetition and tempo adjustment.

Adjusting the Tempo

How to change the tempo of songs and music styles using buttons or the dial.

Chapter 4 Recording and Saving the Performance

Recording a New Song (New Song)

Instructions for recording keyboard performances without accompaniment.

Recording With Accompaniment

Guide to recording performances along with automatic accompaniment.

Recording Along with a Song

How to record your performance while listening to internal songs or disk songs.

Erasing Recorded Performances

Method to delete recorded performances from memory.

Chapter 5 User Program Registration

Saving Performance Settings (User Program)

How to save and store current settings as a User Program for quick recall.

Calling Up Saved User Programs

Steps to load previously saved User Program settings.

Chapter 6 Creating and Editing Songs

Multitrack Recording with 16 Parts (16-Track Sequencer)

Explains the 16-track sequencer for layering multiple performances.

Chapter 7 Creating Music Styles

Creating Original Styles (User Styles)

Methods for creating custom music styles by combining internal styles or converting songs.

Saving a User Style

How to save created User Styles to floppy disks or user memory.

Deleting Saved User Styles

How to delete saved User Styles from floppy disks or user memory.

Chapter 8 Various Settings

Assigning Functions to Pedals and Performance Pads (Pedal Setting/User Functions)

How to assign various functions to pedals and performance pads.

Chapter 9 Connecting External Devices

Connecting MIDI Devices

Guide to connecting MIDI sequencers and sound modules for performance data exchange.

Connecting Audio Equipment

Instructions for connecting to audio equipment for playback or recording.

Connecting a Computer

Instructions for connecting the KR-7/5 to a computer for sequencing and data transfer.

Troubleshooting

The power doesn’t come on.

Checks for power cord connection and proper power switch operation.

No sound is heard

Troubleshooting steps for no audio output, checking volume and connections.

The automatic accompaniment doesn’t play correctly

Steps to resolve issues with automatic accompaniment not playing as expected.

Error Messages

Related product manuals