17
Assigning an Imported User Sample to an Instrument
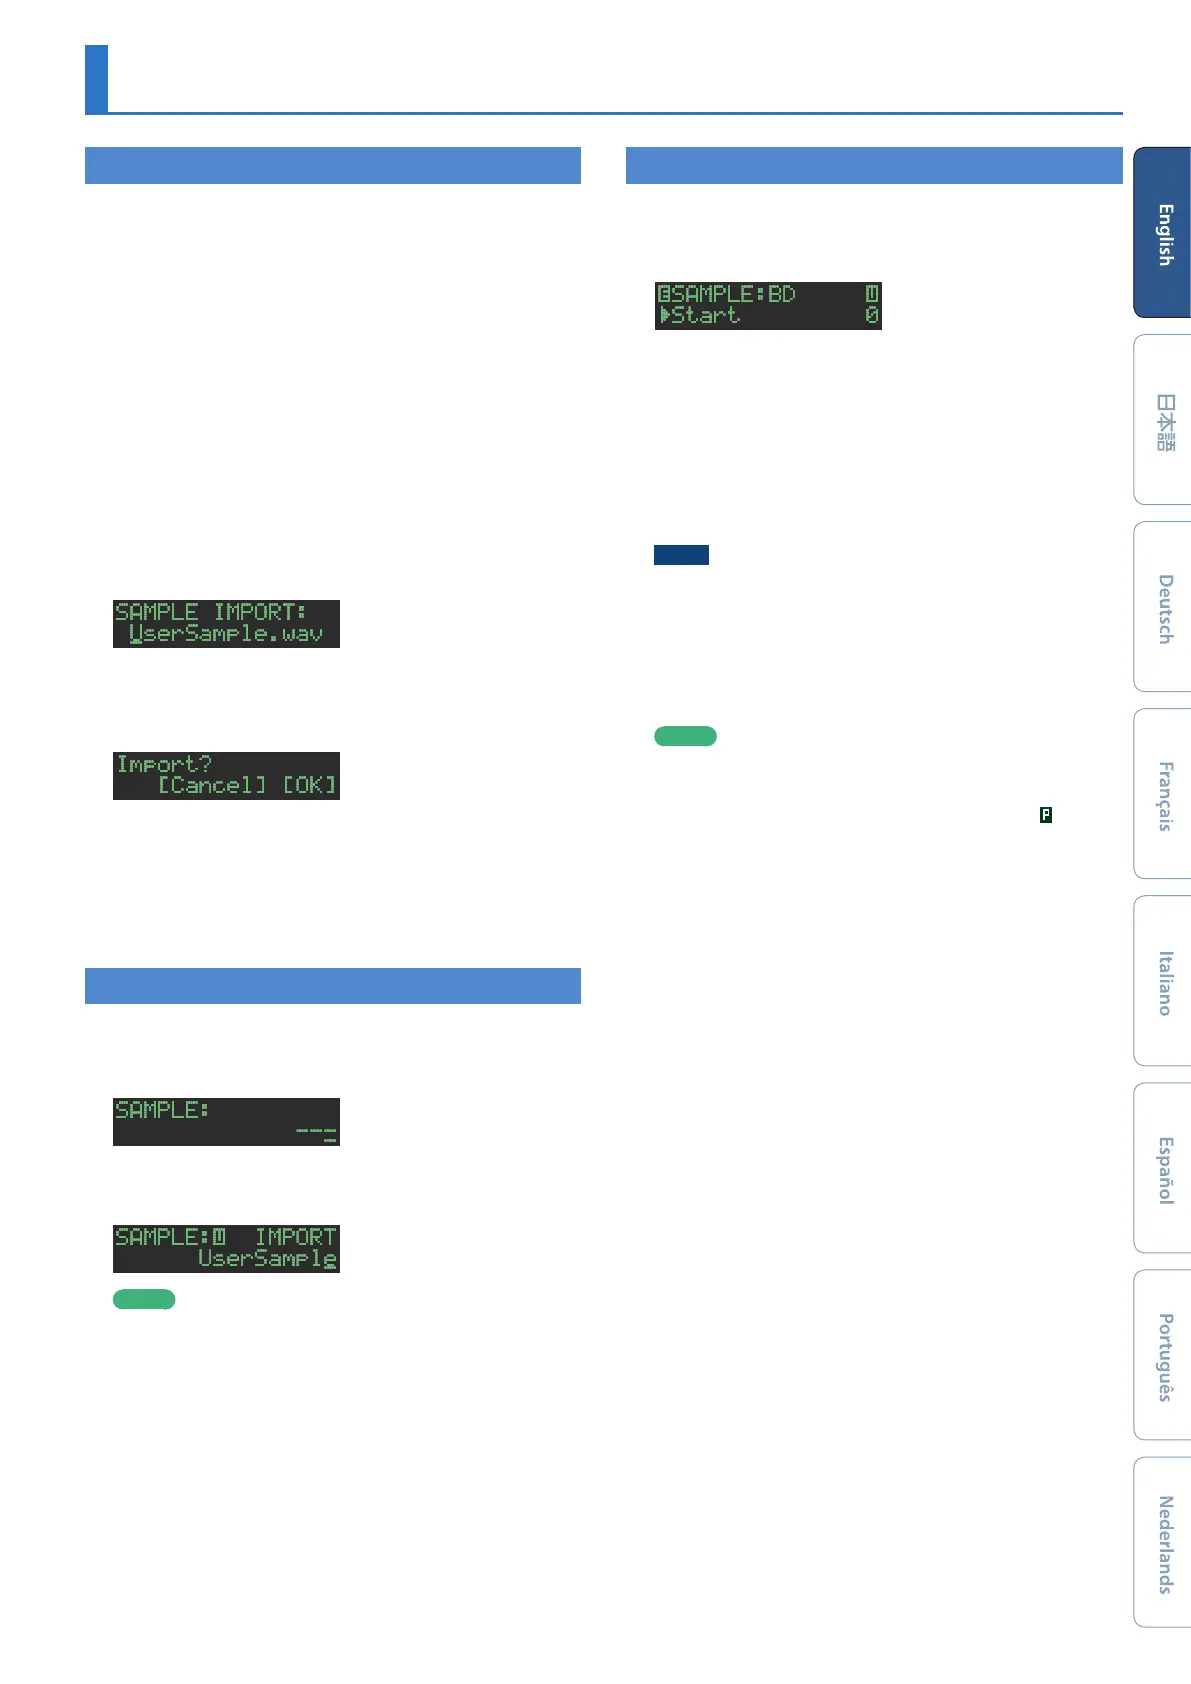
Importing a User Sample (SAMPLE Import)
Here’s how an audio file saved on an SD card can be imported as a
user sample.
* Use the TR-8S to format the SD card.
* The maximum length of a single audio file that can be imported
is approximately 180 seconds (in the case of 44.1 kHz/MONO).
Depending on the state of memory usage, the maximum time might
be shorter.
1. Using your computer, copy an audio file to the
following folder of the SD card.
ROLAND\TR-8S\SAMPLE\
File formats that can be imported
WAV, AIFF
2. Insert the SD card into the TR-8S (p. 6).
3. Press the [UTILITY] button.
4. Use the [VALUE] knob to select “Sample Import,”
and then press the [ENTER] button.
5. Use the [VALUE] knob to select the audio file that
you want to import, and press the [ENTER] button.
A confirmation message appears.
6. To execute, use the [VALUE] knob to select “O K ,”
and press the [ENTER] button.
If you decide to cancel, use the [VALUE] knob to select “Cancel,”
and then press the [ENTER] button.
When the import is completed, the display indicates
“Completed!” and you exit the UTILITY screen.
Selecting a User Sample (SAMPLE)
1. Press the [SAMPLE] button.
The [SAMPLE] button and the [BD]–[RC] button (that had been
selected in [TR-REC]) are lit, and the SAMPLE screen appears.
2. Use the [VALUE] knob to select the user sample
that you want to assign as the instrument’s tone.
MEMO
5 Choose from the sample that you imported from the SD card.
5 You can press a [BD]–[RC] button to change the loading-
destination.
3. Press the lit [SAMPLE] button.
The [SAMPLE] button goes dark, and you exit the SAMPLE screen.
Editing a User Sample’s Settings (SAMPLE Edit)
1. Hold down the [SHIFT] button and press the
[SAMPLE] button.
The SAMPLE Edit screen appears.
2. Select a parameter.
2-1. Use the [VALUE] knob to select a parameter.
2-2. Press the [ENTER] button.
3. Modify values.
3-1. Use the [VALUE] knob to edit the parameter value.
3-2. Press the [ENTER] button.
Return to the parameter selection (step 2).
NOTE
If the screen indicates “---,” editing is not possible.
4. Press the lit [SAMPLE] button.
The [SAMPLE] button goes dark, and you exit the SAMPLE Edit
screen.
If you had edited the settings, a screen asks whether you want to
save the sample.
MEMO
5 The settings you specify here are common to all kits that use
the same user sample.
5 ACB tone or preset samples (samples for which the
icon
is shown) show the parameter values as “---”; these values
cannot be edited.


 To Next Page