20
Feb.2004
Detailed Tests
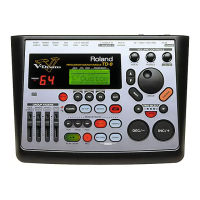
1. Version Display [TEST - 1 VERSION]
1. This checks the software version
fig.test-3
FLASH: Program version number
SRAM: Version number for initial SRAM settings values.
IROM: MAIN CPU version number
IROM(T): TRIG CPU version number
2. Under normal circumstances, confirm only the program version number.
Press the [F5 (OK)] button to advance to the next test
2. Device Test [TEST - 2 DEVICE]
1. This test is performed automatically.
The determination of “OK” or “NG” (no good, i.e. fail) appears to the
right of each test category; if all checks are OK, the procedure
automatically advances to the next test.
fig.test-5
Test Categories
• MAIN CPU: Checksum check
• FLASH: Checksum check
• TRIG CPU: Checksum check
• MAIN SDRAM: Confirms reading/writing
• TRIG SDRAM: Confirms reading/writing
• SRAM: Confirms reading/writing
• XV: Confirms reading/writing of WAVE ROM, DSP RAM, DRAM
• ESP: Confirms reading/writing of DSP RAM, DRAM
• BATTERY: Battery voltage check
2. If even one check fails, the procedure does not advance to the next test;
press the [F3 RETRY] button to carry out the test again.
3. Expansion Test [TEST - 3 EXP-BOARD]
1. A read/write test of the expansion board is performed automatically.
fig.test-6
2. If all tests result in OK, the procedure automatically advances to the next
test category.
3. If even one check fails, the procedure does not advance to the next test;
press the [F3 RETRY] button to carry out the test again.
The following appears in the LCD display if no expansion board is installed.
Hold down the [SHIFT] button and press the [F5] button to advance to the next
test.
fig.test-7
4. CompactFlash Test [TEST - 4 CF-CARD]
1. A detection and read/write test of the compactFlash is performed
automatically.
2. If the test results in OK, the following screen appears in the LCD display;
remove the CompactFlash
fig.test-8
3. When the unit detects that the CompactFlash has been removed, the
procedure automatically advances to the next test category.
4. If detection or the read/write test of the compactFlash check fails, or if no
CompactFlash has been inserted, the procedure does not advance to the
next test; press the [F3 RETRY] button to carry out the test again.
5. MIDI Test [TEST - 5 MIDI]
1. When a MIDI cable is connecting the MIDI IN and MIDI OUT connectors,
signals are detected, and the following appears in the LCD display (ON-
LINE OK).
Before Connecting
fig.test-9
After Connecting
fig.test-10
2. Disconnect the MIDI cable and confirm the signal is off (OFF-LINE OK);
the procedure automatically advances to the next test.

 Loading...