Page 18 RollSeal SC-325 & SC-650 Controllers Part No 4801-5156 Rev 1-2017
P7 – Refresh Door Limits – Default Set to 25
This parameter is associated with the Open and Close Limits programmed into the door. These limits are
determined using an encoder and they are referenced off of the “Home Switch” located in the door header.
From time to time, the Open and/or Close Limits may drift due to the nature of the encoder. This setting
allows the user to set a number of Open & Close cycles before the door refreshes its limits by going back
to its Home reference. This value can be set from 1 to 25. One means it will refresh every time it opens;
Twenty-five means it will refresh every 25
th
time it opens.
P10 – Service Cycle Reset
This parameter provides a means for a service technician to reset the Service Cycle Count. This provides
a means to track cycles in an effort to properly maintain the door system. If you desire to reset the
Service Cycle Count, you must change P10 from “NO” to “YES” by pressing the Up ( ) arrow button.
To complete the reset, you must then depress the “MODE” button.
P11 – Service Reminder – Default Set to 240
This parameter works in conjunction with P10 to provide a means for the controller to visually remind the
service technician when it is time for service. The user can set a Service Cycle Limit in this parameter.
The limit (displayed number from 10 to 240) shown is “Cycles x 100” just as the cycle counts are
displayed. This parameter is constantly compared to the value in “Service Cycles”. Once the “Service
Cycles” is greater than or equal to “Service Reminder”, the “Cycle LED” on the controller interface will
begin blinking indicating that service is needed. EXAMPLE: If the P11 displayed value is 10, the “Cycle
LED” on the controller interface will begin blinking after the door has operated 1000 cycles.
P12 – Input Status
This parameter is used only to service or troubleshoot the door. The various inputs are represented by LED
segments on the display. *Available on Software versions V0.21 and later.
Refer to Section 9.
PS1 – Change Program Limits
This parameter can be either “Yes” or “No”. To change the Open Limit (PS2) or the Closed Limit (PS3)
set this parameter to “Yes” and then proceed by pressing the Mode button. To leave the programming
mode at this time, set PS1 to “No” and press the Mode button. The controller will exit the programming
mode and return to displaying the actual position.
PS2 – Set Open Limit – Default set to 25
When the Mode button is pressed after setting PS1, the door will open to the position of the Home switch
then proceed toward the current setting of the Open Limit. Use the Up and Down arrows to set the door
to a new Open Limit position. Then press Mode to proceed to the next parameter.
PS3 – Set Closed Limit - Default set to 400 (Must Be Lower To Seal At The Bottom)
When the Mode button is pressed after setting the Open Limit, the door will close to the current setting of
the Closed Limit. Use the Up () and Down ( ) arrows to set the door to a new Closed Limit position.
Then press Mode to exit the programming mode and return to displaying the actual position.
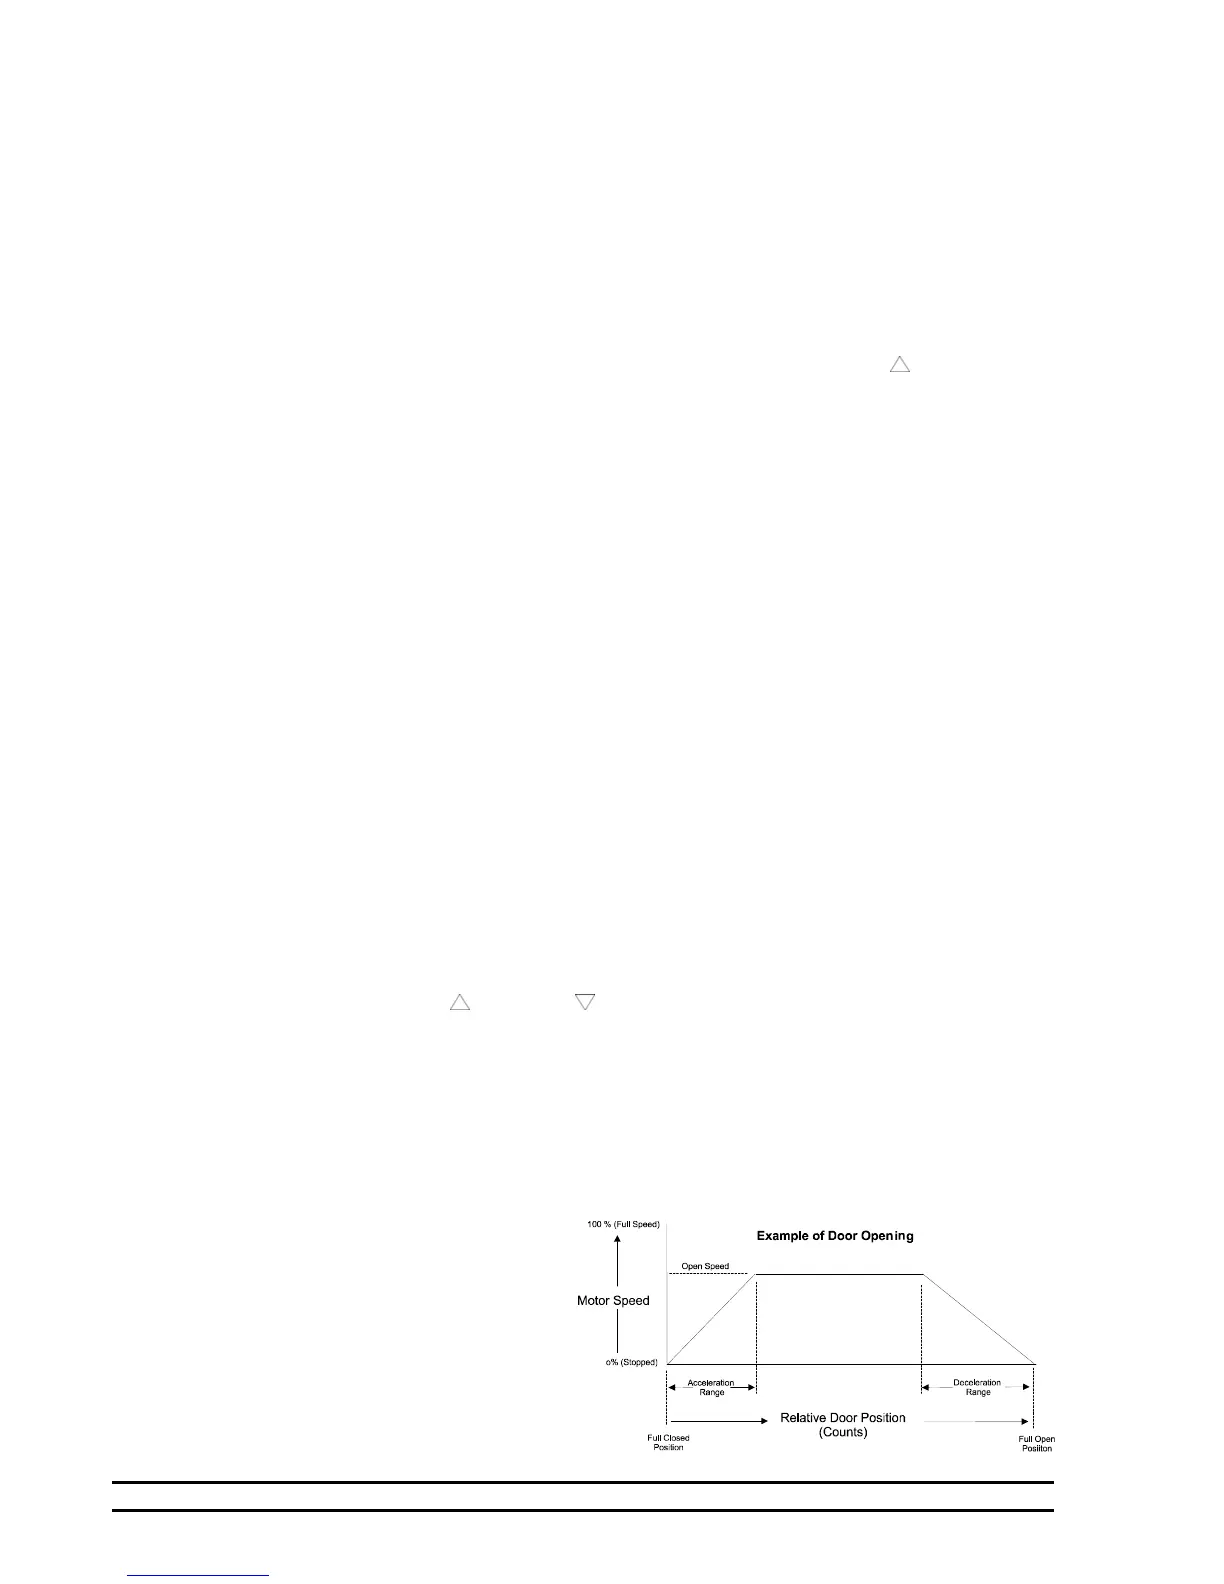
6.2 Acceleration and Deceleration Range
The Smart Controllers measure the position of the door in Relative Position Units called counts. (See
Section 4.1.) Counts are read from the door encoder and transmitted to the controller as electrical
pulses. Counts begin at zero when the door is open and get higher as the door is closed. Acceleration
and Deceleration ranges are also measured in Counts.
The Smart Controllers have
programmable adjustments for the
Acceleration and for the Deceleration
Ranges. These are adjusted by setting the
program parameters P2 and P3. See
Section 6.1 for the procedure to set these
parameters.
The acceleration range is measured in
units of counts and is the range over
which the door will accelerate from a
 Loading...