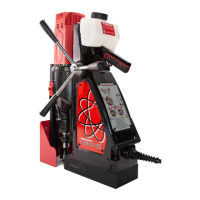
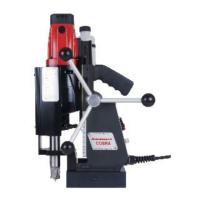
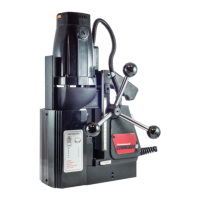
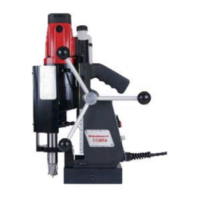
The Rotabroach Element 100 is a magnetic drilling and tapping machine designed for industrial use, particularly in fabrication, construction, railways, petrochemical, and other applications where drilling ferrous metal is required. This machine is designed to hold the drill in place whilst the drilling is functioning.
Function Description
The Element 100 is a versatile machine capable of both magnetic drilling and tapping. It features a magnetic base that adheres to ferrous metal surfaces, providing stability during operation. The machine is equipped with a control panel for power, magnet activation, motor control, and tapping functions. It incorporates a "CutSmart™ Technology" system that provides visual feedback (Green, Yellow, Red zones) to the operator, indicating the optimal drilling pressure for maximum performance and tool life. The machine also includes a gear selection system to adjust speed for different cutting and tapping requirements.
Important Technical Specifications
The Element 100 is available in two models: Element 100/1T and Element 100/3T, with the latter likely indicating a 3-speed gearbox.
Motor Unit:
- Voltages: 110V 50-60Hz or 230V 50-60Hz
- Normal full load: 19.7 A (110V) / 9.5 A (230V)
- Power: 2000 W (both 110V and 230V)
- Electro Magnet: 0.92 A (110V) / 0.5 A (230V)
- Size: 128mm wide
- Total load (magnet + motor): 2096W (110V) / 2109W (230V)
Overall Dimensions:
- Height - maximum extended: 733mm
- Height - minimum: 533mm
- Width (including capstan fitting): 230mm
- Length Overall (including guard): 370mm
- Nett Weight: 24.8kgs (Element 100/1T) / 24.5kgs (Element 100/3T)
Vibration Total Values (triax vector sum) in accordance with EN61029-1:
- Element 100/1T: 3.862 m/s² (Vibration emission value), 1.5 m/s² (Uncertainty(K))
- Element 100/3T: 3.824 m/s² (Vibration emission value), 1.5 m/s² (Uncertainty(K))
Level of Sound Pressure in accordance with EN61029-1:
- Element 100/1T: 89.0 dB(A) (Sound pressure), 102.0 dB(A) (Acoustic power), 3 dB(A) (Uncertainty(K))
- Element 100/3T: 88.0 dB(A) (Sound pressure), 101.0 dB(A) (Acoustic power), 3 dB(A) (Uncertainty(K))
Magnetic Holding Force:
- The magnetic base provides a holding force of 20000N on 25mm minimum plate thickness. The holding force is crucial for safety and effective drilling.
Extension Cable Selection:
- For 110V supply: 3.5 metres of 3 core x 2.5mm²
- For 230V supply: 26 metres of 3 core x 1.5mm²
Cutters:
- The machine is designed to accept cutters having 19.05mm (3/4") & 31.75mm (1 1/4") dia. Weldon shanks.
Usage Features
Safety Guidelines:
- Always ensure the power supply is removed before making adjustments or servicing.
- Work in a clean, uncluttered, and well-lit area.
- Do not expose tools to rain or wet locations.
- Use in well-ventilated areas, away from flammable liquids or gases.
- Ensure adequate space for mains and motor on/off switches.
- Avoid contact with earthed or ground surfaces.
- Keep other persons away, especially children.
- Store idle tools when not in use, in a dry, locked-up place.
- Do not apply too much force through the machine.
- Use the correct tool for the job.
- Dress properly; do not wear loose clothing or jewellery.
- Wear non-skid footwear.
- Wear a protective hair covering.
- Use personal protective equipment: safety glasses, ear defenders, dust masks.
- Use protective gloves to prevent swarf or debris cutting the skin.
- Ensure the work area is clear of swarf and do not reach into the cutting area.
- Connect dust extraction and collecting equipment.
- Do not abuse the cord; never pull the cord to disconnect it.
- Secure work where possible.
- Do not overreach! Keep proper footing and balance.
- Maintain tools with care; keep cutting tools sharp and clean.
- Regularly check the machine for wear or damage.
Control Panel Operation:
- Power: Red LED illuminates when power is connected.
- Magnet ON: Press the magnet switch. LED illuminates green or red depending on material thickness and magnetic adhesion. Green indicates optimum adhesion, red indicates drilling operation is not achievable.
- Motor ON: Press the green switch to turn the motor on.
- Cutting: The CutSmart™ Technology provides visual feedback:
- Green Zone: Perfect, try to keep in this zone for the best cut and optimum machine performance.
- Yellow Zone: A little too much pressure, ease off to get back to the green zone.
- Red Zone: Overload. Back off immediately as too much force will cause the motor to cut off.
- Motor OFF: Press the green switch to stop the motor. The magnet will remain on.
- Tapping Function:
- Ensure power is on (red LED illuminates).
- Press the magnet switch to engage the magnet (LED lights up green or red).
- Use the speed controller to dictate the speed.
- Turn the motor on in the forward direction.
- Drill the hole to the recommended tapping size.
- Without disengaging the magnet, replace the drill with the tap.
- Set the spindle speed to the required tapping speed.
- Start the drill spindle in the forward direction and feed the tap into the hole.
- Once the tap has threaded the hole, the drill should be stopped immediately.
- The drill spindle should then be switched to reverse and the tap can be fed back out of the hole.
Gear Selection:
- The Element 100 magnetic drill is fitted with a 4 speed gearbox. The gear is used to reduce the output speed when using larger cutters.
- Slide selector positions (Left and Right) correspond to different speed settings (Level 1 to Level 6), offering a range of 45-700 min⁻¹.
Mounting of Cutters:
- The machine accepts cutters with 19.05mm (3/4") & 31.75mm (1 1/4") dia. Weldon shanks.
- To mount cutters, ensure the Arbor Assembly (CA130) is fully inserted into the Motor Spindle (RDD4052).
- Take appropriate pilot and place through the hole in the cutter shank.
- Insert shank of cutter into bore of Arbor Assembly, ensuring alignment of two drive flats with socket screws.
- Tighten both screws using hexagon key.
Capstan Operation:
- The quick release capstan is a feature that offers user simple dual side operation.
- To remove the capstan, simply do the following:
- Press in the central button on the capstan hub, holding onto the capstan arms.
- With the button pressed in, pull the capstan away from the main body, holding on to the capstan arms.
- Re-insert the hexagonal shaft into the hexagonal slot to attach the capstan.
Maintenance Features
Regular Checks:
- Visual check of machine for damage: Every operation.
- Check brush wear: Every operation.
- Check magnetic base: Every operation.
- Check alignment of the machine: 1 week.
- Check grease: 1 month.
- Check armature: 1 month.
Detailed Maintenance Procedures:
- Machine clean and free from debris: Ensure the machine is clean and free from debris prior to use.
- Remove from the mains prior to any maintenance: Always disconnect from power.
- Follow instructions for lubricating and changing accessories: Refer to specific instructions for these tasks.
- Inspect tool cords periodically: If damaged, have it repaired by an authorized Rotabroach service facility.
- Inspect extension cords periodically: Replace if damaged.
- Keep handles dry, clean and free from oil and grease: Maintain clean handles for safe operation.
- Disconnect tools from the power supply when not in use: Store safely.
- Form the habit of checking to see that keys and adjusting wrenches are removed from the tool before turning it on: Prevent accidental damage or injury.
- Avoid unintentional starting: Ensure the magnet is off before plugging the machine in.
- Use extension leads only intended for outdoor use: If the tool is used outdoors.
- The vibration emissions during actual use can differ from the declared total value: Depending on the ways in which the tool is being used.
- Watch what you are doing, use common sense: Do not operate the tool when you are tired. Do not operate the machine under the influence of alcohol or any illegal substances.
- Check damaged parts: Before further use of tool, it should be carefully checked to determine that it will operate properly and perform its intended function.
- Check for alignment of moving parts, binding of moving parts, breakage of parts, mounting and any other conditions that may affect its operation: A guard or other part that is damaged should be properly repaired or replaced by an authorized service centre unless otherwise indicated in this instruction manual.
- Have defective switches replaced by authorized service centre: Do not use the tool if the switch does no turn it on and off.
- The use of any accessory or attachment, other than ones recommended in this instruction manual, may present a risk of personal injury: Use only recommended accessories.
- Have your machine repaired by a qualified Rotabroach technician: This electric tool complies with the relevant safety rules. Qualified persons using original spare parts should only carry out repairs.
- Never operate the machine if parts are missing or damaged: Ensure all parts are present and in good condition.
- Never direct jets of water or flammable liquids over the drill: Avoid water and flammable liquids.
- Operator must be physically able to handle the weight of the machine: Ensure the operator can safely handle the machine.
- Operator should be trained in the use of the machine: Proper training is essential for safe operation.
Magnetic Base Maintenance:
- Before every operation, the magnetic base should be checked to make sure that the base is flat and there is no damage present. An uneven magnet base will cause the magnet not to hold as efficiently and may cause injury to the operator.
Adjustment of Slide and Bearing Bracket Alignment:
- An essential requirement is that the slide can move in a smooth and controlled manner, free of lateral movement and vibration.
- This situation can be maintained by periodic adjustment of the slide and is accomplished in the following manner:
- Place the machine in an upright position and, by means of the capstan, raise the slide to its highest position. Clean the brass gib strips and apply a small amount of light machine oil to the wear surfaces.
- Now lower the slide back to its lowest position. Bring the slide into the center of the deep-rail slide housing and loosen screws thus allowing free movement of the arbor support bracket.
- Commencing with the middle screws, gently feed in all the screws until slight resistance is encountered.
- Operate the slide up and down a few times to test the movement and make any further necessary adjustments. Try to ensure that all the screws are exerting a uniform pressure on the slide from top to bottom. A perfectly adjusted slide will operate freely up and down without any sideways movement.
- Now raise the slide to its highest position. Slightly undo the arbor bearing bracket and, using fingers only, tighten the screws.
- Place the machine on a steel plate, connect to power supply and switch on the magnet. Start up the motor. If the arbor is incorrectly aligned, the arbor support bracket will be seen to oscillate. Make any necessary further adjustments to the bracket to ensure correct alignment of the spindle and finally tighten the screws using a spanner. Lastly tighten the arbor bearing bracket.
Check Machines Grease:
- The gearbox grease should be checked once a month to ensure all moving components are covered to prevent wear. The grease should be changed at least once a year to ensure you gain the best from your machine.
Check Armature of the Machine:
- This should be checked at least once a month to check that there are no visual signs of damage to the body or to the commutator. Some signs of wear will be seen on the commutator over a period of time but this is normal (this is the part that comes into contact with the brushes) however, if there are any signs of abnormal damage the part should be replaced.