40
FA ROTEX HPSU compact (V5) •
4 x Set-up and installation
4.6 Laying coolant lines
Ɣ Check whether oil trap arc necessary.
– Required if ROTEX HPSU compact is not installed at
ground level with the heat pump exterior unit (fig. 4-45,
H
O
10 m).
– At least one oil trap arc must be installed every 10 m dif-
ference in height (fig. 4-45, H = clearance from oil trap arc
to oil trap arc).
– Oil trap arc only required in gas line.
Ɣ Install
lines with bending unit and an adequate clearance to
electrical lines.
Ɣ Only solder with light nitrogen flow
(hard soldering only).
Ɣ D
o not apply heat insulation to joins until after start-up
(for purposes of leakage search).
Ɣ Establ
ish flange connections and connect to the units.
( Pay attention to the tightening torque, see chapter 10.3
"Tightening torque").
4.7 Pressure test and filling the coolant circuit
Ɣ Perform pressure test with nitrogen.
– Use nitrogen 4.0 or higher.
– Maximum 40 bar.
Ɣ Af
ter leak search is complete, completely drain.
Ɣ Vacuum lines.
– Pressure to be achieved: 1 mbar absolute.
– Time: minimum 1 h
Ɣ Che
ck whether additional refrigerant is needed for primer
filling, fill where necessary.
Ɣ Op
en stop valve on exterior unit completely until the stop.
Tighten loosely.
Ɣ Reas
semble valve caps.
Ɣ Check whether the storage tank temperature sensors t
DHW1
and t
DHW2
are inserted to a depth of 80 cm.
4.8 Filling the system with water
Do not fill the ROTEX HPSU compact until all installation activ-
ities have been completed, in the order shown as follows.
4.8.1 Checking the water quality and adjusting the
pressure gauge
Ɣ Observe the information on the water connection and water
quality in accordance with section 4.4.
The correct minimum pressure markin
g must be set on the
pressure gauge installed by the customer before filling the
system for the first time:
Ɣ Rotate the pressure
gauge glass in such a way that the
minimum pressure mark corresponds to the system
height +2 m (1 m water column = 0.1 bar).
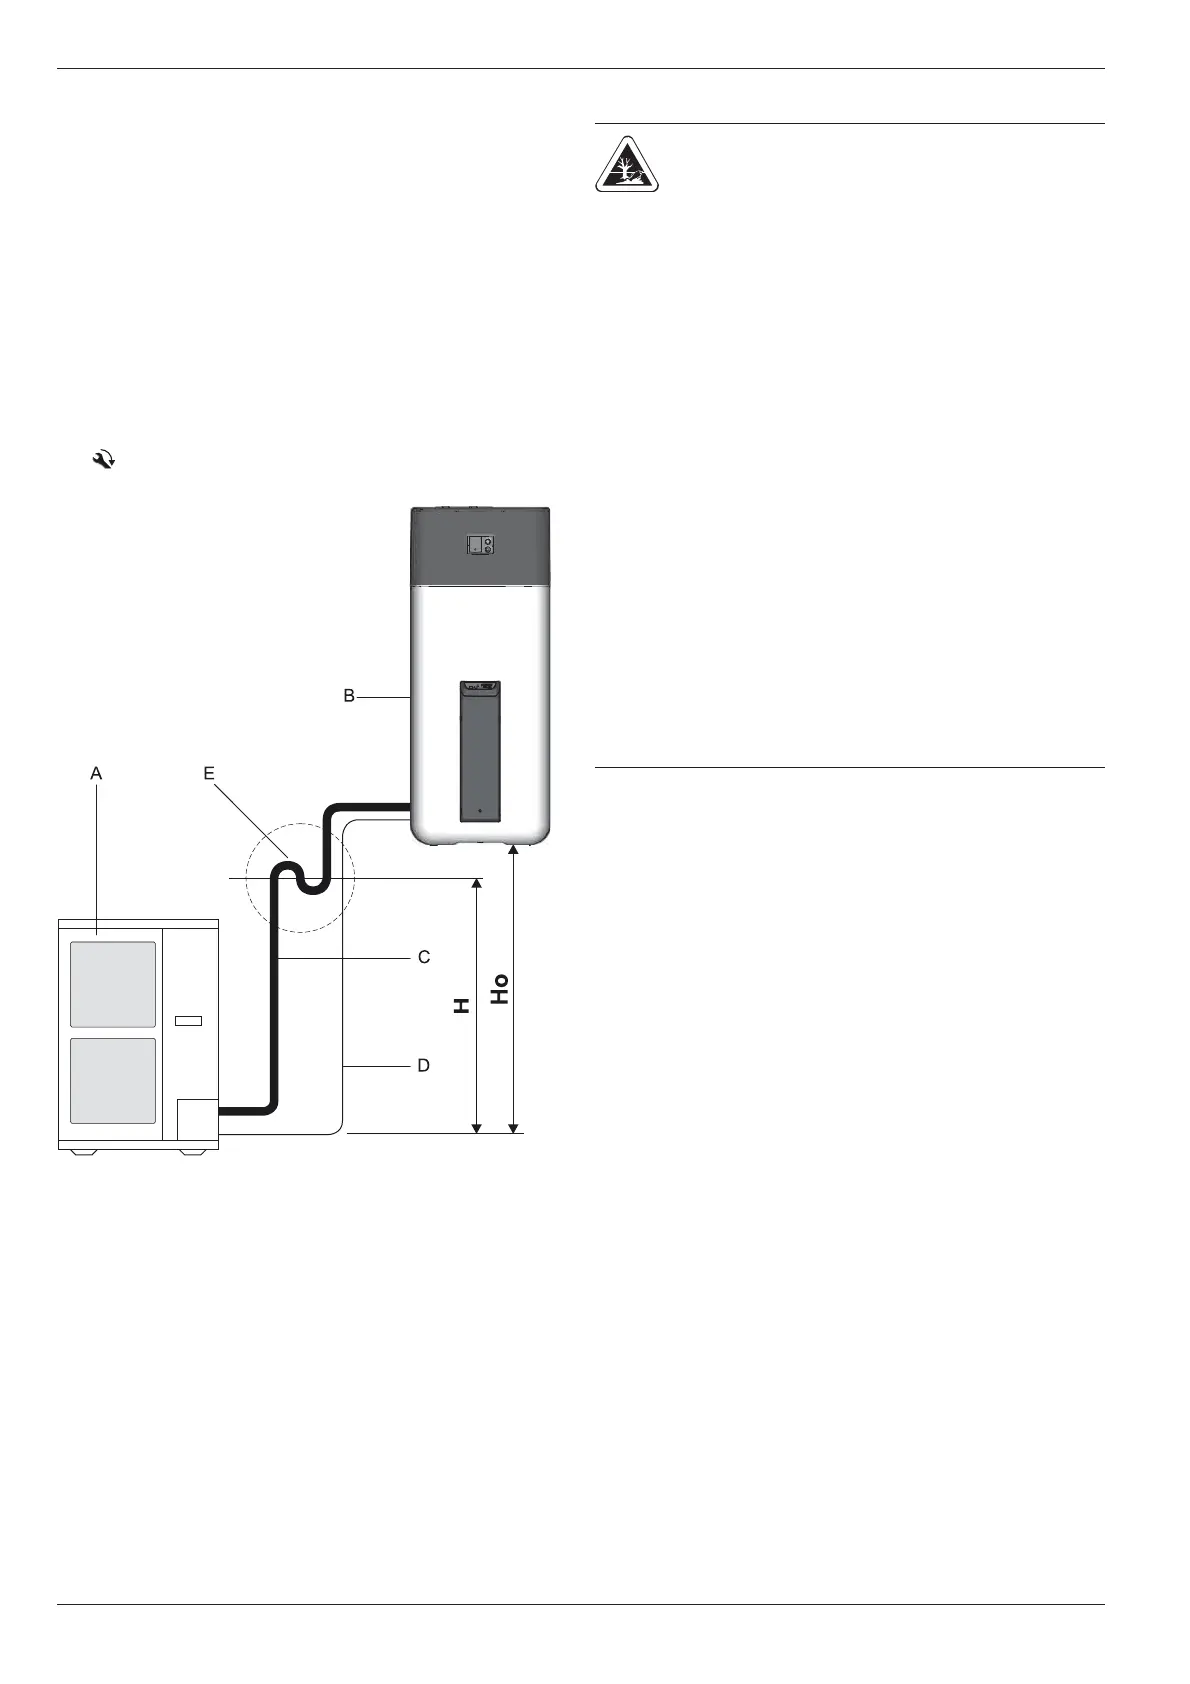
A Exterior heat pump unit (RRLQ)
B ROTEX HPSU compact
C Gas line
D Liquid line
E Oil trap arc
H height to 1st oil trap (max. 10 m)
H
O
Height difference between heat pump exterior unit and heat pump
interior unit.
Fig. 4-45 Oil trap arc coolant line
RISK OF ENVIRONMENTAL
DAMAGE!
Important information regarding the
coolant used.
The entire heat pump system contains
refrigerant with fluoridated greenhouse
gases which damage the environment if
released.
Coolant type: R410A
GWP* value: 2087,5
* GWP = Global Warning Potential
Ɣ Fill in the total coolant filling quantity
on the supplied lable on the heat
pump exterior unit (for information
consult the installation instructions for
the heat pump exterior unit).
Ɣ Never allow coolant to be released
into the atmosphere - always suction
it off and recycle using a suitable
recycling device.
 Loading...