22
FA ROTEX HPSU compact (V5) •
4 x Set-up and installation
4.3 Remove cover hood and heat insulation
Ɣ Lift the cover hood at the back and remove to the front.
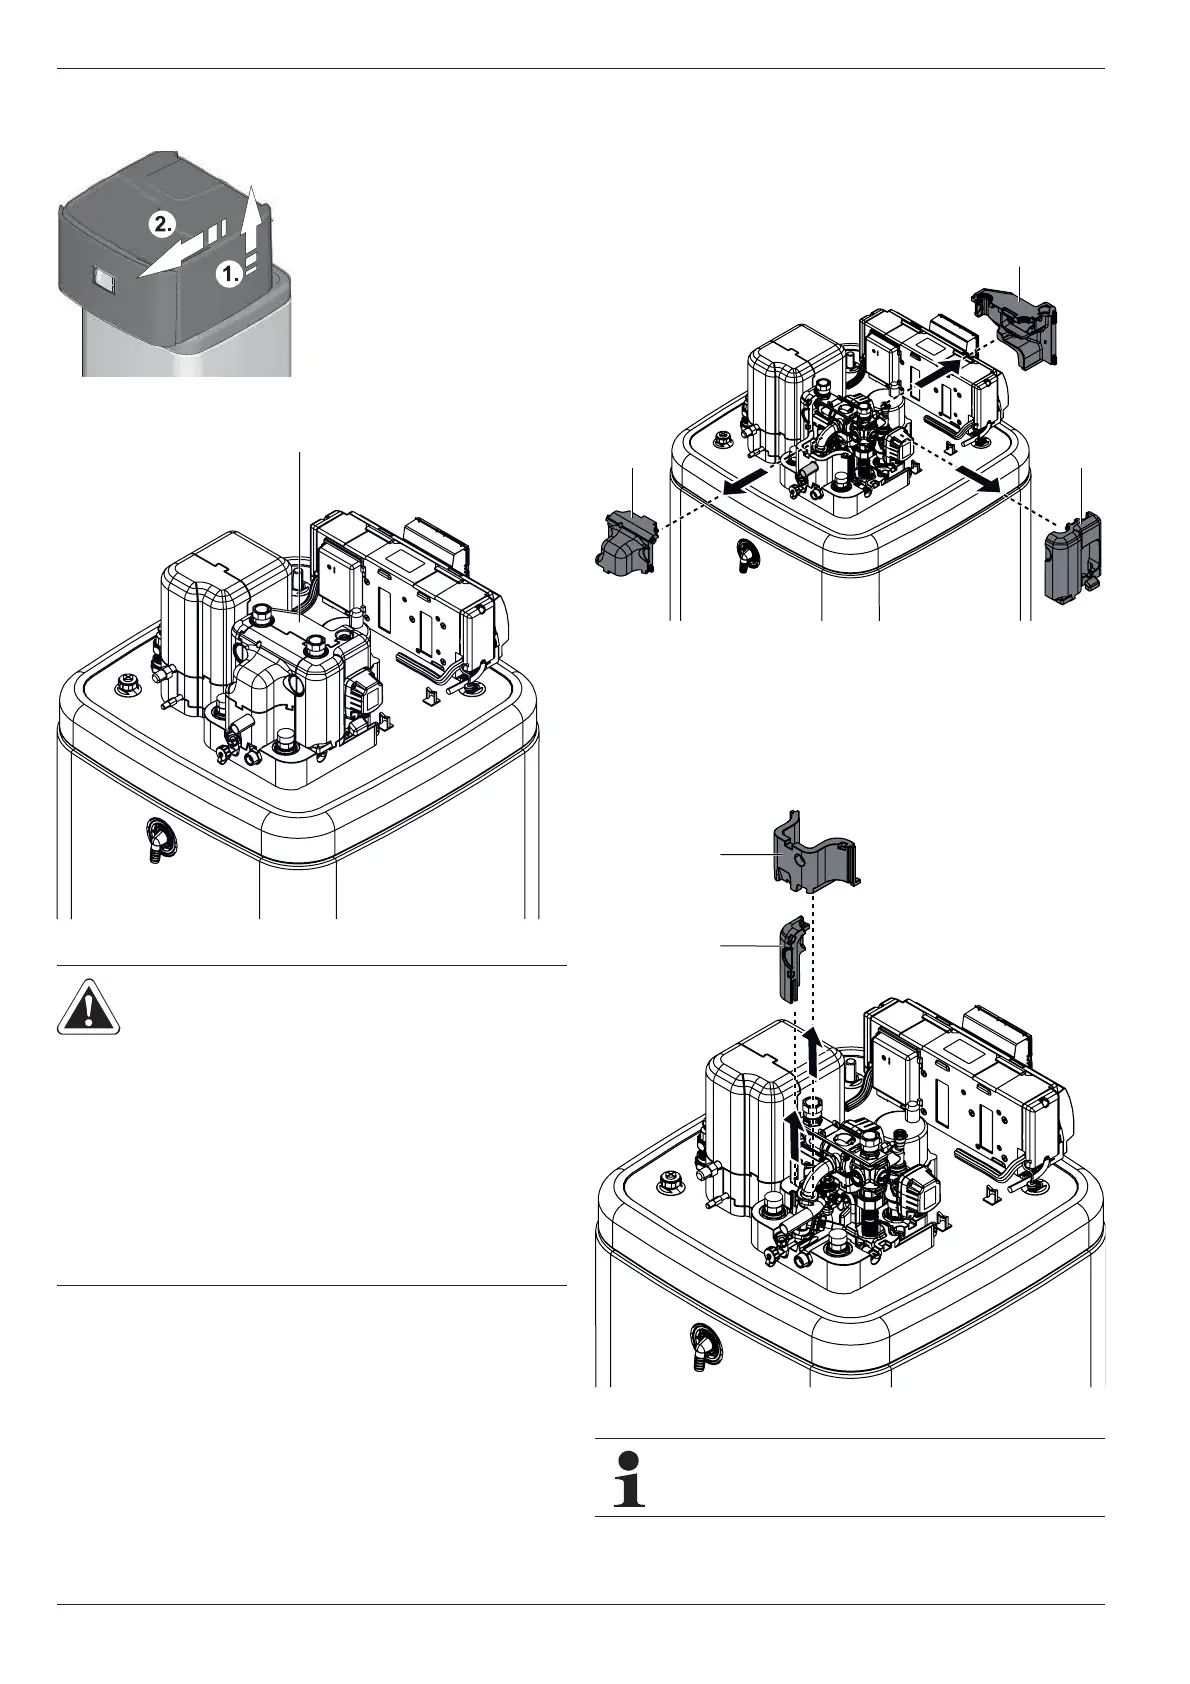
Ɣ Remove the top thermal insu
lation in the following order:
– Pull away the side insulation element (fig. 4-8, item A)
horizontally.
– Pull away the rear insulation element (fig. 4-8, item B) hor-
izontally.
– Pull away the front insulation element (fig. 4-8, item C)
horizontally.
Ɣ If re
quired: Remove the bottom thermal insulation in the
following order:
– Pull away the side insulation element (fig. 4-9, item A) ver-
tically.
– Pull away the rear insulation element (fig. 4-9, item B) ver-
tically.
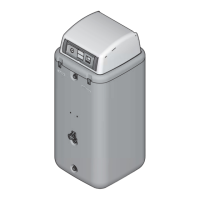
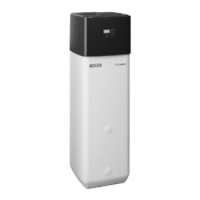
Fig. 4-6 Removing the protective cover
Fig. 4-7 ROTEX HPSU compact without cover hood
CAUTION!
The thermal insulation (fig. 4-7, item A)
consists of pressure sensitive shaped
EPP components that can easily be
damaged by inappropriate handling.
Ɣ Carry out removal of the thermal
insulation only in the sequence and in
the directions quoted below.
Ɣ Do not use force.
Ɣ Do not use tools.
Fig. 4-8 Removing top thermal insulation
Fig. 4-9 Removing bottom thermal insulation
Installing the thermal insulation is carried out in the
reverse order.
 Loading...