54
FA ROTEX HPSU compact (V5) •
7 x Service and maintenance
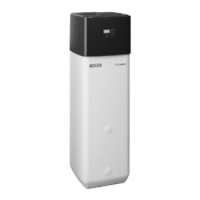
Without installed solar system
Ɣ Connect the filling hose with backflush prevention (1/2") to
the connection "DrainBack Solar - feed" (see fig. 7-1,
item 1).
Ɣ Fil
l the storage tank on the ROTEX HPSU compact until
water comes out of the connection (fig. 7-1, item 23), t
hat
has been connected as the safety overflow.
Ɣ Disconnect the filling hose with backflush prevention (1/2")
again.
With KFE filling connection or with installed solar
system (see also chapter 6.1)
Ɣ Without solar system: KFE filling connection (accessory
KFE BA 16 52 15)
to the filling and drain connection of the ROTEX HPSU
com
pact (fig. 3-2 to fig. 3-5, item 10)
or
with the solar system: KF
E filling connection (accessory
KFE BA, 16 52 15) to the connecting elbow of the
control and pump unit (RPS4).
Ɣ C
onnect the filling hose with backflush prevention (1/2") to
the previously installed KFE cock.
Ɣ Fill the storage tank on the ROTEX HPSU compact until
water comes out of the connection (fig. 7-1, item 23), t
hat
has been connected as the safety overflow.
Ɣ Disconnect the filling hose with backflush prevention (1/2")
again.
7.4 Filling and topping up the heating system
1. Connect the filling hose (fig. 7-2, item 1) with backflush
prevention (1/2") and an external pressure gauge (on-site) to
the KFE cock
(fig. 7-2, item 2) and secure from slipping using
a hose clamp.
2. Connect the drain hose to the venting valve and direct away
from the unit. Open the venting valve with connected hose
and check that the other venting valve is closed.
3. Open the water cock (fig. 7-2, item 4) in the supply line.
4. Open KFE cock (fig. 7-2, item. 2) and watch the pressure
gauge.
5. Fill the system with water until the system target pressure is
reached on the pressure gauge (System height +2 m,
whereby 1 m water column = 0.1 bar).
The overpressure valve must not be triggered!
6. Close
manual venting valve as soon as bubble-free water
comes out.
7. Close water stopcock (fig. 7-2, item 4). KFE valve must
remain open so that the water pressure can be read off on the
external pressure gauge.
8. Switch on the power supply of the HPSU compact.
9. Set rotary switch to position operating mode and select
"Heating".
Î ROTEX HPSU compact runs in the hot water heating
mode after the start phase.
10. During hot water heating mode, continuously check the water
pressure on the external pressure gauge and, if necessary,
top up the water via the KFE valve (fig. 7-2, item 2).
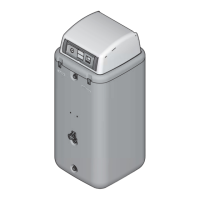
Fig. 7-1 Buffer storage filling - without solar system
DANGER!
During the filling procedure, water can
leak from potential leaking sites, which,
in the event of contact with live parts, can
result in an electric shock.
Ɣ Prior to the filling procedure,
disconnect the ROTEX HPSU
compact from the power.
Ɣ After the initial filling, prior to switching
on the power supply to the ROTEX
HPSU compact, check whether all
electronic parts and connection points
are dry.
WARNING!
Contamination of the drinking water is
damaging to health.
Ɣ When filling the heating system
prevent any back-flow of heating
water into the drinking water piping.
Observe the information on the water connection and
water quality in accordance with chap. 2.4 and 4.4.
 Loading...