6 x Decommissioning
FA ROTEX HPSU compact (V5) •
47
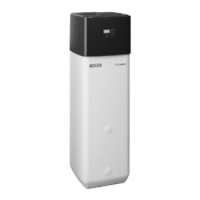
Ɣ Insert the KFE filling connection into the threaded piece
(fig. 6-3, item E) and secure it using a clamping piece
(fig. 6-3, item D).
Ɣ Place a suitab
le collection trough beneath the filling and
emptying fitting.
Ɣ At the
filling and emptying connection, unscrew the threaded
piece (fig. 6-4, item E), remove the sealing plug (fig. 6-4,
item F) an
d immediately screw the pre-assembled threaded
insert with the KFE filling connection back into the filling and
empyting connection (fig. 6-4).
Ɣ Ope
n the KFE cock on the KFE filling connection and
drain the water out of the storage tank.
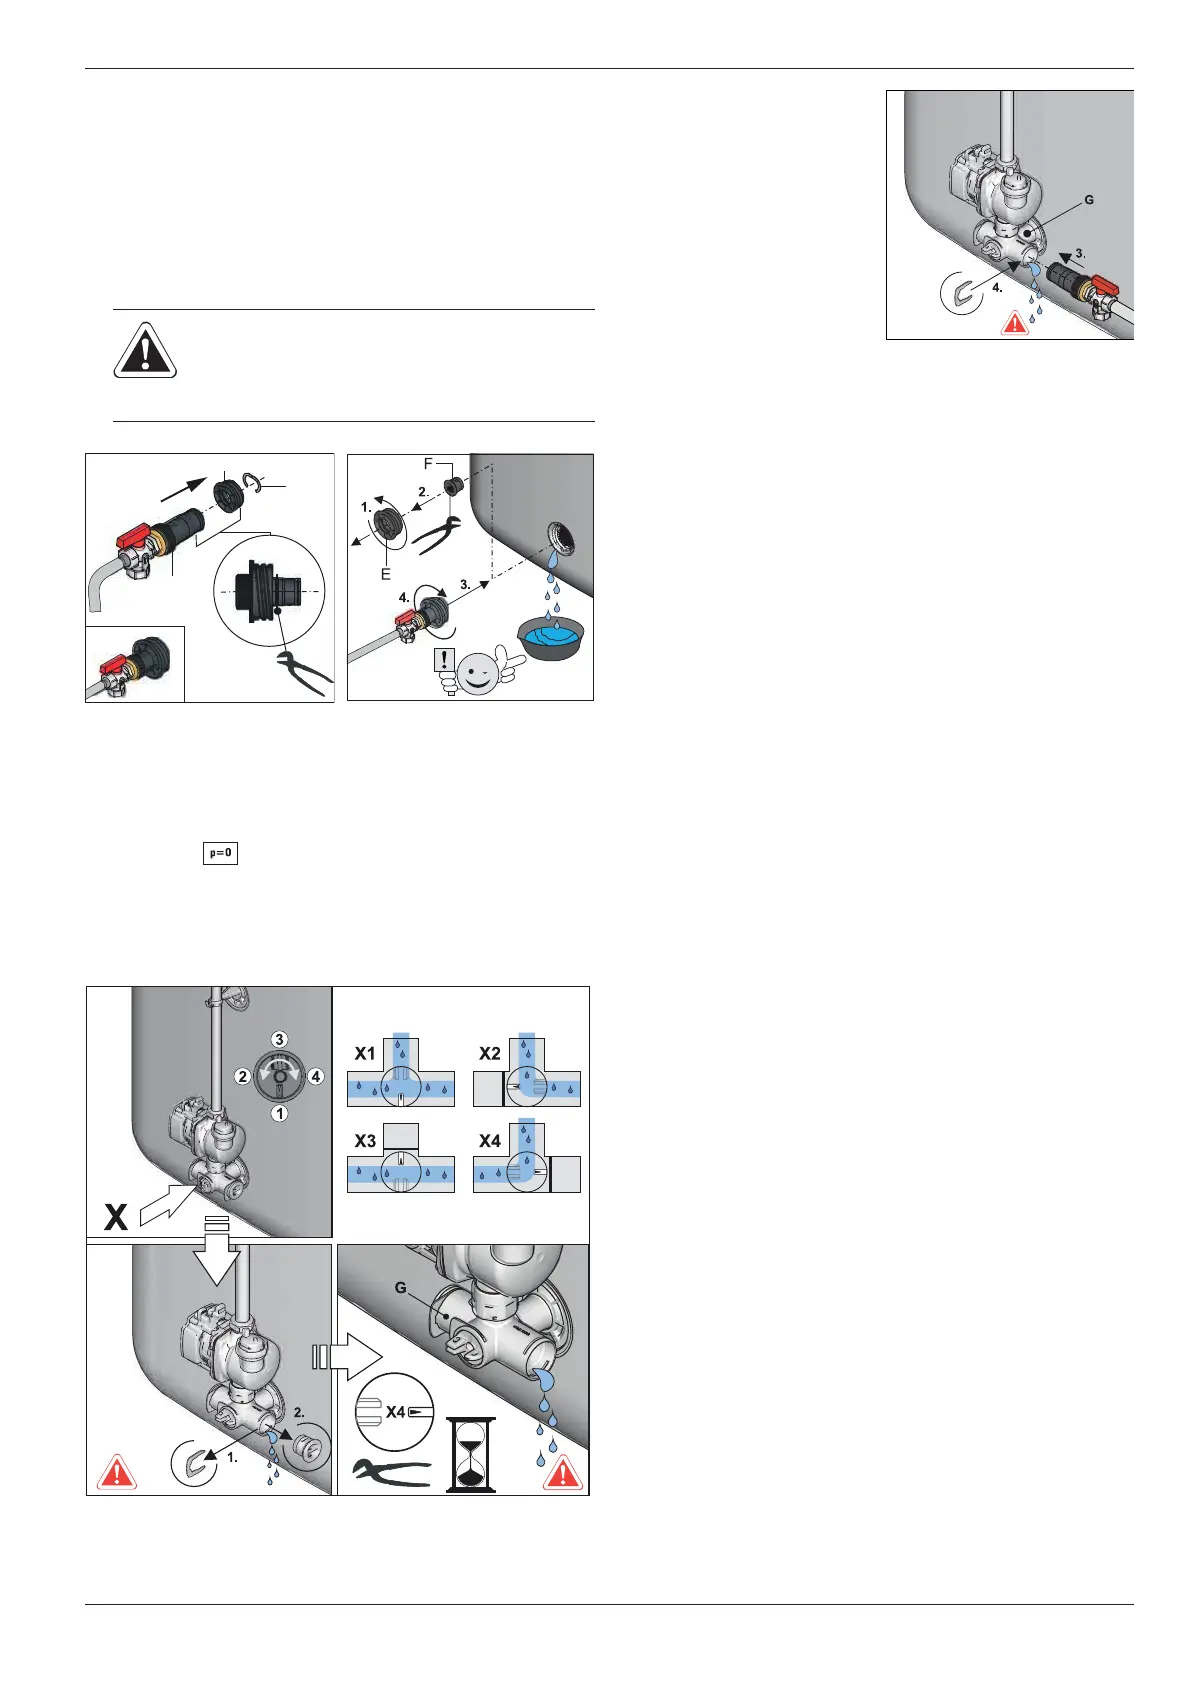
Only for the solar installation
Ɣ Adjust the valve insert on the connecting angle so that the
path to the blind plug is blocked off (fig. 6-5).
Ɣ Remove
the blanking plug from the connecting elbow
(fig. 6-5) and place a suitable collection trough beneath the
unit.
Ɣ Open the KFE fil
ling connection.
Ɣ Adjust the valve insert on the connecting angle so that the
flow to the drain hose is opened (also refer to fig. 6-5) and
drain the water content of the storage tank.
6.1.2 Draining the heating circuit and hot water
circuit
Ɣ Connect the drain hose to the combined filling and draining
valve on the ROTEX HPSU compact.
Ɣ Open the combin
ed filling and draining valve on the
ROTEX HPSU compact.
Ɣ Allo
w the heating and hot water circuit to drain.
Ɣ Disconnect the heating flow and return flow as well as the cold
water inflow and the hot water outflow from the ROTEX HPSU
compact.
Ɣ Con
nect the discharge hose on the heating flow and return
flow as well as the cold water inflow and hot water outflow so
that the hose opening is at ground level.
Ɣ Allo
w the individual heat exchangers to run empty one after
the other based on the suction lifter method.
CAUTION!
Storage water will gush out as soon
as the sealing plug is removed.
Fig. 6-3 Complete KFE filling
connection
Fig. 6-4 Screw the KFE filling
connection into the fill-
ing and draining fitting
Fig. 6-5 Shutting off the valve insert and removing the blanking plug
fr
om the connecting angle
Ɣ Insert the KFE filling
connection into the
connecting elbow and
secure using a retaining
clamp (
fig. 6-6).
Fig. 6-6 Assembling the KFE fill-
ing connection in the
connecting e
lbow
 Loading...