www.rotexautomation.com
8. Disassembly
Refer the view on page 22/23/24.
a. Loosen the lock nuts #13, and remove stroke
adjustment screws #5A and #5B, washers #10,
and o-rings #23.
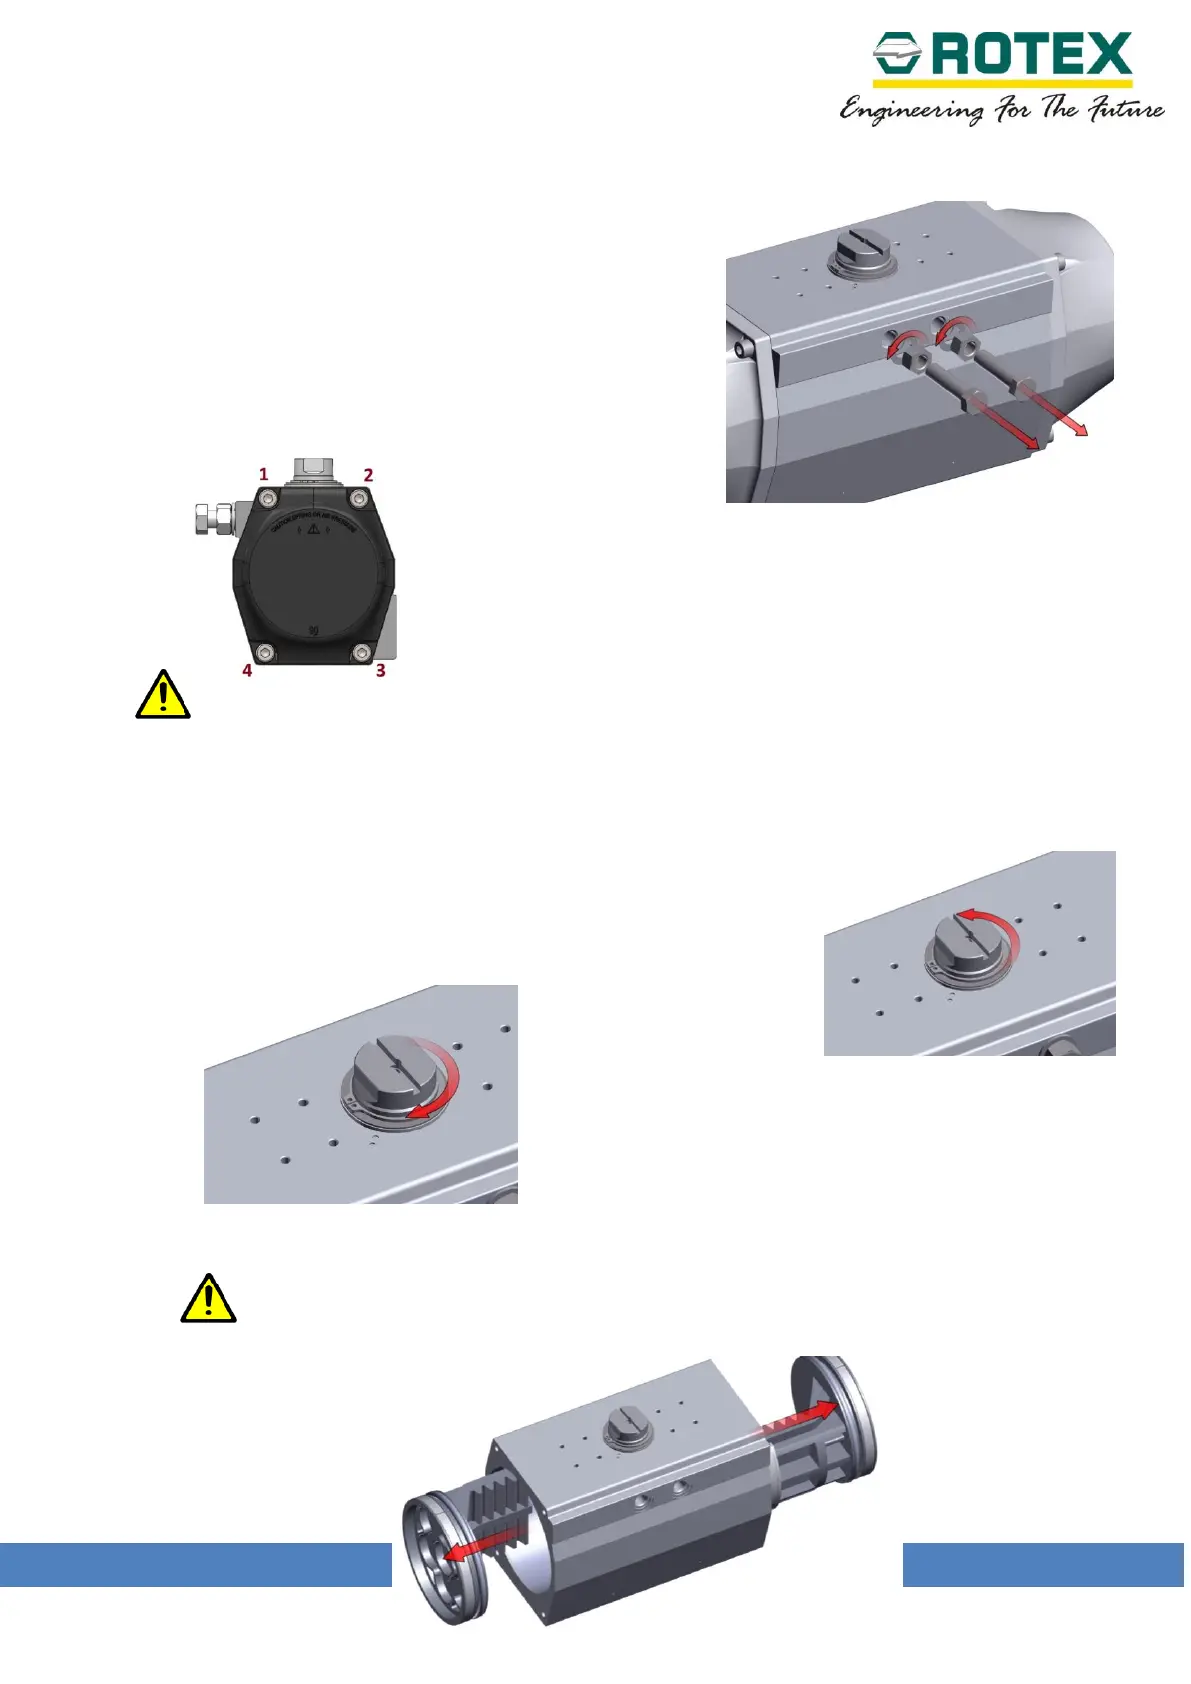
b. Loosen the cover bolts #9 on each end cap gradually in 1
– 3 - 2 – 4 sequence.
The bolts are long enough to retain the cover connected to the
body until the spring tension is fully released.
CAUTION: Spring return actuator end caps are under spring tension. Caution
must be used while removing end cap bolts and end caps. It is recommended to
put actuator into a press during removal of end caps to ensure safe release of
spring tension
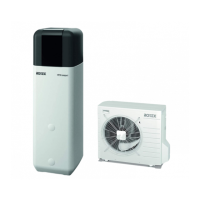
c. Rotate the pinion #2 in the counter clockwise direction
(For double acting & Spring return fail safe close
actuators) until the pinion becomes free.
Rotate the pinion #2 in the clockwise direction (For
Spring return fail safe open actuators) until the pinion
becomes free.
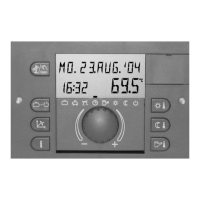
d. Pull the piston out from each side by holding with pliers.
CAUTION: NEVER attempt to remove pistons from actuator body
using air pressure when the end caps have been removed!!