4 Operation
User reference guide
4
RHBX04+08DA
ROTEX HPSU low temperature Bi‑bloc
4P495261-1 – 2017.12
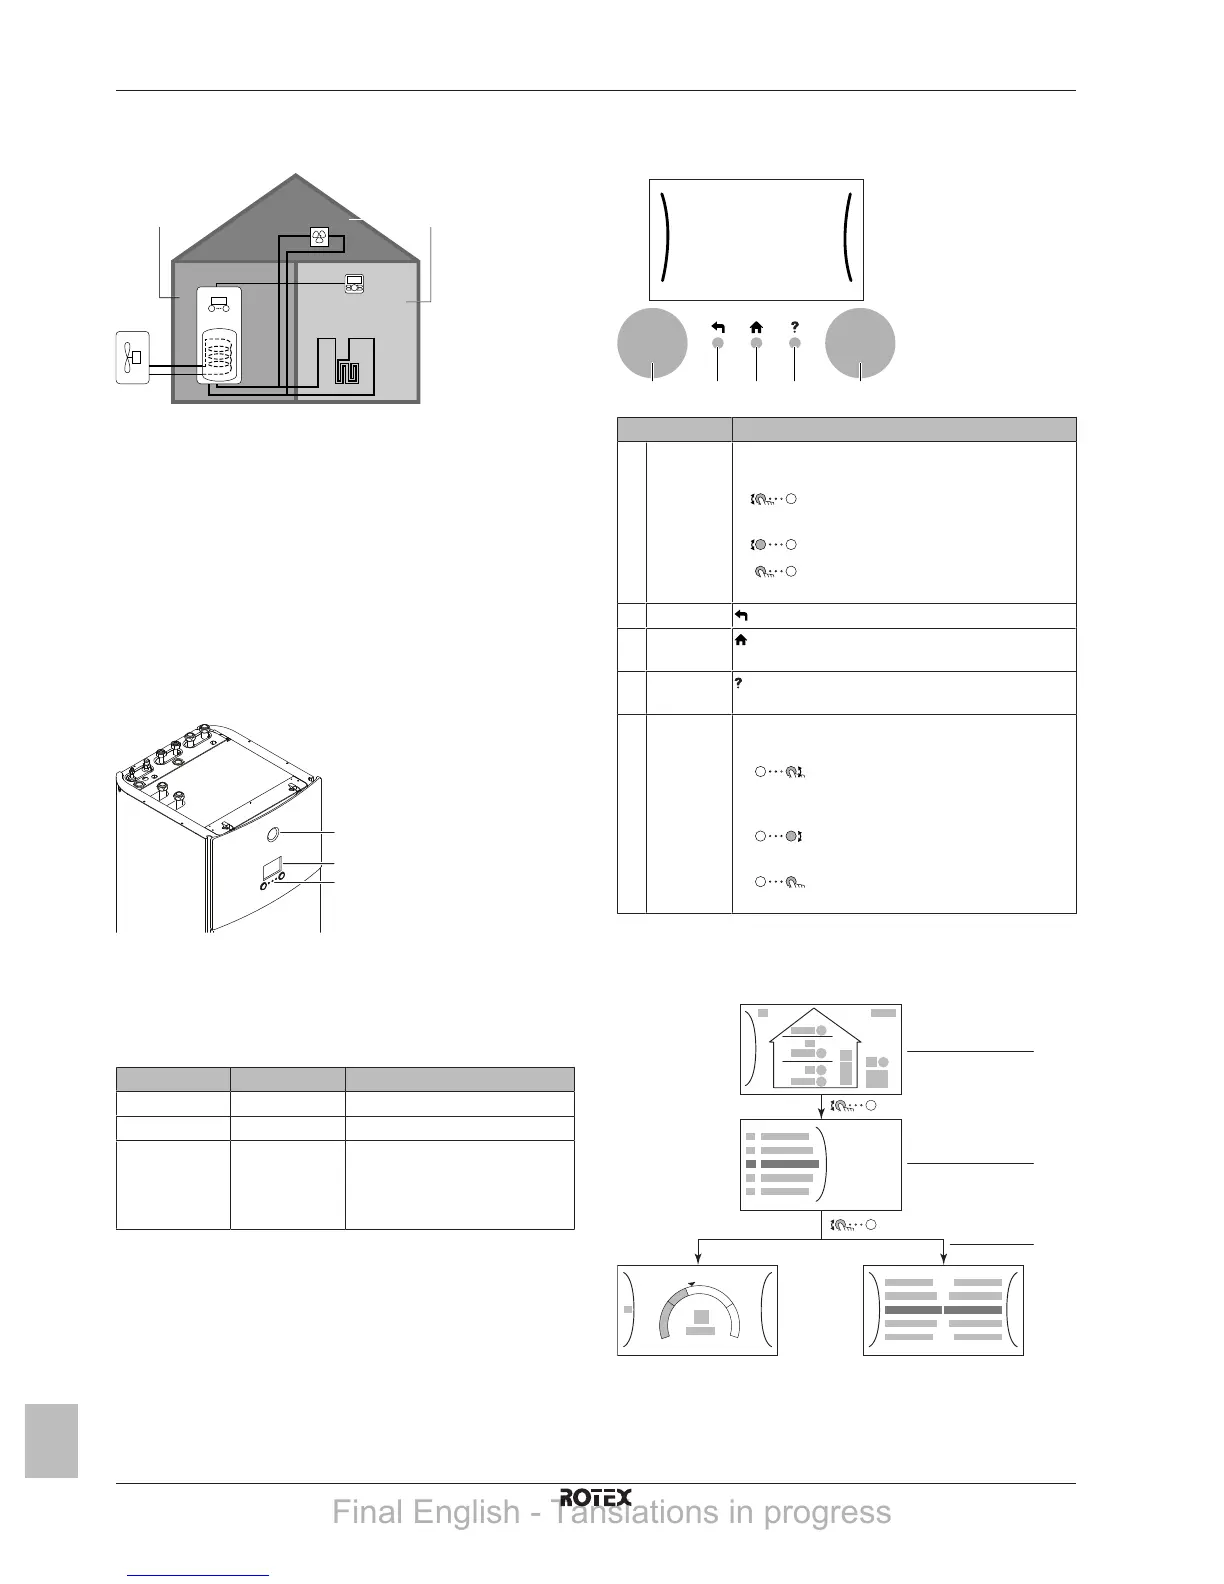
3.1 Components in a typical system
layout
A Main zone. Example: Living room.
B Additional zone. Example: Bedroom.
C Technical room. Example: Garage.
a Outdoor unit heatpump
b Indoor unit heatpump
c Domestic hot water (DHW) tank
d User interface at the indoor unit
e User interface used as room thermostat
f Underfloor heating
g Radiators, heatpump convectors, or fancoil units
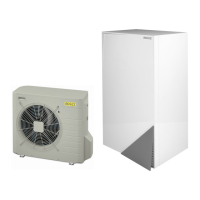
4 Operation
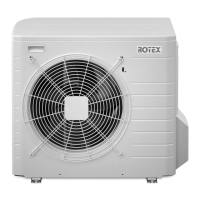
4.1 User interface: Overview
The user interface has the following components:
a Status indicator
b LCD screen
c Dials and buttons
Status indicator
The LEDs of the status indicator light up or blink to show the
operating mode of the unit.
LED Mode Description
Blinking blue Standby The unit is not in operation.
Continuous blue Operation The unit is in operation.
Blinking red Malfunction A malfunction occurred.
See "7.1To display the help text
in case of a malfunction"on
page16 for more information.
LCD screen
The LCD screen has a sleeping function. After a certain time of non-
interaction with the user interface, the screen darkens. Pressing any
button or rotating any dial awakens the display. The time of non-
interaction differs depending on the user permission level:
▪ User or Advanced user: 15min
▪ Installer: 1h
Dials and buttons
You use the dials and buttons:
▪ To navigate through the screens, menus and settings of the LCD
screen
▪ To set values
Item Description
a Left dial The LCD shows an arc on the left side of the
display when you can use the left dial.
▪
: Turn, then press the left dial. Navigate
through the menu structure.
▪
: Turn the left dial. Choose a menu item.
▪
: Press the left dial. Confirm your choice
or go to a submenu.
b Back button : Press to go back 1 step in the menu structure.
c Home
button
: Press to go back to the home screen.
d Help button : Press to show a help text related to the current
page (if available).
e Right dial The LCD shows an arc on the right side of the
display when you can use the right dial.
▪
: Turn, then press the right dial. Change
a value or setting, shown at the right side of the
screen.
▪
: Turn the right dial. Navigate through
the possible values and settings.
▪
: Press the right dial. Confirm your
choice and go to the next menu item.
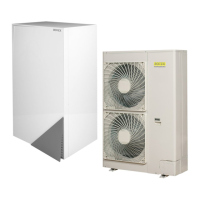
4.2 Possible screens: Overview
The most common screens are as follows:
a Home screen
b Main menu screen
c Lower level screens:
c1: Setpoint screen
c2: Detailed screen with values
Final English - Tanslations in progress