Copyright © 2016 Ruckus Wireless, Inc.
Published June 2016, Part Number 800-71267-001 Rev A
Page 4 of 4
NOTE: The color coding of wire conductors varies by region. Before
completing this step, check your local wiring standards for guidance.
5
Using a small screwdriver, tighten the small screws around the connector housing to
fix the connector pins into the terminals.
6 Mate the cable gland with the connector housing, and then hand-tighten.
Figure 11: Assembling the AC power connector
Two different-sized grommets are supplied in the AC connector assembly kit. Use the
grommet that is appropriate to the diameter of the AC cable that you are using.
7 Mate the boot with the cable gland, and then hand-tighten to seal.
8 Connect the AC cord connector that you have assembled to the AC power socket on
the AP.
9 Connect the AC cord to an AC power source.
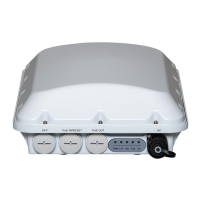
STEP 9: EARTH GROUNDING THE AP
CAUTION: Make sure that earth grounding is available and that it meets
local and national electrical codes. For additional lightning protection, use
lightning rods and lightning arrestors.
NOTE: The color coding of ground wires varies by region. Before
completing this step, check your local wiring standards for guidance.
Using the factory-supplied ground wire and ground screw/washer set, connect a good
earth ground to the AP chassis ground point (Figure 12).
CAUTION: The Unleashed T710 AP includes one 12mm stainless steel
M6x1 earth ground screw with split lock and flat washers. Make sure that
any replacement screw is no longer than 12mm. If a screw is longer than
12mm, it can damage the AP chassis.
Figure 12: Connect good earth ground to AP here
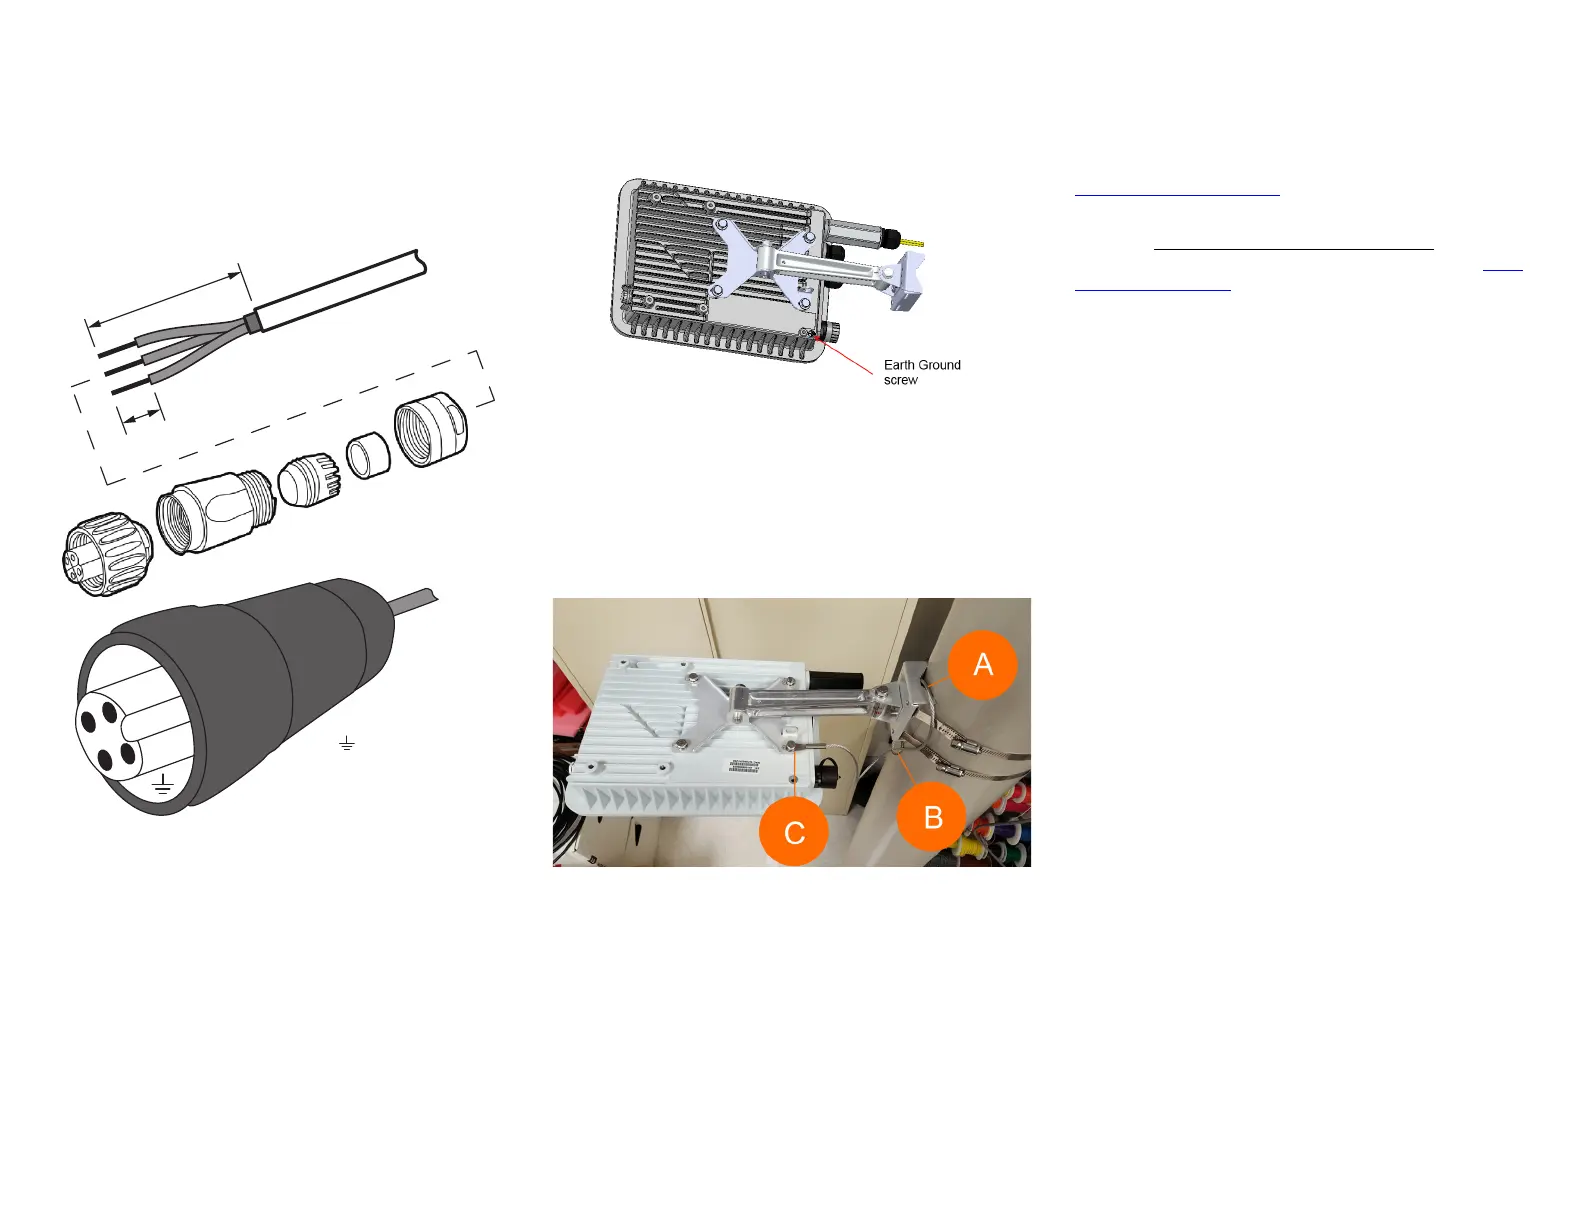
STEP 10: INSTALLING THE SECURITY CABLE
1 Thread the security cable through the mounting bracket (A) and through the eye on
the cable itself (B), as shown in Figure 13.
2 Attach the safety cable to the AP (C) in Figure 13.
Figure 13: Attaching the security cable
Congratulations! You have mounted your Unleashed T710 access point.
TROUBLESHOOTING
CAUTION: If required, you can reset the AP to its factory default settings
by pressing the reset button located inside the PoE IN port. DO NOT DO
THIS UNLESS SO INSTRUCTED. (Doing this resets the AP IP address to
192.168.0.1.)
NOTE: After a reset, you can access the internal AP web interface using
https://192.168.0.1. Your device must use any other address
from 192.168.0.2 through 192.168.0.254, with subnet mask
255.255.255.0. The username is super, and the password is sp-admin.
Refer to the ZoneFlex Outdoor Access Point User Guide for information on
configuring and operating the AP. This document is available at https://
support.ruckuswireless.com.
NOTE: After an AP is removed from its mounting, it may drip some water
from the channel surrounding the radome. As long as the AP has been
operating normally, this incidental water collection and dripping is normal,
and is not service-affecting.
36mm or 1.42in (max)
9mm or 0.35in (max)
1
3
2
Earth Ground
Neutral/Return
Line/Hot
(not used)
1
3
2
Wire Stripping
(Not Actual Size)
 Loading...