5.2 Replacement of HEPA filter assembly
TURN UNIT OFF AND UNPLUG FROM ELECTRICAL POWER.
Open new filter carton. You should have received 1 HEPA RX3000 filter.
Step 1: Remove new filter from carton. AVOID TOUCHING HEPA FILTER WITH
HANDS. APPLYING PRESSURE ON FILTER WILL REDUCE ITS
EFFECTIVENESS.
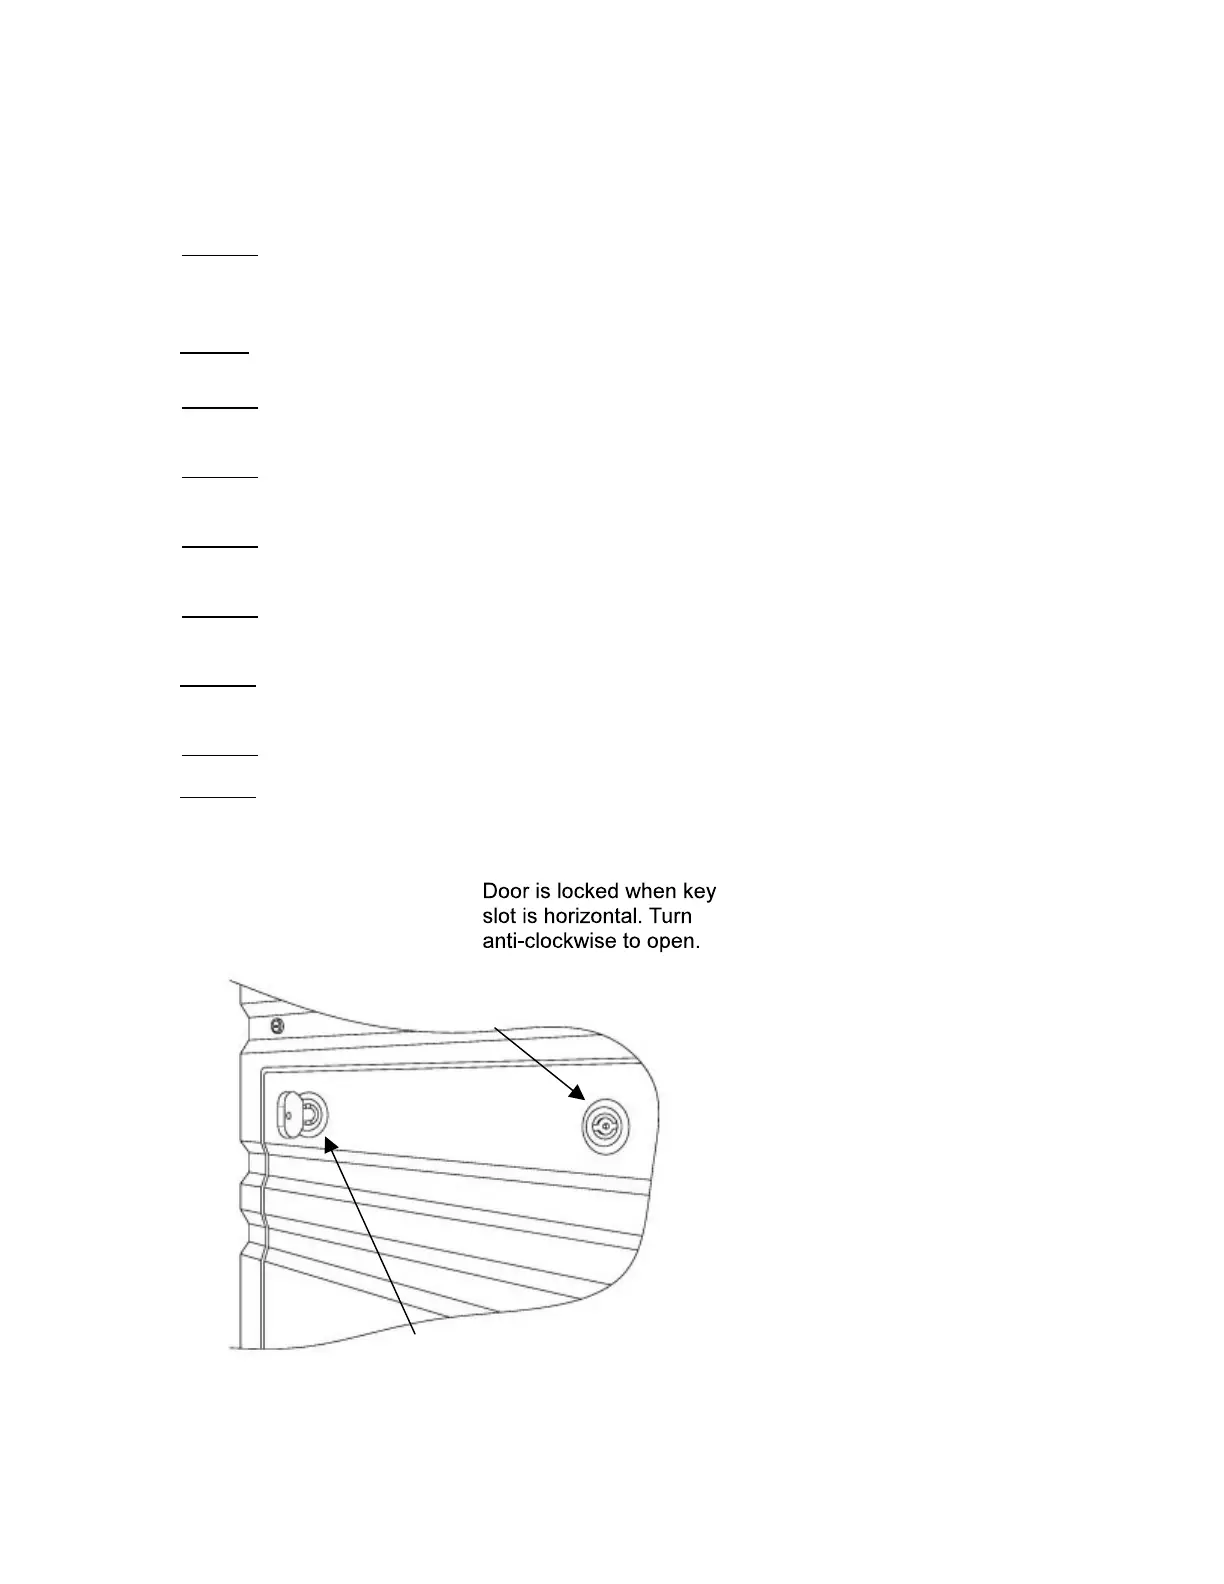
Step 2: Open rear panel door of the RxAir unit. (Figure 4)
Step 3: Grasp the flexible rubber T handles and pull up to release the filter assembly.
(Figure 3)
Step 4: Grasp the filter handle and carefully lift and pull filter toward you until the filter
is clear of the RxAir unit. Place old filter assembly in carton.
Step 5: Grasp new filter assembly by the handle and insert into the RxAir unit, with
care not to damage the filter seal, slide filter all the way forward. (Figure 3)
Step 6: Grasp the flexible rubber T handles and pull up to engage clips on the filter
assembly. (Figure 3)
Step 7: Replace rear panel door of the RxAir unit. (Figure 4)
Step 8: Re-plug the cord and turn on the power.
Step 9: Record new filter’s installation date on filter decal and in the filter log located
inside the back cover of the owner’s manual.
Figure 4: HEPA Installation