Do you have a question about the Ryobi ts1341 and is the answer not in the manual?
Wear eye protection, proper clothing, and hearing protection; avoid overreaching.
Maintain a clean area, secure work, ensure guards are in place, remove tools.
Use cords properly, avoid dampness, disconnect tool when not in use.
Know tool limits, avoid dangerous environments, and use in non-explosive atmospheres.
Clamp workpiece and bolt tool to workbench for stability.
Keep hands clear, ensure blade clearance, support long workpieces.
Lock miter table/arm, avoid freehand cuts, cut one piece at a time.
Symbols for Volts, Amperes, Hertz, Watts, Minutes, AC/DC, and RPM.
Symbols indicating wet conditions, eye protection, hot surfaces, and general alerts.
Explains DANGER, WARNING, and CAUTION levels of risk.
Recommends professional servicing for repairs by qualified technicians.
Emphasizes wearing safety goggles or face shields to prevent eye injury.
Explanation of double insulation and its safety benefits.
Chart and advice for choosing appropriate extension cords.
Specifies voltage, frequency, and current type for tool operation.
Definitions of various cut types like crosscut, miter, bevel, and compound cuts.
Terms for saw parts, safety hazards like kickback, and materials.
Glossary entries for measurements, resin, workpiece, and worktable.
Lists blade size, speed, input voltage, and weight.
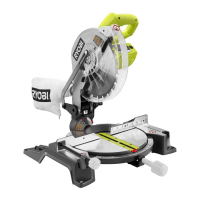
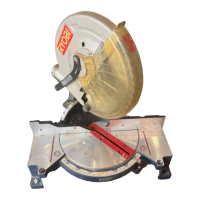
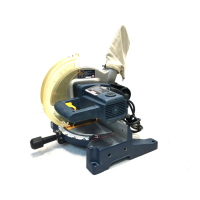
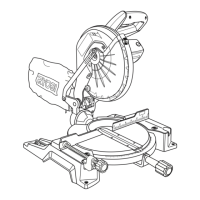
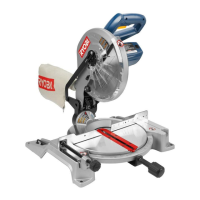
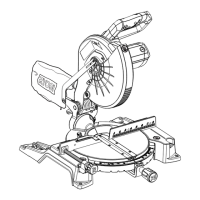
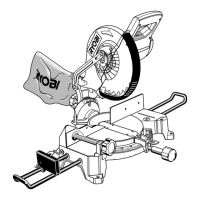
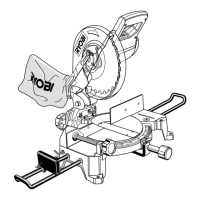
Labels major parts like saw arm, guards, fence, and scales.
Highlights miter/bevel locks, scales, and positive stops.
Information on the 15 AMP motor, 10-inch blade, and wrench storage.
Details carrying handle, arm lock, and miter lock handle.
Explains the switch trigger and padlock feature for security.
Covers positive stops, bevel lock, electric brake, and guards.
Lists necessary wrenches, hex key, and squares for assembly and alignment.
Lists items like miter lock handle, dust bag, and work clamp.
Includes operator's manual, blade wrench, and warranty card.
Steps for safe removal from packaging and initial checks.
Instructions for securely attaching the saw to a work surface.
Ensures the miter table is square to the fence.
Steps for attaching the miter lock handle to the control arm.
Instructions for fitting the dust bag to the exhaust port.
Procedure for placing and adjusting the work clamp on the table.
Warnings about blade thickness and proper installation.
Steps to unplug, raise arm, expose bolt, and loosen blade bolt.
Fitting blade, washers, and tightening blade bolt securely.
Using a square to align the miter table parallel with the fence.
Loosening screws to adjust fence position for proper alignment.
Aligning saw blade parallel to fence using a framing square.
Loosening screws to adjust fence position for blade alignment.
Adjusting indicator screws on scales after alignment procedures.
Aligning saw blade perpendicular to the miter table.
Using adjustment screws for precise bevel angle settings.
Warnings about familiarity, eye protection, and accessory use.
Lists applications like crosscutting wood, plastic, and joinery.
Steps for making straight and miter crosscuts.
Securing workpiece, aligning cut, and lowering blade.
Steps for setting bevel angle and performing bevel cuts.
Grasping stock, dry run, lowering blade, checking bevel settings.
Setting miter and bevel angles simultaneously for complex cuts.
Securing workpiece for compound cuts and test cuts.
Using supports to prevent sagging of long lumber during cuts.
Chart providing miter and bevel settings for popular structures.
Using the saw for accurate crown molding cuts.
Method for positioning molding flat for inside/outside corners.
Specific bevel/miter angles for 52°/38° crown molding.
Instructions for safely cutting bowed or warped lumber.
Using C-clamps to secure wide boards for cutting.
How to adjust the depth stop for maximum cutting capacity.
Notes on pivot adjustments requiring professional service.
Steps for checking and replacing worn motor brushes.
Advice on cleaning plastic parts and avoiding chemical damage.
Notes that bearings are pre-lubricated for the unit's life.
Information on finding and contacting Ryobi Authorized Service Centers.
Details required information for ordering replacement parts.