3
English
Nederlands
Deutsch
Français
Before you start:
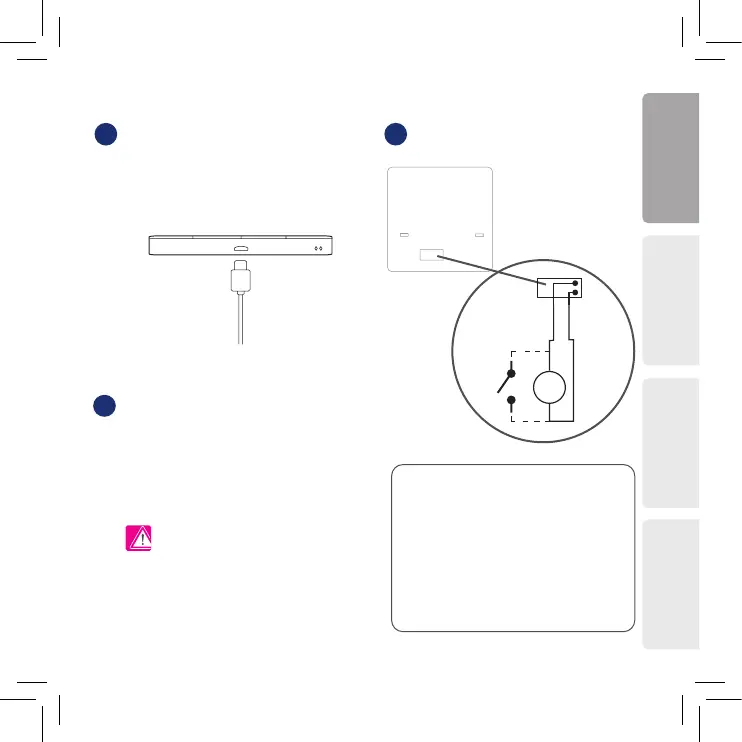
Charging to full battery level may take up to
24h maximum.
New SQ610BRF Quantum Thermostat is partially
charged, however, we recommend you to fully
charge the battery before use.
Connect charger to micro-USB Port which is at
the bottom of SQ610BRF Quantum Thermostat to
charge the device.
Wiring diagram (S1, S2 Input)
Symbols explanation:
S – volt-free contact
T – temperature sensor
S1,S2 Terminals:
- air or oor temperature sensor
- external volt-free contact to connect any
ON/OFF switch or occupancy sensor (Hotel card)
Mounting: to mount thermostat you can use
included accesories (mounting screws or
self-adhesive tape). Remove back cover
to mount the plate to the wall. After this just
attach thermostat to the plate (it has built-in
magnet).
Please note:
The ideal position to thermostat mounting is about
1,5m from oor level far from heating or cooling
sources. Thermostat can’t be exposed to sunlight
or any extreme conditions like for example draft.
1 2
3
S1
S2
S