Instruction Manual
17
Instruction Manual
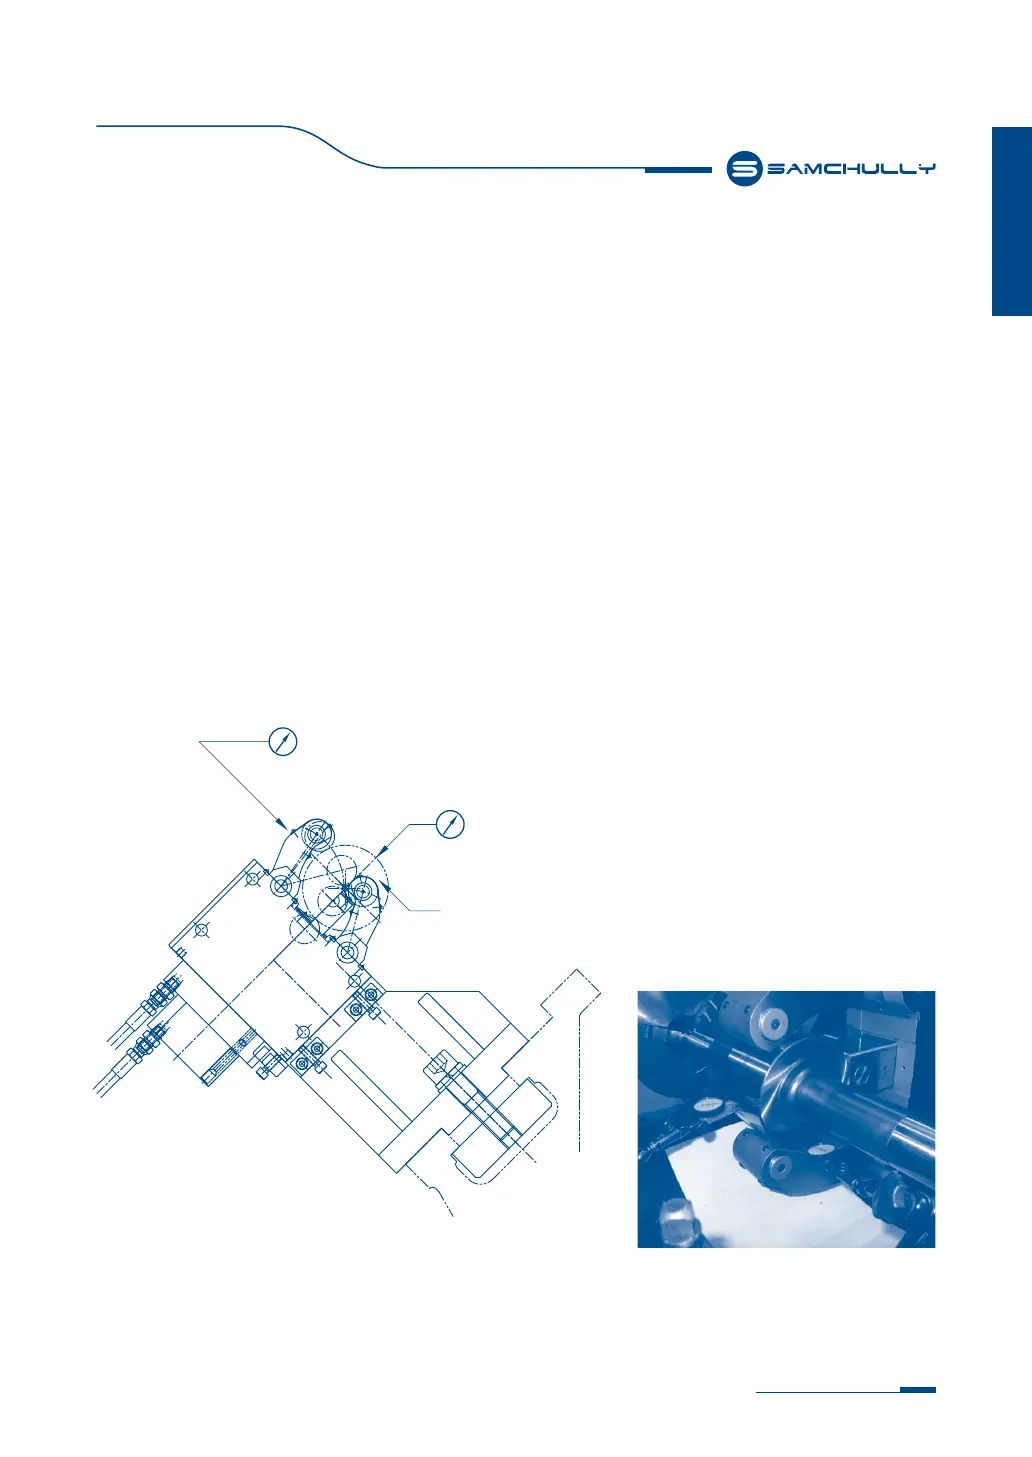
[ 그림 / Fig 9 ]
1. Clamp a Work-piece (or Master) in the
chuck and support with the tailstock-
center.
2. Set 2(two) Dial Gauges 90° offset and
check concentricity.(Fig.9)
3. Does not tighten the Mounting Bolt of
Steady Rest on the Steady Rest Sup-
port, so that the Steady Rest can slide
on the support surface, without loos-
ening. Clamp the Steady Rest on the
Work-piece(or Master). Then tighten
the Mounting Bolt. Retract the tailstock-
center. And check the 2 dialGauges.
4. Tighten the Mounting Bolts with spe-
cial washer(Part No. 25) and repeat the
same procedure until the requested
accuracy is achieved. And must be
checked the Max. Torque for Fixing
Bolt. Fixing Bolt Torque refer to Para 3-2
Mounting of the Steady Rest.
1. 척에 공작물 (또는 마스터)를 클램프하고 심압대로
지지합니다.
2. 다이얼 게이지 2개를 그림과 같이 수직으로 설치하
고 동심도 및 흔들림을 체크합니다.(Fig.9)
3. 방진구를 조절할 수 있도록 방진구와 방진구 지지대
의 체결볼트를 약간 느슨하게 풀어둡니다. 방진구에
공작물 (마스터)를 클램프하고 체결 볼트를 단단히
고정합니다. 심압대를 후진시킨 후 다이얼 게이지의
눈금을 확인합니다.
4. 공작물의 용구 정도에 만족이 될때까지 위의 과정을
반복합니다. 설치 전에는 반드시 고정볼트의 토크를
확인하십시오. (볼트의 토크는 3-2의 도표를 참조하
여 주십시오.)
1. 在卡盘夹紧工件 (或主板),并用尾架支撑。
2. 如图垂直安装2个千分表 ,并检查同心度
及是否晃动。(Fig.9)
3. 应略微松开中心架和中心架支撑架的紧
固螺栓,以便调节中心架。在中心架夹紧
工件(主板),并拧紧紧固螺栓。使尾架后退
后检查千分表的刻度。
4. 反复上述过程,直至满足工件的用具精
度。 安装前请务必确认固定螺栓的扭矩。
(螺栓的扭矩请参考3-2图表。)
3-4 스트로크 확인
3-4 Stroke check after installation
3-4 确认行程
Dial Gauge (within 0.005)
Dial Gauge (within 0.005)
Work-Piece (or Master)