8
Installation Procedure
English
Installation Procedure
Moving the outdoor unit with wire rope
1 Before carrying the outdoor unit, fasten two wire ropes
ͱ˙ߪͱθͱ˝ʪθࡥɇϑϑ˵ͱиϩ˵ʪѣ˝Їθʪ
2 To prevent damages or scratches effectively, insert a
piece of cloth between the outdoor unit and the ropes.
3 Move the outdoor unit.
Wire rope
AC100/120/140/160TXAD*C
Plate protection cloth
Wire rope
AC052/071TXADKC
Plate protection cloth
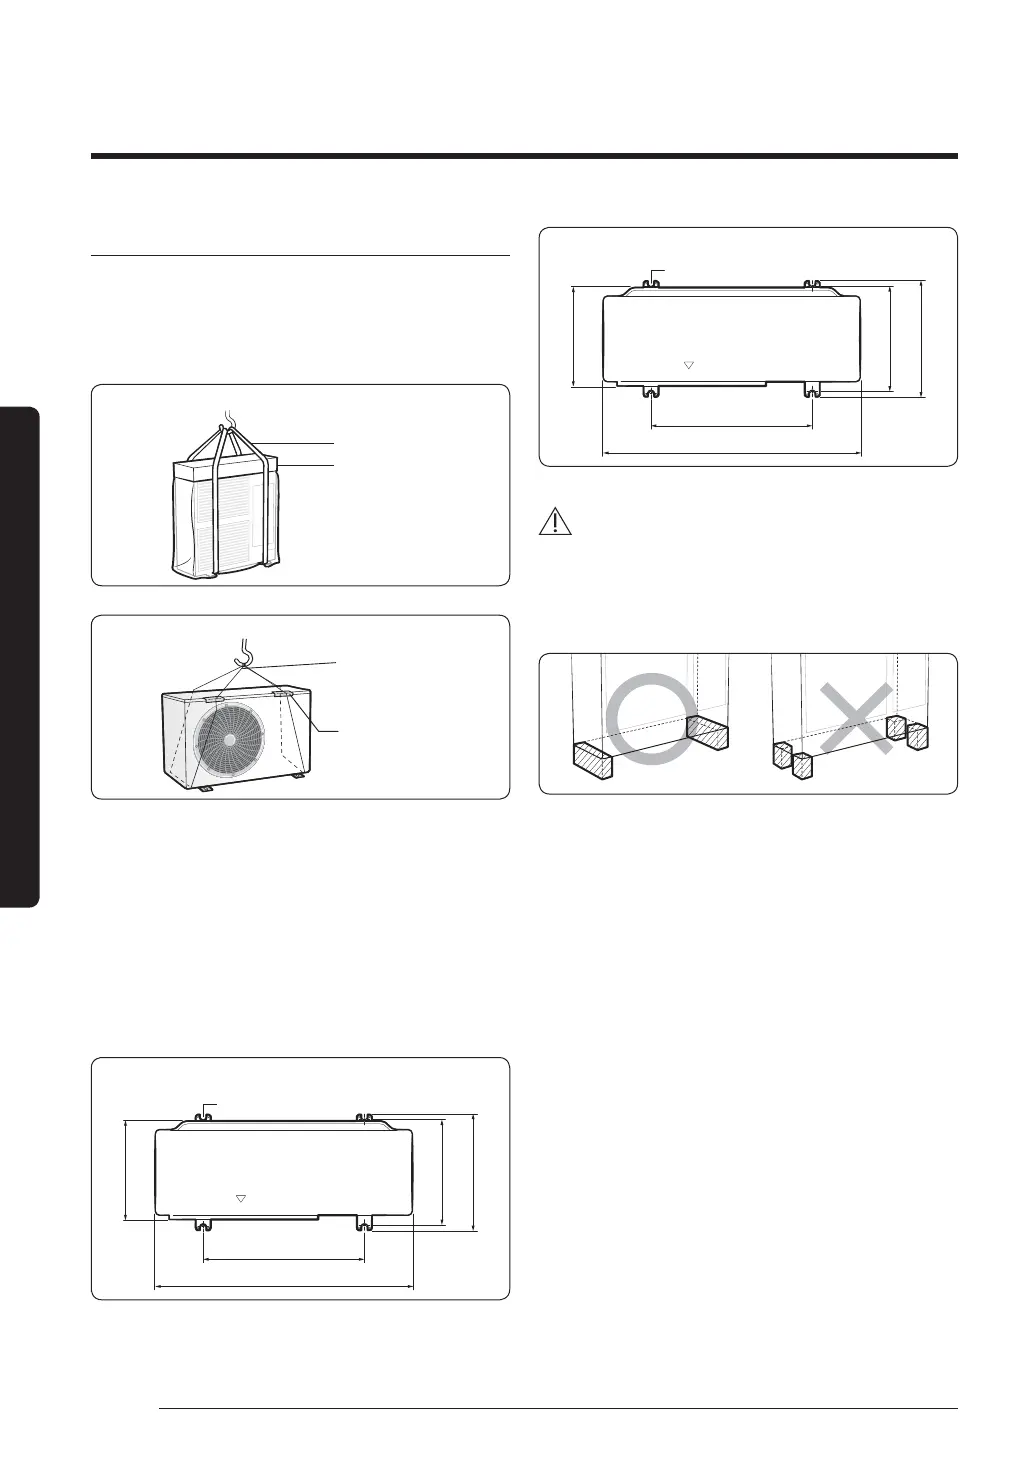
Step 2 Fixing the outdoor unit in place
Install the outdoor unit on a rigid and stable base to
prevent disturbance from any noise caused by vibration.
When installing the unit at a height or in a location
ʪуΧͱϑʪʒϩͱϑϩθͱ˝иʒϑࡥѣуϩ˵ʪЇϩϑʪʀЇθʪцϩͱɇϑЇΧΧͱθϩ
(i.e., a wall or a ground).
Fix the outdoor unit with anchor bolts. Make sure that the
anchor bolts are 20 mm or higher from the base surface.
AC052/071TXADKC
Anchor bolt hole
357
338
359
661
880
(Unit : mm)
AC100/120/140/160TXAD*C
Anchor bolt hole
330
360
384
620
940
(Unit : mm)
CAUTION
• Install a drain outlet at the lowest end around the base
for outdoor unit drainage
• When installing the outdoor unit on the roof,
waterproof the unit and check the ceiling strength.
• Make sure that the wall can support the weights of the
rack and the outdoor unit.
• Install the rack close to the column as much as
possible.
 Loading...