EasyManua.ls Logo

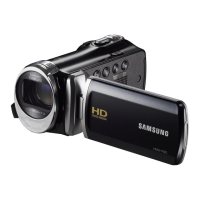
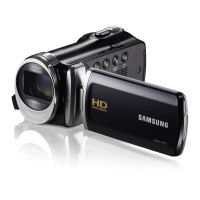
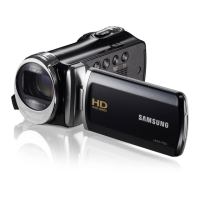
Samsung HMX-F90BP User Manual

Samsung HMX-F90BP
110 pages
To Next Page IconTo Next Page
Page #1 background imageLoading...
Page #1 background image
HMX-F90/HMX-F91
HMX-F900/HMX-F910
HMX-F920
Digital Camcorder
www.samsung.com/register
USER
M
ANUAL
For video recording, use a memory card that supports faster write speeds.
- Recommended Memory Card: 6MB/s (Class 6) or above.

Table of Contents

Questions and Answers:

Samsung HMX-F90BP Specifications

General IconGeneral
Sensor typeCMOS
Total megapixels5 MP
Optical sensor size1/3.2 \
Effective megapixels (image)0.921 MP
Digital zoom130 x
Optical zoom52 x
Image stabilizerYes
Focal length range2.1 - 109.2 mm
Interchangeable lensNo
Image stabilizer typeElectronic Image Stabilization (EIS)
Maximum aperture number4.9
Minimum aperture number1.8
Focal length (35mm film equivalent)35.3 - 2298 mm
Camcorder media typeMemory card
Compatible memory cardsSD, SDHC, SDXC
Internal storage capacity- GB
Focus adjustmentAuto/Manual
Built-in light-
Display diagonal2.7 \
Viewfinder typeNot available
Camcorder typeHandheld camcorder
Minimum illumination15 lx
Product colorBlack
Video resolutions720 x 576, 1280 x 720 pixels
Video formats supportedH.264
Maximum video resolution1280 x 720 pixels
Analog signal format systemPAL
Image formats supportedJPG
Maximum image resolution1600 x 1200 pixels
Still image resolution(s)800 x 600, 1280 x 720, 1600 x 1200, 1696 x 960
Audio formats supportedAAC
USB 2.0 ports quantity1
Component video (YPbPr/YCbCr) out0
Battery typeBP105R
Battery capacity- mAh
Battery life (max)1.67 h
Cables includedAV, USB
Weight and Dimensions IconWeight and Dimensions
Depth119 mm
Width53.9 mm
Height56.4 mm
Weight220 g

Summary

USER MANUAL

Digital Camcorder

Identifies the product covered by the manual.

SAFETY WARNINGS

What the icons and signs in this user manual mean

Explains the meaning of safety icons used throughout the manual.

IMPORTANT INFORMATION ON USE

About this user manual

Gives an overview and context for the user manual's content.

Before reading this user manual

The following terms are used in this manual

Defines key terms and terminology used within the manual.

Safety information

WARNING

Indicates potential risk of death or serious personal injury.

Quick start guide

STEP 1: Get ready

Outlines the initial setup steps before using the camcorder.

Getting to know the camcorder

UNPACKING

Details the items included in the camcorder package.

Getting to know the camcorder

LOCATION OF CONTROLS

Identifies the buttons and ports on the camcorder's front and left side.

Getting to know the camcorder

IDENTIFYING THE SCREEN DISPLAYS

Explains the indicators and information shown on the LCD screen.

Getting started

INSERTING/EJECTING THE BATTERY

Instructions for installing and removing the camcorder's battery.

Getting started

CHARGING THE BATTERY

Procedures for charging the camcorder's battery using different methods.

Basic operation of the camcorder

TURNING YOUR CAMCORDER ON/OFF

Steps to power the camcorder on and off.

Basic operation of the camcorder

SETTING THE DATE/TIME FOR THE FIRST TIME

Guide to setting the camcorder's date and time upon initial use.

Basic operation of the camcorder

SETTING THE OPERATION MODES

How to switch between recording and playback modes.

Basic operation of the camcorder

USING THE SHORTCUT MENU (OK GUIDE)

How to access frequently used functions via the shortcut menu.

Getting ready to start recording

INSERTING AND EJECTING A MEMORY CARD (NOT SUPPLIED)

Instructions for handling the memory card.

Getting ready to start recording

SELECTING A SUITABLE MEMORY CARD (NOT SUPPLIED)

Guidance on choosing compatible memory cards.

Getting ready to start recording

RECORDABLE TIME AND CAPACITY

Information on how much video and how many photos can be stored.

Basic recording

RECORDING VIDEOS

Step-by-step guide to recording video footage.

Basic recording

RECORDING PAUSE/RESUME

How to pause and resume video recording to capture separate scenes.

Basic recording

RECORDING PHOTOS

Step-by-step guide to capturing still photos.

Basic recording

RECORDING WITH EASE FOR BEGINNERS (SMART AUTO)

Using the SMART AUTO mode for automatic scene optimization.

Basic recording

ZOOMING IN/OUT

How to use the zoom function for close-up or wide-angle shots.

Basic playback

CHANGING THE PLAYBACK MODE

Switching between video and photo playback views.

Basic playback

PLAYING BACK VIDEOS

How to view recorded video files.

Basic playback

PLAYING BACK My Clip

Playing back specific scenes tagged with the My Clip function.

Basic playback

VIEWING PHOTOS

How to view recorded still image files.

Using the menu items

HANDLING MENUS

Provides examples and guidance on menu interaction.

Using the menu items

MENU ITEMS

Lists available menu options for recording and playback.

Advanced recording

iSCENE

Automatically adjusts settings based on scene for optimal recording.

Advanced recording

Video Resolution

Selects the resolution for recorded video files.

Advanced recording

Photo Resolution

Selects the resolution for captured still photos.

Advanced recording

Face Detection

Automatically detects and optimizes settings for faces in the frame.

Advanced recording

EV (Exposure Value)

Manually adjusts the exposure level for desired brightness.

Advanced recording

Focus

Options for manual or automatic focus adjustment.

Advanced recording

Anti-Shake(HDIS)

Compensates for image instability caused by camera shake.

Advanced recording

Digital Special Effect

Applies creative visual effects to recordings.

Advanced recording

Zoom Type

Selects between optical, intelligent, and digital zoom modes.

Advanced recording

Cont. Shot

Captures photos in rapid succession.

Advanced recording

Time Lapse REC

Records frames at intervals to create time-lapse videos.

Advanced playback

Thumbnail View Option

Customizes how recorded files are displayed as thumbnails.

Advanced playback

PlayOption

Controls how videos are played back (once, repeatedly).

Advanced playback

Delete

Erases recorded videos or photos one by one or all at once.

Advanced playback

Delete My Clip

Removes My Clip tags from videos.

Advanced playback

Protect

Prevents accidental deletion of important files.

Advanced playback

Share Mark

Marks videos for direct upload to sites like YouTube.

Advanced playback

File Info

Displays detailed information about recorded files.

Other settings

Storage Info

Shows details about the storage media's capacity and usage.

Other settings

Date/Time Set

Sets the camcorder's date and time for recording metadata.

Other settings

LCD Brightness

Adjusts the brightness of the camcorder's LCD screen.

Other settings

Beep Sound

Enables or disables audible beeps for button presses.

Other settings

Auto Power Off

Sets the camcorder to turn off automatically after a period of inactivity.

Other settings

Format

Deletes all files and prepares storage media for use.

Connecting to a TV

Connecting to a high definition TV with HDMI

How to connect the camcorder to an HDTV using an HDMI cable.

Connecting to a TV

CONNECTING TO A REGULAR TV

How to connect the camcorder to a standard definition TV.

Dubbing videos

DUBBING TO VCR OR DVD/HDD RECORDERS

How to copy videos to VCRs or DVD/HDD recorders.

Using with a windows computer

WHAT YOU CAN DO WITH A WINDOWS COMPUTER

Features available when connecting to a Windows computer.

Using with a windows computer

USING THE Intelli-studio programme

Introduction to the camcorder's bundled PC editing software.

Using with a windows computer

Step 2. About the Intelli-studio main window

Overview of the Intelli-studio software interface.

Using with a windows computer

Step 3. Playing back videos or photos

How to play back recorded content using Intelli-studio.

Using with a windows computer

Step 5. Sharing the videos/photos online

Uploading videos and photos to web services.

Using with a windows computer

Upload your videos directly to YouTube!

One-press function to upload videos to YouTube.

Using with a windows computer

USING AS A REMOVABLE STORAGE DEVICE

Using the camcorder as a storage device to transfer files.

Using with a windows computer

Structure of folders and files on the storage media

Details the organization of files and folders on the storage media.

Troubleshooting

WARNING INDICATORS AND MESSAGES

Explains warning indicators and messages displayed on the screen.

Troubleshooting

Storage media

Troubleshooting issues related to memory cards and storage.

Troubleshooting

SYMPTOMS AND SOLUTIONS

General guide to diagnosing and resolving camcorder issues.

Troubleshooting

Recording

Troubleshooting common recording errors and issues.

Troubleshooting

Playback on your camcorder

Troubleshooting issues specific to playback on the camcorder itself.

Troubleshooting

Connecting to a computer

Troubleshooting problems related to computer connectivity.

Troubleshooting

General operations

Troubleshooting general camcorder operations.

Maintenance & additional information

MAINTENANCE

Guidelines for maintaining the camcorder's condition.

Maintenance & additional information

USING YOUR CAMCORDER ABROAD

Considerations for using the camcorder internationally.

Maintenance & additional information

GLOSSARY

Definitions of technical terms used in the manual.

Specifications

Related product manuals