Do you have a question about the Samsung HMX-U10 and is the answer not in the manual?
Guide on how to use the camcorder and keep the manual for future reference.
Prepare the camcorder by inserting a memory card and checking battery status.
Instructions for recording videos in HD quality and taking photos.
How to find and view recorded videos and photos on the camcorder.
Enjoy features of Intelli-studio for managing videos and photos on a computer.
Procedure for deleting recorded videos or photos from the storage media.
List of accessories included with the camcorder and their model numbers.
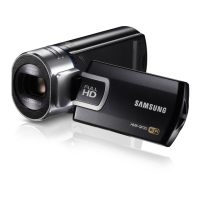
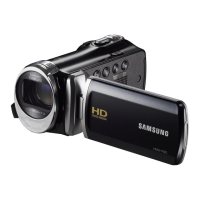
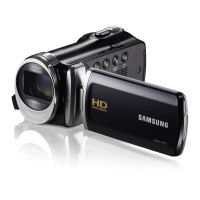
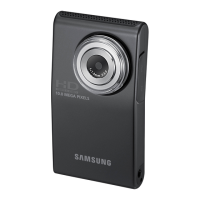
Identification of buttons and controls on the front and right side of the camcorder.
Identification of ports and features on the rear, left, and top sides of the camcorder.
How to attach and use the wrist strap to prevent dropping the camcorder.
Instructions for mounting the camcorder on a tripod for stable shooting.
Guide on connecting the AC power adaptor or USB cable to charge the battery.
Steps for charging the camcorder's built-in battery using AC adaptor or USB cable.
Explanation of LED indicator colors showing battery charging status.
Information on how the battery level is displayed on the screen.
Tips for battery care, life, and saving power, including AC power adaptor usage.
How to turn the camcorder on/off, set operating modes, and use touch buttons.
Explanation of various indicators shown on the camcorder's LCD screen.
Setting the date/time and selecting the OSD language for menus and messages.
Instructions for inserting and removing SD/SDHC memory cards.
Information on compatible memory cards and recommended types for optimal use.
Precautions for memory card use, including formatting and data backup.
Table showing recording times for videos based on resolution and card capacity.
Table showing the number of photos that can be recorded by resolution and card capacity.
Guidelines for holding the camcorder correctly while recording.
Basic procedures for recording videos and taking photos with the camcorder.
Step-by-step guide to start and stop video recording.
Step-by-step guide to capture still photos using the camcorder.
How to use the digital zoom function for close-up or wide-angle recording.
Switching between thumbnail index view and single view for playback.
Finding and playing desired videos using the thumbnail index view.
Finding and viewing desired photos using the thumbnail index view.
How to magnify playback photo images to adjust magnification.
How to access and change camcorder menu settings for customization.
List of available recording menu items, default values, and corresponding pages.
Using iSCENE modes for automatic shutter speed adjustment based on scene.
How to select the video resolution for recording (HD and SD formats).
Selecting the video quality (Super Fine, Fine) for recording.
Selecting the resolution for still photos based on aspect ratio.
Compensating for lighting when the subject is lit from behind.
Applying digital effects like B&W, Sepia, Negative, or Art to recordings.
Setting up Time Lapse REC mode to capture images at intervals.
Overview of available menu items for playback across different views.
How to erase recorded videos or photos individually or all at once.
Protecting important videos or photos from accidental deletion.
Dividing a video into sections to delete unwanted parts.
Setting share marks on videos for direct upload to YouTube.
Playing back all stored photos automatically in a slide show format.
Viewing detailed information for each image file.
How to customize camcorder settings through the Settings menu.
List of settings items, default values, and corresponding pages for configuration.
Displays storage media information, used space, and available memory space.
Function to completely delete all files and options on the storage media.
Adjusting the camcorder's LCD screen brightness for ambient lighting.
Power saving feature that dims the LCD screen when idle.
Setting to turn the beep sound on or off when operating menu settings.
Turning the shutter sound on or off for photo capture.
Function to automatically turn off the camcorder after a period of inactivity.
Enabling PC software for file transfer and editing via USB cable.
Setting the video output signal according to the TV color system.
Setting component or composite video output to match connected TV.
Turning the on-screen display (OSD) on or off when connected to a TV.
Initializing camcorder settings to factory defaults.
Selecting the desired language for menus and messages.
Determining computer type (Windows/Mac) before connecting the camcorder.
Operations available using Intelli-studio software with a Windows computer.
Minimum hardware and software requirements for Intelli-studio software.
Connecting the camcorder via USB and starting the Intelli-studio program.
Overview of the Intelli-studio main window interface and its functions.
How to play back recordings using the Intelli-studio application.
Using Intelli-studio to edit videos or photos with various effects.
Uploading photos and videos directly to web sites like YouTube.
Using the One-Touch Share button to upload videos directly to YouTube.
Importing files from PC to Intelli-studio and viewing them.
Selecting and exporting files from Intelli-studio back to the camcorder.
Steps to install the Intelli-studio application on a Windows computer.
Connecting camcorder via USB to transfer data to a Windows computer.
Understanding the folder and file structure used on the camcorder's storage media.
General information and steps for connecting the camcorder to a TV.
How to connect the camcorder to a HDTV for HD-quality playback.
Connecting to a standard definition TV for downconverted HD images.
How to view camcorder images and perform operations on a TV screen.
Procedure to record (dub) camcorder playback onto other video devices.
Guidelines for proper care, storage, and cleaning of the camcorder.
Precautions for storing the camcorder in various environmental conditions.
Instructions on how to clean the camcorder's exterior, LCD monitor, and lens.
Information regarding LCD screen care, using camcorder abroad, and TV color systems.
Precautions for LCD screen care and phenomena that are not malfunctions.
Considerations for using the camcorder in different countries and regions.
Explanation of warning messages and indicators for power source and storage media.
Solutions for problems related to memory cards like errors or lack of space.
Troubleshooting steps for recording problems like write errors or full storage.
Solutions for problems encountered during playback, such as read errors.
Troubleshooting power-related issues like camcorder not turning on or auto power off.
Troubleshooting display issues like incorrect image aspect ratio or dark screen.
Troubleshooting common recording problems and their solutions.
Resolving issues with playing back videos or photos on the camcorder.
Troubleshooting playback issues when connecting to external devices like TVs.
Solutions for problems when connecting the camcorder to a computer.
Troubleshooting common operational problems like incorrect date/time or unresponsiveness.
Details of Samsung's limited warranty terms and conditions for the product.
Specifies damages and conditions not covered by the product warranty.
| Digital zoom | 4 x |
|---|---|
| Optical zoom | 1 x |
| Sensor type | CMOS |
| Total megapixels | 10 MP |
| Optical sensor size | 1/2.3 \ |
| Display diagonal | 2 \ |
| Auto focus | Yes |
| Maximum frame rate | 25 fps |
| Video formats supported | H.264 |
| Maximum video resolution | 1920 x 1080 pixels |
| Analog signal format system | NTSC |
| Image formats supported | JPG |
| Still image resolution(s) | 3648 x 2736 |
| Audio formats supported | AAC |
| USB 2.0 ports quantity | 1 |
| Compatible memory cards | SD, SDHC |
| Product color | Black |
| Battery type | SLB-10A |
| Depth | 15.5 mm |
|---|---|
| Width | 103 mm |
| Height | 56 mm |
| Weight | 95 g |