7 Initial
Settings-
-=
=
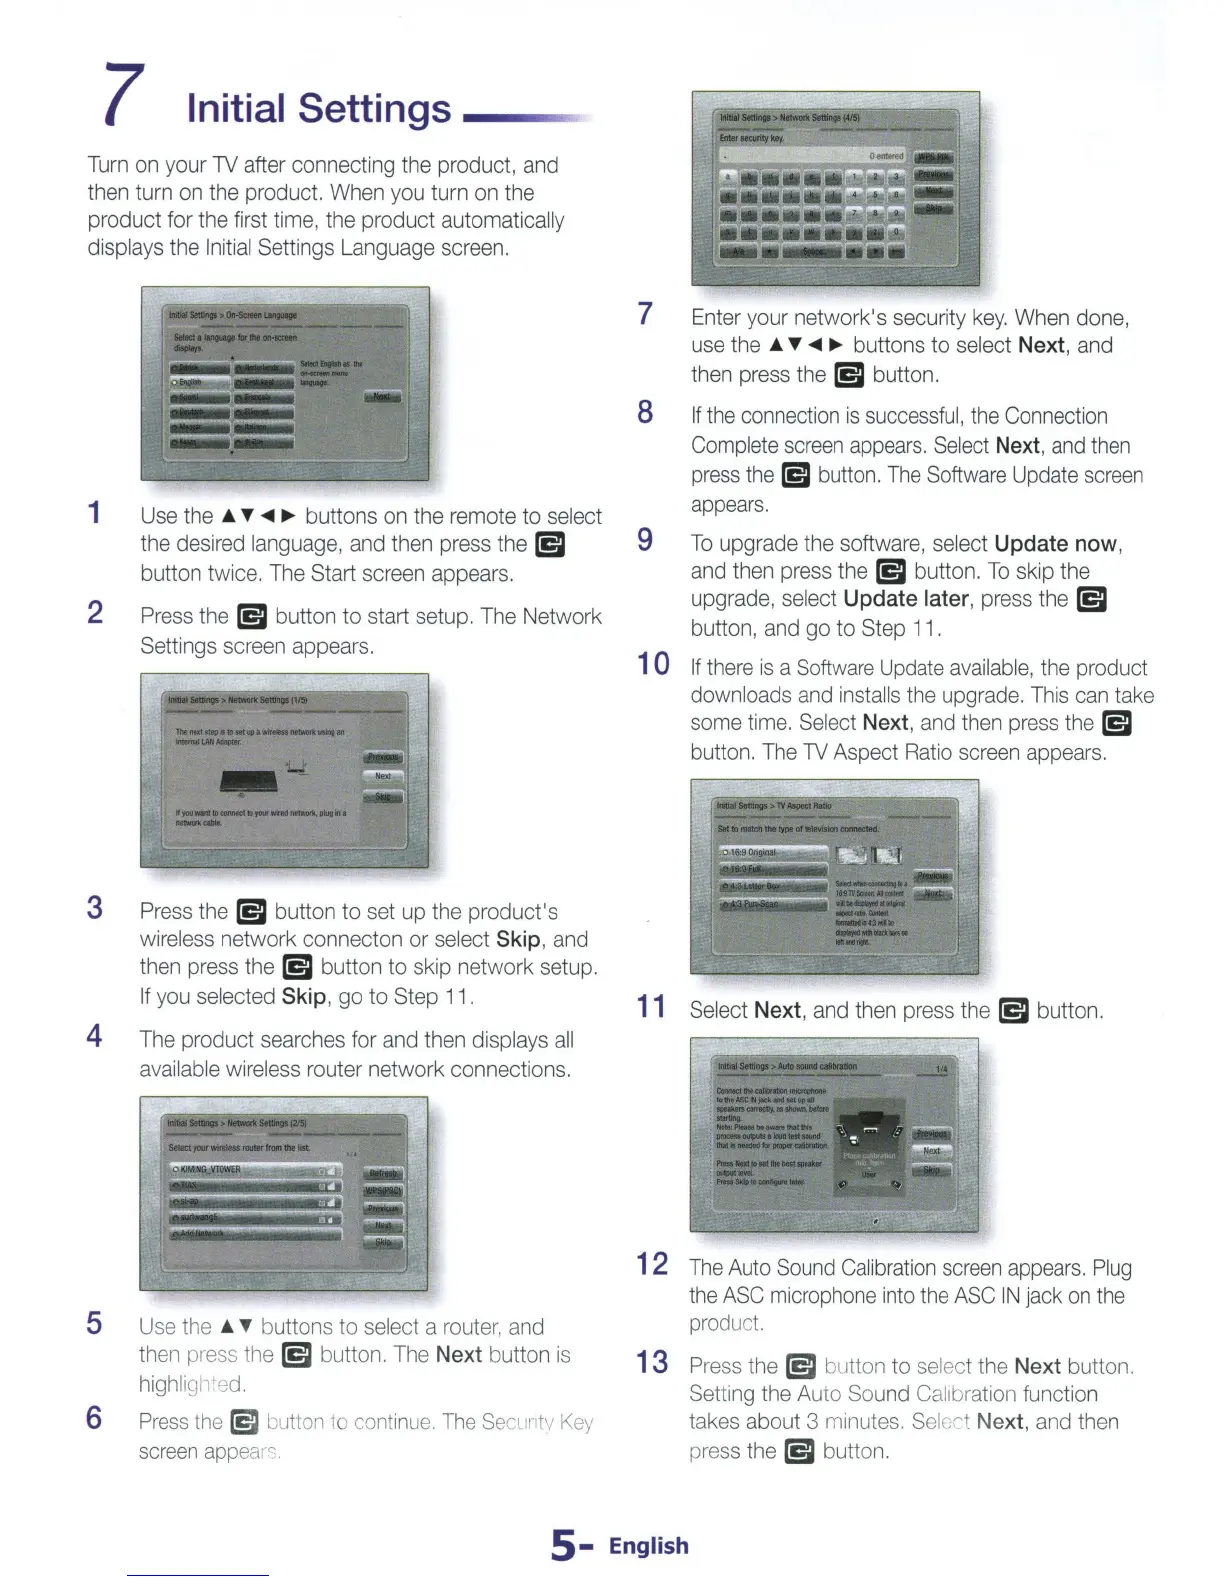
Turn
on
your 1V after connecting the product,
and
then
turn
on
the
product.
When
you
turn
on
the
product for the first
time,
the product
au
tomat
ical
ly
displays the
Initial
Setti
ngs
Language
screen.
1
2
Use
the
• Y
~
..,..
bu
tt
ons
on
the remote to
select
the
desired
language
,
and
then
press
the [ig
button twice.
The
Start
screen
appears.
Press
the [ig button to start setup.
The
Network
Settings
screen
appears.
3 P
ress
the [ig button to
set
up
th
e product's
wireless
network connecton or
selec
t
Skip
,
and
then
press
the
[ig button to skip network setup.
If
you
selected
Skip
,
go
to
Step
11.
4
The
product
searches
for
and
then
displ
ays
all
available
wireless
router network connections.
5
Use
the
• Y buttons to
se
lect a router,
and
th
en
pre
ss
the [ig button. The Next b
ut
ton is
high
li
gh+e
d.
6
Press
the
~
button
to
con
tinue.
The
Se
cuntv
Key
sc
r
ee
n
app
earc:.
7
Enter
your network's security
key.
When
done,
use
the • Y
~
..,..
buttons to select Next,
and
t
hen
press
the [ig button.
8
If
the
connect
ion
is
success
ful,
the
Connect
i
on
Complete
screen
appears
.
Se
l
ect
Next,
and
then
press
t
he
~
but
t
on.
The
So
ftwar
e
Update
sc
r
een
appears
.
9
To
upgrade
the
software, select Update now,
and
then
press
the
[ig button. To skip the
upgrade,
se
lect Update later,
press
the [ig
butt
on,
and
go
to Step
11
.
1 0
If
there
is
a
Software
Update
ava
il
able,
the
product
downloads
and
instal
ls
the
upgrade.
T
his
can
t
ake
some
time.
Select
Next,
and
t
hen
press
the
[ig
button.
The
1V Aspect
Rat
io
screen
appears.
11
Se
lect Next,
and
then
press
the [ig button.
1 2
The
Auto
Sound
Calibration
sc
r
een
appears.
Plug
the
ASC
mi
cr
ophone
in
to t
he
ASC
IN
j
ack
on
t
he
produ
c
t.
13
Press
the [ig button to
se
le
ct
the
Next button.
Setti
ng
the Auto
Sou
nd
Calibration funct
io
n
tak
es
abou
t 3 minutes. Select Next,
and
then
pr
es
s the [ig button.
5-
English