14
Tenant address θͱЇΧʀ˵ɇʪɇʒʒθʪϑϑ˙ͱθϩ˵ʪʒͱͱθЇϩϑʀͱϩθͱʪʒɵцɇǮࣗçϩ
A Controls the indoor units with the group channel address “A"
B Controls the indoor units with the group channel address “B"
C Controls the indoor units with the group channel address “C"
D Controls the indoor units with the group channel address “D"
E Controls the indoor units with the group channel address “E"
F Controls the indoor units with the group channel address “F"
- e.g. When you set the tenant address of a Wi-Fi Kit to 2 through the S-NET pro 2,
the Wi-Fi Kit can control and monitor the indoor units with the RMC1 set as 2.
ߥ࣎Ɗʪʪʀϩϩ˵ʪࣄΧΧцࣅɵЇϩϩͱϩͱϑɇЭʪϩ˵ʪϑΧʪʀѣʪʒϩʪɇϩɇʒʒθʪϑϑ˙ͱθϩ˵ʪǮࣗçϩࢋ
• To set the group channel address for indoor units, see “Setting the indoor unit address" in
Installation Manual of the indoor unit.
ࣄƊkߪࡏߢ࣍˙ͱθŵđAɇʒʒθʪϑϑͱʒʪ࣎ࡡƊkߢߢࡏŵđAߢɇʒʒθʪϑϑϑʪϩϩ˝ࣅ
• To set the tenant address upon request, contact the Samsung service centre.
• To control all indoor units with different tenant addresses, make sure that all the Wi-Fi Kits are
registered to the smartphone.
• When using the multi-tenants feature for Wi-Fi Kits, the upper-level controllers (touch centralized
controller, DMS) other than the OnOff controller can be installed at the same time.
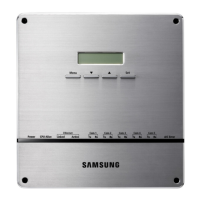
Checking the Wi-Fi Kit
Power LED
AP button
Wi-Fi connection LED
Reset button
Wi-Fi setting LED
<Front panel of the Wi-Fi Kit>
Items on the LED display
Item LED indication Power supply Wi-Fi connection Wi-Fi setting
ߢ Initialized On On On
ߣ General On On Off
ߤ AP connected, Internet connection incomplete On Blinking Off
NOTE
Installing the Wi-Fi Kit
ki]_TW_[Y]hTW[piptuhzhGvjmG~TmGrl|luUGGGX[ YWYYTXXTYZGGG㝘㤸GXXaWWaZ\

 Loading...