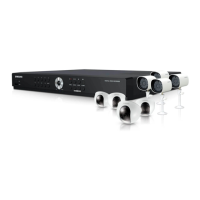
42_ using the DVR
using the DVR
SETTING THE DEVICE
You can configure the settings of: Camera, Storage Device, Remote Device and Monitor.
Camera
Setting the Camera
You can set Video, Audio, Channel Name and Dwell Time of a Camera.
Using the mouse may help make setup easier.
1. Press the [MENU] button on the remote control or front
panel.
2. Use the left/right button (
◄ ►
) to select <Device>.
Device setting menu is selected.
3. Use the up/down buttons (
) to move to <Camera>,
and press [ENTER] button.
4. Select <Camera>.
You will see a window where you can configure the
camera settings including Video, Audio, Channel Name,
Dwell Time and Progressive.
5. Use direction buttons (
◄ ►
) to move to a desired
item, and set the value.
• Video
- <ON/OFF> : You can turn ON/OFF the selected
channel’s camera.
- <Covert1> : Shows information other than the video of the selected channel.
For privacy protection, it does not display the video while the recording continues.
- <Covert2> : Shows nothing but an empty screen while the recording continues.
• Audio
- If set to <ON>, you can turn the audio of the channel ON on the Live screen.
- If set to <OFF>, the channel’s audio is off on the Live screen and not recorded.
Audio output is available for only 1 channel.
• CH Name : Up to 15 characters including blanks are allowed.
Refer to “Using Virtual Keyboard”. (Page 34)
• SEQ-Dwell Time : You can set the dwell time between channels for the Live screen.
If set to <OFF>, the channel is not listed in the Auto Sequence mode.
• Progressive : You can set the progressive camera to ON/OFF.
J
If you set it to <ON> for the progressive camera, screen flickering will be reduced.
Device
Logout
Exit
Camera
Storage Device
Remote Device
Monitor
CH Video
Audio
CH Name SEQ-Dwell Time
Progressive
1 ON
OFF
CAM 01 5 sec
OFF
2 ON
OFF
CAM 02 5 sec
OFF
3 ON
OFF
CAM 03 5 sec
OFF
4 ON
OFF
CAM 04 5 sec
OFF
5 ON
OFF
CAM 05 5 sec
OFF
6 ON
OFF
CAM 06 5 sec
OFF
7 ON
OFF
CAM 07 5 sec
OFF
8 ON
OFF
CAM 08 5 sec
OFF
Camera
Previous/Next Page
Screen Setup
OK Cancel

 Loading...