• Toavoidpropertydamage,personalinjury,and/ordeath,contactanauthorizedtechnicianforservicing
orrepairofthisunit.
• RefertotheServiceManualfordetailedinstallation,operating,testing,troubleshooting,and
disassemblyinstructions.
• And'éviterdesdommagesmatériels,desblessurescorporelleset/oumortelles,demandezàun
technicienqualiéd'eectuerlesopérationsd'entretienouderéparationdecetappareil.
• Reportez-vousaumanuelderéparationpourconnaîtrelesconsignesd'installation,d'utilisation,detest,
dedépannageetdedémontagedétaillées.
• Paraevitardañosmateriales,lesionesomuerte,comuníqueseconuntécnicoautorizadopararealizarel
mantenimientodeestaunidadopararepararla.
• ConsulteelManualdeservicioparaobtenerinstruccionesdetalladasdeinstalación,funcionamiento,
prueba,solucióndeproblemasydesensambledelaunidad.
CAUTION / ATTENTION / PRECAUCIÓN
FollowallsafetyinformationprovidedintheServiceManual.
Respecteztouteslesconsignesdesécuritégurantdanslemanuelderéparation.
SigatodalainformacióndeseguridadproporcionadaenelManualdeservicio.
WARNING / AVERTISSEMENT / ADVERTENCIA
Toavoidelectricalshock,personalinjuryand/ordeath,disconnectpowertothewasherbeforeservicing,
unlesstestingrequirespower.
And'éviteruneélectrocution,desblessurescorporelleset/oumortelles,débranchezlelave-lingeavant
deprocéderauxréparations(saufsiletestnécessitesamisesoustension).
Paraevitarriesgosdedescargaeléctrica,lesionesomuerte,antesderealizarelmantenimiento
desconectelaalimentacióndelalavadoraamenosquelapruebarequieraqueestéconectada.
DC68-03672A-00
ERROR CODES
NO
Error
code
Meaning Action
1 Ub
Unbalancedloadpreventswasherfrom
spinning.
Redistributetheload,andthenpresstheStart/Pause
button.
2 dC/dC1
Thewasherdidnotproperlylockthe
door.
Makesurethedoorisrmlyclosed.Restartthe
washer.Ifthecodereappears,callcustomerservice.
3 dC3 AddDoordidnotlock.
MakesuretheAddDoorisrmlyclosed.Restartthe
washer.Ifthecodereappears,callcustomerservice.
4 ddC AddDooropenwhileworking
5 5C
Thewasherdoesnotdrain.Thewasher
maydetectasmallclogwhiledraining.
1. Restartthewasher.
2. SelecttheSpinOnlycycle.
3. PresstheStart/Pausebuttontodrainthewater.
Ifthewasherstilldoesnotdrain,callcustomerservice.
6 4C
Waterisnotbeingsuppliedtothe
washer.
Makesurethewatertapsareopen.
Makesurethewaterhosesarenotclogged.
Makesurethewatertapsarenotfrozen.
Makesurethewashingmachineisoperatingwith
sucientwaterpressure.
Makesurethatthecoldwatertapandthehotwater
tapareproperlyconnected.
Cleanthemeshlterasitmaybeclogged.
7 4C2
Thehotwaterwassuppliedfromthe
coursewashingthedelicacyclothes.
Makesurethecoldwatersupplyhoseisrmly
connectedtothecoldwatertap.
Ifitisconnectedtothehotwatertap,thelaundrymay
bedeformedwithsomecycles.
8 tC1 Temperaturesensorproblem.
Restartthewasher.Ifthecodereappears,call
customerservice.
9 3C Motorproblem.
10 9C1/9C2 High/lowvoltagedetected.
11 HC
Watertemperaturecontrolproblem.
(Heatercontrol)
Callcustomerservice.
12 LC Waterlevelproblem
13 OC Waterlevelsensorproblem
14 1C
TheWaterLevelsensorisnotworking
properly
15 bC2 Jammedbutton.
16 AC
Communicationerror(SUB(sensor)
PBAMAINPBA)
17 AC4
Communicationerror
(WIFIPBAMAINPBA)
18 AC3
Communicationerror
(DRModuleMAINPBA)
19 AC5
Communicationerror
(LCDPBAMAINPBA)
20 AC6
Communicationerror
(InverterPBAMAINPBA)
21 8C MEMSsensorproblem.
22 SF Systemerror.
23 Sud
Thewasherhasdetectedtoomanysuds.Thewasherwillstopoperatinguntiltheamountofsuds
hasreduced.Thewasherwillthenresumenormaloperation.
TEST MODES
NO Mode How to enter
1 Smart Install
Standby
Set the scheduled time
to 17:00
Press Start/Pause for
7seconds
Smart Install
2
Automatic
check mode
Smart Install
Press Start/Pause While displaying "AS"
3
Manual check
mode
Enter Smart Install
Press Delay End While displaying "AS" delay end, Check devices in turm when
pressing delay end.
NO Mode How to enter
4
S/W version
Check
Enter Smart Install
Press Temp While displaying "AS"
5
Diagnostic
Code Check
Enter Smart Install
Press Extra Rinse While displaying "AS", "Cr". Tum jog dial along the direction of
CW when displaying.
Automatic Mode of Smart Install
• AutomaticallystartalloperationmodesofSmartInstall.
• Thingslikewashings,etc.arenotallowedinthedrum.
Manual Mode of Smart Install
• Undertheconditionofmanualmode,everytimewhen“DelayEnd”ispressed,nextstepwillbeentered.
• Contentslikewashings,etc.arenotallowedinthedrum.
Operation
mode
Description
Operation
mode
Description
1 carryouttestformachinedoorlocking 7
carryouttestforoperationof
drainagepump
2
carryouttestfordrainagepump
operation
8
carryouttestforoperationof
dehydration
3
carryouttestforoperationof
preparatoryvalve
9
carryouttestforoperationofdrying
heateranddryingfan
Co
carryouttestforoperationofcoldwater
valve
10
carryouttestforopeningofmachine
door
Ho
carryouttestforoperationofhotwater
valve
OK(Ot)
AutomaticmodeofSmartInstallis
completednormally
6
carryouttestforoperationofwatershot
valve
carryouttestforoperationofwashingheater
carryouttestforoperationofrinsing
*Accessoriesnotincludedintheproductarenotrequiredtocheckandtheycanbeskippeddirectly.
Identity of Smart Install completion
• AfterSmartInstalliscompletednormally,
┏
OK(Ot)
┛
identitywilldisplay.
• IfSmartInstalliscompletedabnormallyorSmartInstallfailstowork,
┏
nG
┛
identitywilldisplay.
Result Enquiry of Automatic Mode of Smart Install
• Undertheconditionofappearanceof
┏
AS
┛
identity,press“DelayEnd+Start/Pause”button.
• Ifautomaticmoderesultisinnormalcondition,
┏
OK(Ot)
┛
identitywilldisplay.Ifautomaticcheckingmode
failstocompletenormallyorfailstoexecute,
┏
nG
┛
identitywillappear.
Diagnosis Information Display Mode
• Undertheconditionofappearanceof
┏
AS
┛
identity,iftherstbuttonontherightatthebottomis
pressed,
┏
CR
┛
identitywillappearanddiagnosisinformationdisplaymodeisentered.
• Undertheconditionofappearanceof
┏
CR
┛
identity,ifturnthejogdialcontrolswitchclockwise,
diagnosiscodesgeneratedbeforewilldisplay7digitsatmost.
*IftherstbuttonontherightcoincideswithDelayEndbutton,pressthesecondbuttonontheright.
TROUBLESHOOTING
Trouble diagnosis
Cautions for repair and replacement
Pleasefollowthebelowinstructionsfortroublediagnosisandpartsreplacement.
1. Becausesomeelectroniccomponentsaredamagedbythechargedstaticelectricityfromtheresinfrom
amachineorthehumanbody,preparethehumanbodyby
groundingittotheearth,orremovethepotentialdierenceofthe
humanbodyandmachinebycontactingthepowersupplyplug
whencontactingthePCB.
2. BecauseAC120VisappliedtothetriacT1andT2onthePCB,
electricalshockmayoccurbycontacting.Takecautionthatthe
strongandweakelectricityarenotmixed.
3. DonotreplacethePCBassemblyunlessit’sfounddefectivebya
strictdiagnosis.Followthetroublediagnosisprocedureifthemicomisnotoperatingnormally.
Does not start
• Plugthewasherintothewalloutlet.Checkforpropervoltage.
• Checkthefuseorresetthecircuitbreaker.
• ClosethedoorandpresstheStart/Pausebuttontostartthewasher.
• Checkifthewasherisinapause,soak,orsudsprocess.Waitbrieyanditmaystart.
(Ifthewasherisinasudsprocess,‘Suds or sud’willlightupinsteadoftheremainingtime.)
• Checkforarestricteddrainsystem.(Ifthereisanelectricalproblemwiththedrainsystem,
“NODRAINING”errorwilloccurafter15minutes.)
• Checkthewatersupplyandtheline,orwatervalvescreenlter.
• CheckifthePCBconnectorsareconnectedtotheLCD/LEDmoduleproperly.
ReplacethePCBifanerrorisdetected.
Leaks
• Makesuretheinlethoseanddrainhoseconnectionsarenotleaking.
Checkforrubbergasketdamageduetoovertightening.
• Checkthestandpipesforleaks.Wrapadryragaroundthestandpipeopening.
Iftheragbecomeswet,theleakisduetohomeplumbing.
Makesurethestandpipeiscapableofacceptingthewaterowfromthewasher.
• Checkinternalhoseconnections(ll,drainsystems,dispenserhoses,andclamps).
• Checktherubberboot.Remove,reposition,andreinstallifnecessary.
• Checkforkinksinthedispenserhosetotheoutertub.Hotwaterpressurizationmayforcethedooropen.
Does not tumble
• Startanempty,normalcycleandallowittolltocheckifthewashertumbles.
• PerformManualcheckmodeofSmartInstall.Beforetesting,makesurethetumblerisempty.
• Checkforlooseconnectionsatthemachinecontrolboard,pressureswitch,motor,tachharness,and
motorcontrol.(Refertothecomponenttestingprocedures.)
• Checkmotorwindingsresistance.CN6Pins1&3/Pins1&2/Pins2&3=11.6ohms±7%.
Does not spin
• Makesurethedooriscompletelyclosed.
• Checkforremainingwaterinthewasher.Ifthereisremainingwater,see“Does not drain”.
• PerformManualcheckmodeofSmartInstall.(Makesurethewasherisempty.)Ifitdoesnottumbleafter
performingthetest,replacethePCB.Iftheproblempersists,replacethemotor.
• Ifthewasherspins,checkforapossibleunbalancedloadscenarioinnormalmode.
• CheckforlooseconnectionsatthePCB,waterlevelsensor,motor,andhallsensorwireharness.
(CNS801,CN10,CNS502,CN2,CN6)Refertothecomponenttestingprocedures.
•
Checkmotorwindingsresistance.CN6Pin1&2/1&3/2&3=11.6ohms(at±7%20°C/68°F).
Water does not fill
• PerformManualcheckmodeofSmartInstall.Visuallycheckallthewatervalves.(Cold/HotWaterValve)
• Makesuretapsarefullyopen.Checkwaterleversensor.(RefertothePCBConnectorCheck.)
• Checkifthereareanykinksintheinlethosesandifinletscreensareclogged.
• Checkifthereisenoughwaterpressureandanyfrozenareaintheunit(drainhose,etc.).
• Measuretheresistanceofthewatervalvecoil.CN10pin6,7,8,9,10/CN11pin1=1.18kohm
• CheckpressureS/WandPCBforlooseconnections.(RefertothePCBConnectorCheck.)
Wet clothes
• Unbalancedload.Addmoreclothingtotheload.
• Duetoexcessivesudsbyusinggeneraldetergent.UseHE(High-Eciency)detergentorreducethe
amountofdetergentused.
• LowSpinspeedorDrainOnlywasselected.See,“Does not spin”.
Drum full of suds
• See,“Does not drain”and“Does not spin”andcheckthedraining.
• CheckthePCBanddrainpumpforanyloosewireconnections.
• PerformManualcheckmodeofSmartInstall.
• UseHE(High-Eciency)orlowsudsdetergentspeciallyformulatedforfrontloadwashers.
• Reducetheamountofdetergentforthatspecicloadsizeandsoillevel.Towelsgenerallycreatemore
suds.Doawashcyclewithcoldwaterandatablespoonofsaltwithoutdetergent.
Door does not lock
• Doorisnotalignedorclosedproperly.
• PerformManualcheckmodeofSmartInstall.Checktheoutputvoltageofthedoorlockcoil.Ifitreads
120V,replacethedoorlockswitch;ifnot,replacethePCB.(RefertothePCBConnectorCheck.)
Door does not unlock
• Checkifthedoorisdeformed.Thismaypreventthedoorfromunlocking.
• Doorlocksitselfwhenthewaterlevelistoohigh.Openingthedoorwillresultinwaterdraining.
• Checkthefollowing:
Checkifwaterexistsinthedrum→Ifso,refertoDoes not drain.
Temperature(insidedrum):Checkifwatertemperatureishigh→Ifso,waituntilitdrops.
Wheneverythingisnormal,checkthePCBconnectorsanddoorlockswitch.
• Performmanualcheckmodeinsmartinstall.Checkdoorlock.Checktheoutputvoltageofthedoorlock
coil.Ifitreads120V,replacethedoorlockswitch;ifnot,replacethePCB.
Buttons do not work
• TheOptionandFunctionbuttonsresponddierentlyaccordingtoeachcycle.
• ChildLockisactivated.Todisable,simultaneouslyholddowntheSoil LevelandSpin
buttonsuntilthewasherbeeps.
• When“0”appearsonthedisplay,onlythePowerbuttonworks.PressthePowerbutton
andmakenewcycleselections.
Does not drain
• Checkforkinksorrestrictions(frozen,etc)onthedrainhose.
• ClosethedoorandpresstheStart/Pausebutton.
Forsafetyreasons,thewasherdoesnottumbleorspinwiththedooropen.
• PerformManualcheckmodeofSmartInstall.
• CheckifitreadsAC120V(resistance=14.2±7%ohms)atthepumpwhenaspincycleisselected.
• CheckthepumpatPin#1ofCN10/pin#2ofCN11onthePCB.ItshouldreadAC110~120V.
Incorrect water temperature
• Checkifbothofthewatertapsarefullyopenandthetemperatureselectioniscorrect.
• Makesurethedomesticwaterheaterissettosupplyhotwaterlowerthan120°F(49°C).Checkthe
waterheatercapacityandrecoveryrate.
• Ifthewaterheaterislocatedfarfromthewasher,screwoutthehotwatertapandletthewaterowuntil
yougethotwater.
• Toohot/toocold:AreducedamountofwaterissuppliedwhilethePCBcontrolstheinuxtoregulatethe
actualtemperatureofthewaterinthetub.Thismayseemtobesignicantlyhotter/colderthanexpected.
• Disconnecttheinlethosesfromthewatervalveandremoveanyresiduefromtheinletscreens.
Noisy and/or vibrates
• Checkifthewasherislevelandthelocknutsaretightenedonthebottomplate.
• Makesuretheloadisofadequatesizeandisnotunbalanced.
• Checkifthemotorisfastenedenough.
• Removethingsthatcouldcontributetonoises/vibrations.
(suchasshippingbolt,spacersandobjectsleaningonthewasher)
Diagnosis
- Connectpowertothediagnosticdevice.Alastusedcodeappearsonthedisplay.
Ifnocodeappears,checkthefollowingasinstructed.
Door Lock Check
(MAIN)
Measurethevoltage(AC120V)betweenpin#4of
CN10andpin#3ofRY7.
AC Power Check (MAIN)
Measurethevoltage(AC120V)betweenpin#2of
CN11andpin#4ofRY7.
Drain Motor Check
(MAIN)
Measurethevoltage(AC120V)betweenpin#1of
CN10andpin#3ofRY7.
Wash Heater Relay Check (MAIN)
Measurethevoltage(AC120V)betweenpin#3of
RY2andpin#3ofRY7.
CIRCLE Motor Check
(MAIN)
Measurethevoltage(AC120V)betweenpin#2of
CN10andpin#3ofRY7
Hall Sensor Check (INVERTER)
Measurethevoltagebetweenpin#4and#2ofCN2,
andcheckifit’sDC0Vor1.3V.
Measurethevoltagebetweenpin#4and#3ofCN2,
andcheckifit’sDC0Vor1.3V.
Water Valve Check
(MAIN)
Measurethevoltage(AC120V)betweenpin#10of
CN10andpin#3ofRY7.
Motor Check (INVERTER)
Resistancebetweenpin#1and#2ofCN6=12Ω
Resistancebetweenpin#1and#3ofCN6=12Ω
Resistancebetweenpin#2and#3ofCN6=12Ω
CODES D'ERREUR
N°
Code
d'erreur
Signification Action
1 Ub
Unechargenon-équilibréeempêche
l'essorage.
RééquilibrezlachargeetappuyezsurleboutonStart/
Pause (Démarrer/Pause).
2 dC/dC1
Lehublotdulave-lingen'estpas
correctementverrouillé.
Assurez-vousquelehublotestcorrectementfermé.
Redémarrezlelave-linge.Silecoderéapparaît,appelez
leservicededépannage.
3 dC3 LeHublotd'ajoutnes'estpasverrouillé.
Assurez-vousqueleHublotd'ajoutestcorrectement
fermé.Redémarrezlelave-linge.Silecoderéapparaît,
appelezleservicededépannage.
4 ddC
Hublotd'ajoutouvertpendantle
fonctionnement
5 5C
Lelave-lingenevidangepas.Le
lave-lingepeutdétecterunepetite
obstructionlorsdelavidange.
1. Redémarrezlelave-linge.
2. SélectionnezleprogrammeSpinOnly(Essorage
seulement).
3. AppuyezsurleboutonStart/Pause (Démarrer/
Pause)pourvidangerl'eau.
Sileproblèmepersiste,appelezleservicede
dépannage.
6 4C L’eaun’arrivepasaulave-linge.
Assurez-vousquelesrobinetsd'eausontouverts.
Assurez-vousquelestuyauxdevidangenesontpas
obstrués.
Assurez-vousquelesrobinetsd'eaunesontpasgelés.
Assurez-vousquelelave-lingefonctionneavecune
pressiond'eaususante.
Assurez-vousquelerobinetd'eaufroideetlerobinet
d'eauchaudesontbienraccordés.
Nettoyezleltreàmaillecarilpeutêtreobstrué.
7 4C2
L'eauchaudprovenaitduprogramme
delavagedulingedélicat.
Assurez-vousqueletuyaud'arrivéed'eaufroideestbien
raccordéaurobinetd'eaufroide.
S'ilestraccordéaurobinetd'eauchaude,lelingepeut
êtredéforméaveccertainsprogrammes.
8 tC1
Problèmeauniveauducapteurde
température.
Redémarrezlelave-linge.Silecoderéapparaît,appelez
leservicededépannage.9 3C Problèmedemoteur.
10 9C1/9C2 Tensionélevée/bassedétectée.
11 HC
Problèmedecontrôledelatempérature
del'eau.(Contrôlechaue-eau)
Appelezleserviceclient.
12 LC Problèmedeniveaud’eau
13 OC Problèmeducapteurdeniveaud’eau
14 1C
Lecapteurdeniveaud'eaune
fonctionnepascorrectement
15 bC2 Boutoncoincé.
16 AC
Erreurdecommunication
(SOUS(capteur)PBAPBA
PRINCIPAL)
17 AC4
Erreurdecommunication
(WIFIPBAPBAPRINCIPAL)
18 AC3
Erreurdecommunication
(ModuleDRPBAPRINCIPAL)
19 AC5
Erreurdecommunication
(LCDPBAPBAPRINCIPAL)
20 AC6
Erreurdecommunication
(InverseurPBAPBAPRINCIPAL)
21 8C ProblèmeauniveauducapteurMEMS.
22 SF Erreursystème.
23 Sud
Lelave-lingeadétectétropdemousse.Lelave-lingecesseradefonctionnerjusqu’àréductiondu
volumedemousse.Lelave-lingereprendraensuiteunfonctionnementnormal.
MODES DE TEST
N° Mode Comment entrer
1
Installation
intelligente
Veille
Réglez l'heure
programmée sur 17:00
Appuyez sur Démarrer/
Pause pendant 7 secondes
Installation
intelligente
2
Mode de
contrôle
automatique
Installation
intelligente
Appuyez sur Démarrer/Pause tout en achant "AS"
3
Mode de
contrôle
manuel
Entrer dans Installation
intelligente
Appuyez sur Delay End (Arrêt diéré) tout en achant la fin diérée "AS", contrôlez
les dispositifs à tour de rôle quand vous appuyez sur Delay End (Arrêt diéré).
4
Contrôle de
version S/W
Entrer dans
Installation intelligente
Appuyez sur Temp tout en achant "AS"
N° Mode Comment entrer
5
Contrôle
de code de
diagnostic
Entrer dans
Installation intelligente
Appuyez sur Rinçage supplémentaire tout en achant "AS", "Cr". Tournez la
molette dans le sens du CW lors de l'achage.
Mode automatique de Smart Install
• DémarreautomatiquementtouslesmodesdefonctionnementdeSmartInstall.
• Lesobjetsnesontpasautorisésdansletambour.
Mode manuel de Smart Install
• Enconditionsdemodemanuel,àchaquefoisquel'onappuierasurlatouche"DelayEnd"(Arrêtdiéré),
onatteindral'étapesuivante.
• Lesobjetsnesontpasautorisésdansletambour.
Modede
fonctionnement
Description
Modede
fonctionnement
Description
1
exécutertestpourverrouillagedu
hublotdel'appareil
7
exécutertestpourfonctionnement
delapompedevidange
2
exécutertestpourfonctionnement
delapompedevidange
8
exécutertestpourfonctionnement
deladéshydratation
3
exécutertestpourfonctionnement
delavannepréliminaire
9
exécutertestpourfonctionnement
duchauagedeséchageetdu
ventilateurdeséchage
Co
exécutertestpourfonctionnement
delavanned'eaufroide
10
exécutertestpourouverturedu
hublotdel'appareil
Ho
exécutertestpourfonctionnement
delavanned'eauchaude
OK(Ot)
ModeautomatiquedeSmartInstall
terminénormalement
6
exécutertestpourfonctionnement
delavannedejetd'eau
exécutertestpourfonctionnementdu
chauagepourlelavage
exécutertestpourfonctionnement
durinçage
*Lesaccessoiresnoninclusdansleproduitn'ontpasbesoind'êtrecontrôlésetpeuventêtrepassés.
Identité de l'exécution de Smart Install
• UnefoisqueSmartInstallestexécuténormalement,l'identité
┏
OK(Ot)
┛
s'ache.
• SiSmartInstallestexécutédemanièreanormaleousiSmartInstalln'arrivepasàfonctionner,l'identité
┏
nG
┛
s'ache.
Résultat de la demande de mode automatique de Smart Install
• Enconditionsd'apparitiondel'indicateur
┏
AS
┛
,appuyezsurlebouton“DelayEnd+Start/Pause”(Arrêt
diéré+Démarrer/Pause).
• Silerésultatdumodeautomatiqueestenconditionnormale,l'identité
┏
OK(Ot)
┛
s'ache.Silemode
decontrôleautomatiqueéchoueoun'arrivepasàs'exécuter,l'identité
┏
nG
┛
apparaît.
Mode achage d'Informations de diagnostic
• Enconditiond'aspectd'identité
┏
AS
┛
,sil'onappuiesurlepremierboutonenbasàdroite,
l'identité
┏
CR
┛
apparaîtetonatteintlemoded'achaged'informationsdediagnostic.
• Enconditiond'aspectd'identité
┏
CR
┛
,siontournelecommutateurdecontrôleducadrandanslesens
horaire,lescodesdediagnosticprécédemmentgénérésachent7chiresaumaximum.
*SilepremierboutondedroitecoïncideavecleboutonDelayEnd(Arrêtdiéré),appuyezsurledeuxième
boutonàdroite.
DÉPANNAGE
Diagnostic du problème
Lemicomdulave-lingeétantunestructurecomplexe,ilpeuts'avérernécessaired'appelerleservice
d'assistance.Lesinformationssuivantessontdestinéesàétablirundiagnosticprécisd'unproblèmeet
constituentdesinstructionsderéparationadaptées.
Précautions concernant la réparation et le remplacement
Respectezlesconsignesci-dessouspourlediagnosticdesproblèmesetleremplacementdespièces.
1. Certainscomposantsélectroniquesrisquantd'êtreendommagés
parl'électricitéstatiquerecouvrantlapartieenrésinedelamachine
oulecorpshumain,veillezàcequevotrecorpssoittoujoursreliéà
laterreouéliminezladiérencedepotentielentrevotrecorpsetle
lave-lingeentouchantlaprised'alimentationavantdetravaillersurla
cartedecircuitimprimé.
2. Unetensionde120VCAétantappliquéeauxtriacsT1etT2delacartedecircuitimprimé,vousrisquezde
vousélectrocutersivoustouchezceséléments.Veillezégalementquelescourantsfortsetfaiblesnesoientpas
mélangés.
3. Neremplacezpaslacartedecircuitimprimésiellen'estpasidentiéecommeétantdéfectueuseparun
diagnosticstrict.Respectezlaprocéduredediagnosticdesproblèmessilemicomnefonctionnepas
correctement.
Le lave-linge ne démarre pas
• Branchezl'appareilsurlaprisemurale.Vériezquelatensionestadaptée.
• Vériezlesfusiblesouréarmezledisjoncteur.
• FermezlehublotetappuyezsurleboutonStart/Pause (Départ/Pause)pourdémarrerlelave-linge.
• Vériezquelelave-lingen'estpasdansunephasedepause,detrempageoudelessivage.Ilsepeutquela
machineseremetteenmarcheaprèsquelquesminutes.
(Silelave-lingesetrouvedansunephasedelessivage,lemessage«
Suds ou sud
»s'acheaulieudutemps
restant.)
• Vériezquelesystèmedevidangen'estpasobstrué.(Encasdeproblèmeélectriquedanslesystèmede
vidange,lemessage« NODRAINING »(PASDEVIDANGE)s'acheaprès15minutes.)
• Vériezl'arrivéed'eauetletuyauouletamisdultredelavanned'arrivéed'eau.
• Vériezquelesconnecteursdelacartedecircuitimprimé(notammentleCN6)sontcorrectementconnectésau
moduleLCD/DEL.Remplacezlacartedecircuitimprimésiuneerreurestdétectée.
Fuites
• Assurez-vousquelesraccordementsdestuyauxd'arrivéed'eauetdestuyauxdevidangenefuientpas.
Vériezquelejointencaoutchoucn'apasétéendommagélorsduserrage.
• Vériezl'absencedefuitesauniveaudesconduitesd'évacuation.Enroulezunchionsecautourdel'ouverture
delaconduited'évacuation.
Silechiondevienthumide,lafuiteprovientdelaplomberiedel'habitation.
Assurez-vousquelaconduited'évacuationpeutrecevoirleuxd'eauprovenantdulave-linge.
• Vériezlesraccordementsdestuyauxinternes(remplissage,systèmesd'évacuation,tuyauxdedistributionet
colliersdeserrage).
• Vériezl'étatdelamanchetteencaoutchouc.Sinécessaire,retirez-la,repositionnez-laetréinstallez-la.
• Vériezqueletuyaudedistributionsurlacuveextérieuren'estpasemmêlé.Lamisesouspressiondel'eau
chaudepeutforcerl'ouvertureduhublot.
Le tambour ne tourne pas
• Lancezuncyclenormalàvideetlaissezsedérouleruncyclederemplissagepourvérierlarotationdutambour
dulave-linge.
•
ExécutezleModemanueldeSmartInstall(Installationintelligente).
Avantletest,assurez-vousquele
tambourestvide.
• Vériezlesconnexionsauniveaudupanneaudecommandedelamachine,dupressostat,dumoteur,du
faisceauélectriquedutachymètreetdelacommandedumoteur.(Reportez-vousauxprocéduresdetestdes
composants.)
• Vériezlarésistancedesbobinesdumoteur.
CN6Broches1&3/Broches1&2/Broches2&3=11,6ohms±7%.
Le lave-linge n'essore pas
• Vériezquelehublotestbienfermé.
• Vériezlaquantitéd'eaurestantedanslelave-linge.S'ilrestedel'eau,reportez-vousà« Le lave-linge ne se
vidange pas ».
•
ExécutezleModemanueldeSmartInstall(Installationintelligente).
(Assurez-vousquelelave-lingeestvide.)
Encasd'absencederotationdutambouraprèsavoireectuéletest,remplacezlacartedecircuitimprimé.Sile
problèmepersiste,remplacezlemoteur.
• Silelave-lingeprocèdeàl'essorage,vériezs'ils'agitd'unproblèmededéséquilibredelachargeenmode
normal.
• Vériezleséventuellesconnexionsdesserréesauniveaudufaisceauélectriquedelacartedecircuitimprimé,
ducapteurdeniveaud'eau,dumoteuretducapteuràeetHall.(
CNS801,CN10,CNS502,CN2,CN6
)
Reportez-vousauxprocéduresdetestdescomposants.
• Vériezlarésistancedesbobinesdumoteur.
CN6Broche1&2/1&3/2&3=11,6ohms(à±7%20°C/68°F).
La cuve ne se remplit pas.
•
ExécutezleModemanueldeSmartInstall(Installationintelligente).
Procédezàuncontrôlevisueldel'étatde
touteslesvannesd'arrivéed'eau.(Vanned'eaufroide/chaude.)
• Assurez-vousquelesrobinetsd'eausontentièrementouverts.Vériezlecapteurdeniveaud'eau.
(Reportez-vousàlapartieContrôledesconnecteursdelacartedecircuitimprimé.)
• Vériezqu'aucuntuyaud'arrivéed'eaun'estemmêléetquelestamisd'arrivéed'eaunesontpasobstrués.
• Vériezs'ilyaassezdepressiond'eauetqu'aucunélémentdel'appareiln'estgelé(tuyaudevidange,etc.).
• Mesurezlarésistancedelabobinedelavanned'arrivéed'eau.
CN10broche6,7,8,9,10/CN11broche1=1,18kohm
• Vériezlesconnexionsauniveauducommutateurdepressionetdelacartedecircuitimprimé.
(Reportez-vousàlapartieContrôledesconnecteursdelacartedecircuitimprimé.)
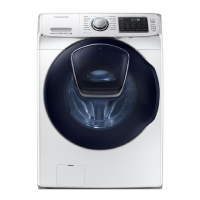
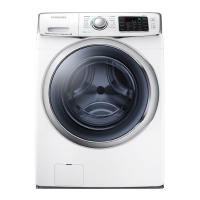
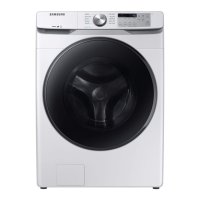
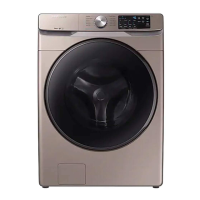
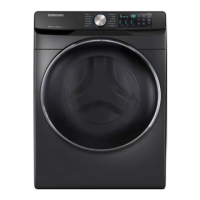
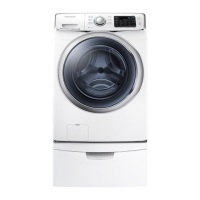
Models / Modèles / Modelos : WF45K6500A*
WF45K6200A*
WASHING MACHINE
LAVE-LINGE / LAVADORA
Technical Information
Informations techniques / Información técnica




 Loading...