This document provides installation and operation instructions for industrial circulating chillers, specifically models CW-5300, CW-6000, CW-6100, CW-6200, and CW-6260. It emphasizes strict adherence to usage guidelines to prevent accidents and ensure proper functioning.
Function Description
The industrial circulating chiller is a cooling device designed for laser processing equipment such as laser cutting, welding, marking, and engraving. Its primary function is to provide a temperature-stable cooling medium to these applications.
The chiller operates on a refrigeration system comprising a compressor, condenser, throttling device (expansion valve or capillary), evaporator, and a water pump. The water pump circulates low-temperature cooling water to the equipment. This water absorbs heat from the equipment, heats up, and returns to the chiller for re-cooling. Within the chiller's refrigeration system, refrigerant in the evaporator coil absorbs heat from the return water, vaporizing into steam. The compressor then extracts and compresses this steam, sending the high-temperature, high-pressure steam to the condenser. Here, heat is released (aided by a fan) and the steam condenses into a high-pressure liquid. After passing through the throttling device, it enters the evaporator to vaporize again, absorbing heat from the water, thus completing the continuous circulation. Users can monitor and adjust the water temperature through a dedicated temperature controller.
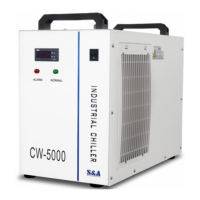
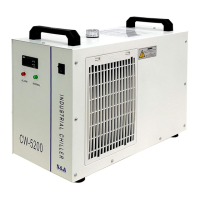
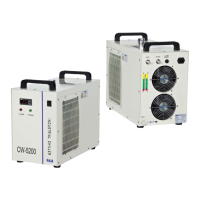
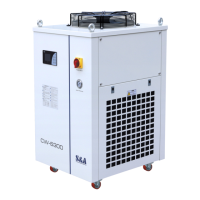
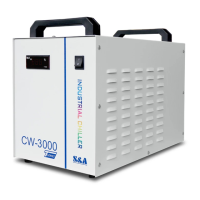
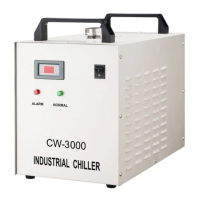
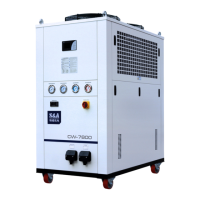
The chiller models are illustrated with a naming convention: "CW" denotes Chiller application, followed by a model series number (e.g., 6000), then an electric source type (e.g., A), and finally a water pump type (e.g., H). This manual focuses on the main product codes, and specific model details should be confirmed with the company.
Usage Features
Installation:
Upon receiving the chiller, users should inspect the package for damage and ensure all accessories are present. It is crucial to verify that the chiller's working voltage is stable and within the normal range (210-240V for standard products, 100-120V for 110V models), as the refrigeration compressor is sensitive to voltage fluctuations. Customization for wider voltage ranges is available.
The chiller must be installed on a horizontal surface without tilting. Adequate clearance is required around the chiller: at least 1.5 meters from obstacles for the air outlet and 1 meter for the air inlet to ensure proper ventilation. Installation in harsh environments, such as those with corrosive or flammable gases, dust, oil mist, conductive dust, high temperature, high humidity, strong magnetic fields, or direct sunlight, is prohibited. The optimal operating environment specifies an ambient temperature range of 0-40°C, ambient humidity of ≤90%RH, and an altitude of ≤3,000m.
For cooling medium, purified water, distilled water, high-purity water, or other softened water are recommended. Oily liquids, liquids with solid particles, or corrosive liquids are forbidden. Regular cleaning of the filter element and replacement of cooling water (every three months) are essential for normal operation.
If the chiller is stored in an environment where the room temperature drops below 2°C, antifreeze (up to 30% ethylene glycol or propylene glycol) should be added to the water tank. Once the temperature rises, the antifreeze should be drained, the system flushed with purified or distilled water for 30 minutes to remove residues, and then refilled with fresh circulating water.
The pipeline layout should be determined based on the chiller's water inlet and outlet directions, ensuring the waterway is clean and free of impurities to prevent blockages or pump failure.
Operation:
Before starting, the power cord must be securely plugged in, and the power switch turned on. It is strictly forbidden to start the chiller without water. Upon initial startup, air bubbles may be present in the pipeline, potentially triggering alarms temporarily; this should normalize after a few minutes. Users should immediately check for water leaks after the first startup. If the water temperature is below the set temperature, the cooling fan and other devices may not operate, which is normal as the temperature controller automatically manages components based on set parameters.
Electrical Connection:
Cables should be selected based on the maximum rated current indicated on the chiller's label. A reference standard for power cord diameter selection is provided (e.g., 1.0 mm² for ≤5A, 10.0 mm² for ≤50A). Standard cables must be used. The main power circuit must include appropriate electric leakage and overload protection devices, and the chiller must be properly grounded. Power supply voltage fluctuation should be less than ±10%, and frequency fluctuation less than ±1Hz. The chiller should be kept away from electromagnetic interference sources.
Water Filling & Air Exhaust:
After initial water filling or replacement, the water pump system needs to be exhausted of air to prevent damage. This can be done by removing the water outlet, connecting a water pipe, draining for 2 minutes, and then reinstalling, or by opening the water supply inlet, starting the machine, and repeatedly pressing and folding the water pipe to expel air. After the new machine is turned on and air is emptied, the water level in the tank will drop slightly. Water should be added to maintain the level within the green area of the water level gauge. Users should monitor the water level after a period of operation to check for leaks if a significant drop occurs.
Test-run Check:
Before full operation, verify correct pipeline connections, absence of bubbling or water leakage, and ensure water inlet/outlet ball valves are open and the drain valve is closed. Check the water tank's liquid level, confirm correct electrical wiring, and ensure the equipment is grounded.
Temperature Control:
The T-506D intelligent temperature controller self-adjusts parameters based on room temperature to meet cooling needs. The T-506E controller maintains a constant water temperature, typically 25°C, which users can adjust. Both controllers share similar functions and structure, differing mainly in factory settings.
Temperature Controller Working Status Indicators:
- Refrigeration indicator: On during refrigeration, off in constant temperature mode, flashes during delay.
- Refrigerant solenoid valve indicator: On when connected, off when disconnected.
- Heating indicator: On when connected, off when disconnected.
- Alarm indicator: On when connected, off when disconnected.
Quick Setting:
Press the "SET" key to adjust temperature. The upper window shows F0 (or F1 in intelligent mode), and the lower window flashes the current value. Use "↑" or "↓" keys to change the value, then "RST" to save and exit.
Status Display:
Press "→" once for t1 (room temperature sensor), twice for t2 (flow rate in L/min with 0.1 resolution), and three times to return to normal operation.
Power-on Sequence:
When first powered on, press "↓" to cancel delay time and connect the compressor.
User Parameter Setting (F0-F11):
Use "↑" and "↓" to change data, and "←" and "→" to switch items. Press and hold "SET", "↑", and "↓" for 6 seconds to enter parameter setting. The lower window will show "PAS" and the upper window "00". Use "↑" or "↓" to revise the password (F7), then "SET". If the password is correct, the lower window shows F0, allowing parameter revision. If incorrect, it returns to temperature display. The controller automatically exits parameter setting after 20 seconds of inactivity. Press "RST" to save and exit.
Restore to Factory Settings:
After 30 seconds of power-on, press and hold "↑" and "↓" for 3 seconds until "rE" is displayed. This restores supplier and user parameters to factory values, returning to temperature display after 3 seconds.
Alarm Codes:
The chiller provides alarm codes (E1-E7) for various conditions like ultra-high room temperature, ultra-high/low water temperature, sensor failures, water shortage, low flow rate, circulating pump failure, and chiller power failure. These alarms trigger a buzzer and change the status of H1/H2 and H1/H3 contacts (open/connected). The alarm output port is connected to normally open and normally closed relay contacts, with a working current under 3A and voltage under 300V.
Operating Modes:
- Intelligent Control Mode (Case 1): Water temperature is controlled intelligently, typically between 25°C and 31°C, with the set water temperature 3°C lower than air temperature. Fluctuation should not exceed ±0.5°C. Alarms trigger if water temperature is 15°C lower or higher than the target (e.g., if air temperature is 30.0°C, target is 27.0-26.5°C; if air temperature is 30.5°C, target is 28.0-27.0°C).
- Constant Mode (Case 2): Water temperature is kept constant, typically at 25°C, with fluctuation not exceeding ±2°C. Ultra-high temperature alarm triggers if water temperature is 5°C higher than target; ultra-low alarm triggers if 10°C lower. Water temperature can be adjusted from 5°C to 30°C.
Maintenance Features
Safety Precautions:
Before any maintenance, the machine must be stopped, and power cut off. Wait 3 minutes before starting maintenance to avoid electric shock, as high-voltage parts may retain charge. If the ambient temperature is below 2°C and the machine is shut down for an extended period, the internal water must be drained.
Dust Filter Cleaning:
Regularly disassemble the dust filter for cleaning. Use a compressed air gun to blow off accumulated dust from the condenser. It is recommended to clean it once a week. The chiller should not operate without the dust filter, except for quick cleaning.
General Maintenance:
- Electrical Connection: Handling, piping installation, electrical operation, maintenance, and overhaul must be performed by professional technicians.
- Specification Adherence: Do not use the equipment beyond its manual specifications.
- Environment: Do not install the chiller in dangerous places with inflammable gas.
- Power Supply: Ensure power supply conforms to nameplate/manual standards, use standard cables of correct diameter, and ensure reliable grounding.
- Operation without Cover: Do not operate the equipment without its outer cover, as live parts are exposed.
- Water Exposure: Do not allow the equipment to encounter water.
- Maintenance Safety: Perform maintenance after 3 minutes of power cut-off to allow high-voltage parts to discharge. Avoid touching live parts.
- High Voltage/Temperature: Be aware of high voltage and high-temperature areas (compressor, refrigerant piping) to prevent injury or burns.
- Transport & Installation: Equipment must be firmly fixed during transport and installation to prevent tipping or falling.
- Electrical Protection: Power cable terminals must have electric leakage and overload protection devices matching the rated current.
- Abnormal Operation: Do not start the machine if it is abnormal; identify and resolve the issue first.
- Rotating Parts: Do not insert fingers or other objects into equipment gaps due to rotating parts.
- Refrigerant Leakage: If refrigerant leaks, ensure ventilation and avoid skin contact.
- Transportation with Liquid: Forbidden to transport with liquid to prevent internal pipeline leakage.
- Transport Tilt Angle: Tilt angle should be ≤45° to prevent refrigeration system failure.
- Motor Impeller: For equipment unused for a long time, gently move the motor impeller before powering on to aid pump startup.
- Physical Damage: Do not step or sit on the equipment to prevent falling or overturning.
- Cleaning Agents: Use non-corrosive cleaning agents for metals and plastics. Store cleaning agents properly to prevent leakage, and seal their containers completely.
- Water Outlet: Do not blow air into the water outlet with an air gun, as a temperature probe is installed there.
- Condenser Fins: Wear protective gloves during maintenance, inspection, and cleaning, as sharp edges of condenser fins may cut skin.
- Anti-freezing: When ambient temperature is below 2°C and the machine is shut down for a long time, drain liquid and blow water away with compressed air to prevent freezing and cracking components/pipelines. Use antifreeze with a concentration of not more than 30% containing ethylene glycol or propylene glycol if room temperature is below 2°C.
Troubleshooting:
The manual provides a simple troubleshooting guide for common failures:
- Machine turned on but unelectrified: Check power cord connection and fuse.
- Flow alarm (no water flow): Check water level, add water, and inspect circulation pipes for blockages or deformation.
- Ultra-high water temperature alarm: Clean dust gauze, ensure good ventilation, check power supply voltage, reset thermostat parameters, allow sufficient refrigeration time, or reduce heat load.
- Ultra-high room temperature alarm: Improve ventilation and ensure operation below 40°C.
- Condensate water problem: Increase water temperature or insulate pipes.
- Slow water drain: Open water supply inlet.
- Startup flow alarm: Exhaust air from the system.