SANTA FE COMPACT INSTALLER'S AND OWNER'S MANUAL
5
Santa Fe Compact Installer’s & Owner’s Manual
7.2 Cleaning Pre-filter
Check lter every six months. Clean and/or replace when
lters are visibly dirty. Replacement lters can be ordered
from your dealer or by calling 1-800-533-7533.
The 1/4" washable pre-lter should not to be discarded.
Inspect for debris, dirt, or other obstructions. Wash the 1/4"
pre-lter every time the 1" pleated fabric lter is replaced.
To clean the 1/4" pre-lter, remove lter from the unit, rinse
the 1/4" pre-lter in water with the water owing through
the aluminum support mesh side. Allow the lter to dry
completely before reinstalling. Reinstall per section 7.5.
7.3 Pleated filter
Replace lter every six months per section 7.4-7.5. To order
lters contact your dealer or call 1-800-533-7533.
CAUTION!
NOTE: Failure to follow filter handling instructions may
result in improper function of the dehumidifier and cause
premature filter wear or unit damage.
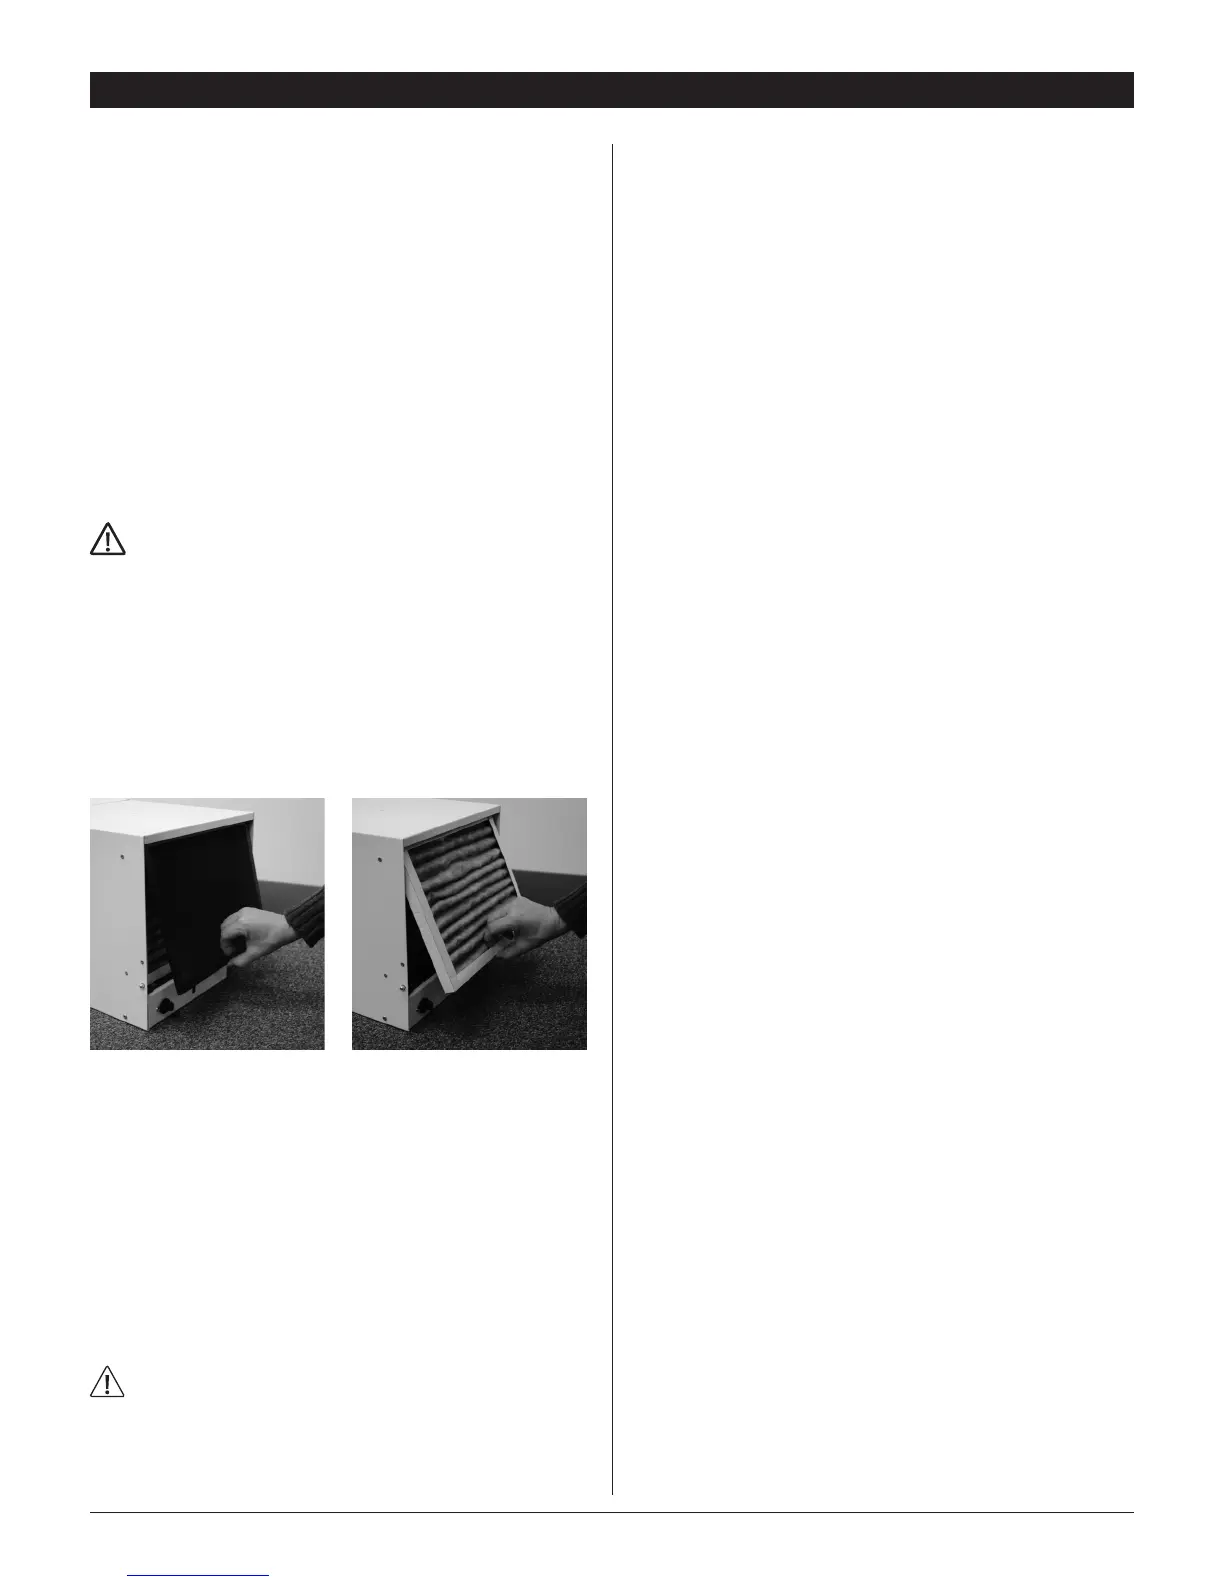
7.4 Removing Filters
1. Remove the 1/4" pre-lter by gently pulling on the bottom
of the lter frame.
2. Remove the 1" pleated fabric lter by gently pulling on
the bottom of the lter frame.
7.5 Installing Filters
1. Angle the top of the lter and gently slide 1" pleated lter
into lter slot. Do not force. If resistance is felt, check
alignment for obstructions or debris inside the lter
housing.
2. Angle the top of the lter and gently slide 1/4" pre-lter in
front of 1" pleated lter. Do not force. If resistance is felt,
check alignment for obstructions or debris inside the
lter housing.
8. Service
WARNING!
Servicing the Santa Fe Compact, with its high pressure
refrigerant system and high voltage circuitry presents a
health hazard which could result in death, serious bodily
injury, and/or property damage. Only qualified service
people should service this unit.
8.1 Technical Description
The Santa Fe Compact uses a refrigeration system similar
to an air conditioner’s to remove heat and moisture from
incoming air and add heat to the air that is discharged. Hot,
high pressure refrigerant gas is routed from the compressor
to the condenser coil. The refrigerant is cooled and
condensed by giving up its heat to the air that is discharged
from the dehumidier. The refrigerant liquid then passes
through capillary tubing which cause the refrigerant pressure
and temperature to drop. It next enters the evaporator coil
where it absorbs heat from the incoming air and evaporates.
The evaporator operates in a ooded condition, which means
that all the evaporator tubes contain liquid refrigerant during
normal operation. A ooded evaporator should maintain
constant pressure and temperature across the entire coil,
from inlet to outlet. The mixture of gas and liquid refrigerant
enter the accumulator after leaving the evaporator coil. The
accumulator prevents any liquid refrigerant from reaching the
compressor. The compressor evacuates the cool refrigerant
gas from the accumulator and compresses it to a high
pressure and temperature gas to repeat the process.
8.2 Troubleshooting
FOR THE HOMEOWNER:
n
If the unit does not work properly, please check the
following:
— Is the unit unplugged?
— Is power to outlet on? (check switch, if applicable)
— Is circuit breaker tripped?
— Is humidity control set? (turn to “ON”)
— Is air flow restricted? (check air filters and grill)
If none of the above, call dealer or 1-800-533-7533.
FOR THE INSTALLING PROFESSIONAL:
n
No dehumidification. Neither blower, nor compressor run
with fan switch AUTO.
1. Unit unplugged or no power to outlet, circuit breaker
tripped.
2. Humidity control set to “Humid” setting.
3. Loose connection in internal wiring.
4. Humidity control is defective.
5. Defective compressor relay.
n
No dehumidification. Compressor does not run but
blower runs with fan switch AUTO and humidity control
turned to ON.
1. Defrost thermostat open, ambient temperature too low.
2. Loose connection in compressor circuit.
 Loading...