12
HERE WE GO!
Scan here to view
your install video.
san.us/1125
We're here to help! If you have questions at any point,
contact customer service at 1-888-333-9952.
THIS IS YOUR DRILLING
TEMPLATE FOR STEP 2
YOU’RE REALLY GOING
TO ENJOY STEP 3
GET STARTED
WITH STEP 1
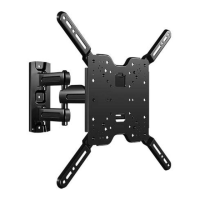
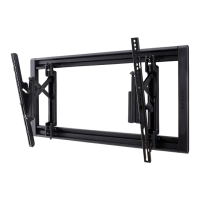
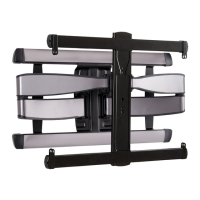
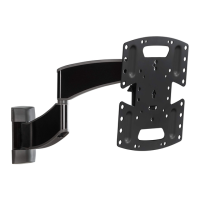
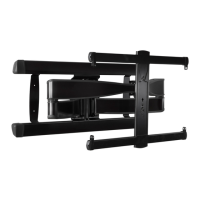
Grab the TV bracket and line
it up with the holes on the
back of your TV.
Attach using the bolts that fit.
Locate your stud and choose a
height for your TV. Then
simply tape this template to
the wall and drill right through.
Once the wall plate is secured,
simply hang TV on arm and secure
into place with safety screw.
Congratulations! You’re done.
WELCOME AND THANKS FOR CHOOSING SANUS VUEPOINT
Reference the product manual for
details on mounting to concrete.
Be sure to review the manual for
complete safety instructions.
Model: FSF207
6700-004862<00>
THIS
WAY UP
2
HERE WE GO!
Scan here to view
your install video.
san.us/1125
We're here to help! If you have questions at any point,
contact customer service at 1-888-333-9952.
THIS IS YOUR DRILLING
TEMPLATE FOR STEP 2
YOU’RE REALLY GOING
TO ENJOY STEP 3
GET STARTED
WITH STEP 1
Grab the TV bracket and line
it up with the holes on the
back of your TV.
Attach using the bolts that fit.
Locate your stud and choose a
height for your TV. Then
simply tape this template to
the wall and drill right through.
Once the wall plate is secured,
simply hang TV on arm and secure
into place with safety screw.
Congratulations! You’re done.
WELCOME AND THANKS FOR CHOOSING SANUS VUEPOINT
Reference the product manual for
details on mounting to concrete.
Be sure to review the manual for
complete safety instructions.
Model: FSF207
6700-004862<00>
THIS
W
AY
UP
3
14
14
≤ 5/8 in.
(16 mm)
1
3 in.
(75 mm)
7/32 in.
(5.5 mm)
NOTE: TV shifts
4.27 in. (108.6 mm)
to the right or left
when in the home
position. Consider
this when select-
ing the location of
your wall mount.
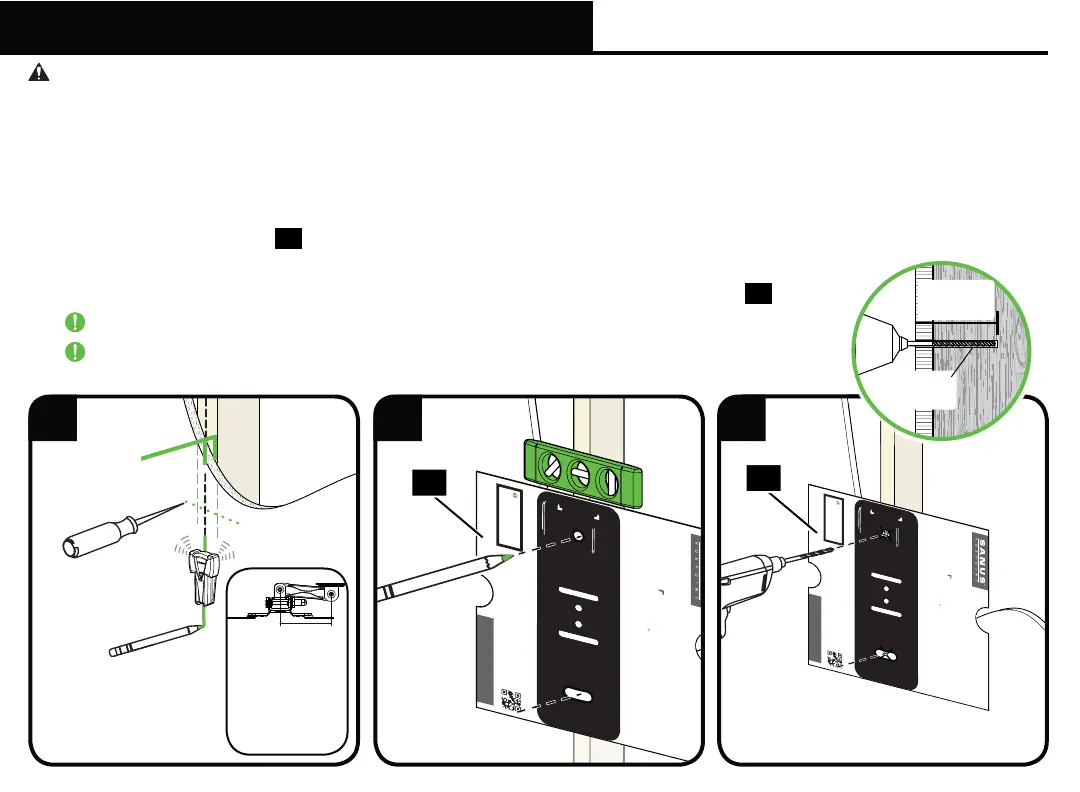
STEP 2A Attach Wall Plate to Wall
Wood Stud Option
CAUTION: Avoid potential personal injuries and property damage!
● Drywall covering the wall must not exceed 5/8 in. (16 mm)
● Minimum wood stud size: common 2 x 4 in. (51 x 102 mm) nominal 1½ x 3½ in. (38 x 89 mm)
1. Locate your stud. Verify and mark the center of the stud by finding the stud edges using an awl, a thin nail, or an edge to
edge stud finder.
2. Position the wall template
14
at your desired height and line up the holes with your stud center line. Level the template and
tape in place.
3. Drill pilot holes using a 7/32 in. (5.5 mm) diameter drill bit. Remove wall plate template
14
.
IMPORTANT: Be sure to drill into the center of the stud.
IMPORTANT: Pilot holes must be drilled to a depth of 3 in. (75 mm).
 Loading...