EasyManua.ls Logo

Sanus SLF428-B2 User Manual

Sanus SLF428-B2
20 pages
To Next Page IconTo Next Page
Page #1 background imageLoading...
Page #1 background image
WE’RE HERE TO HELP
Our US-based install experts
are standing by to help.
Get it right the first time.
HeightFinder™ shows you
where to drill.
Check it out at:
SANUS.com/2692
Want to watch a video that
shows how easy this DIY
project will be?
Watch it now at:
SANUS.com/3025
Call us at:
US: +1 (888) 333-1376
EMEA: +31 (0) 495 580 852
UK: +44 (0) 800 056 2853
SLF
428-B2
INSTRUCTION MANUAL
Texto en Español, página 14
Texte Français page 16
Texti á Íslensku á bls. 18
BEFORE MOUNTING YOUR TV
Record your TV information and
save for future reference.
Or, take a photo of your TV product
sticker and save for future reference.
Brand:
Model No.:
Serial No. (S/N):
Version/SCC/Other:
Your TV product sticker may be inaccessible after mounting your TV.
Question and Answer IconNeed help?

Do you have a question about the Sanus SLF428-B2 and is the answer not in the manual?

Sanus SLF428-B2 Specifications

General IconGeneral
BrandSanus
ModelSLF428-B2
CategoryTV Mount
LanguageEnglish

Summary

We're Here to Help

Watch Video Guide

Find a video guide to demonstrate the DIY project.

HeightFinder™ Tool

Use HeightFinder™ to accurately determine drill locations for proper placement.

Contact US-Based Experts

Reach out to US-based install experts for assistance with setup and questions.

Important Safety Instructions

TV Weight Limit

Ensure the TV weight does not exceed the specified limit to prevent damage or injury.

Acceptable Wall Construction

Install only on wood studs or solid concrete/concrete block walls. Do not use drywall alone.

Tools Needed for Installation

Lists all necessary tools required for both wood stud and concrete installations.

Product Dimensions and Preparation

Review Product Dimensions

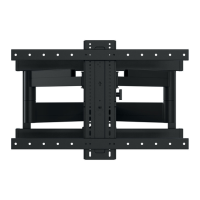
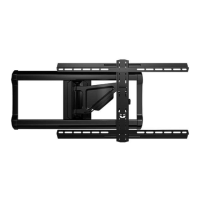
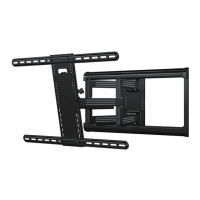
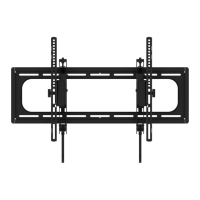
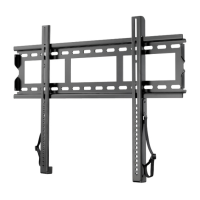
View detailed diagrams showing the mount's dimensions and configurations.

Prepare TV for Mounting

Remove the TV stand and protect the screen before proceeding with installation.

Install TV Accessories

Install any purchased accessories that require TV removal prior to assembly.

Supplied Parts and Hardware

TV Bracket Hardware (Step 1)

Details screws, washers, and spacers for attaching brackets to the TV.

Wall Plate Hardware (Step 2)

Lists lag screws, anchors, and templates for mounting the wall plate.

Arm Assembly Hardware (Step 3)

Includes screws and hex key for assembling the arm to the wall plate.

Step 1: Attach TV Bracket to TV

Select TV Screw Diameter

Identify the correct screw diameter that fits your TV's mounting holes.

Select TV Screw Length and Spacers

Choose the appropriate screw length and spacers based on the TV's back design.

Attach TV Brackets to TV

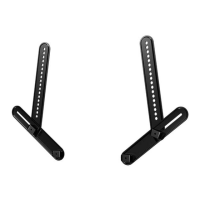
Securely attach the vertical TV brackets to the back of your television.

Step 2A: Attach Wall Plate - Wood Stud Installation

Wood Stud Installation Guidelines

Follow guidelines for drywall thickness, stud size, and stud spacing for wood stud mounting.

Step 2B: Attach Wall Plate - Concrete Installation

Solid Concrete or Block Installation

Mount directly onto concrete surfaces, observing thickness and block size requirements.

Step 3: Hang TV onto Wall Plate

Attach Arm Assembly to Wall Plate

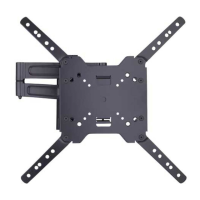
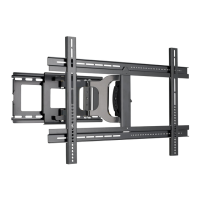
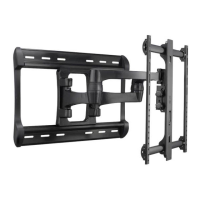
Connect the arm assembly to the securely mounted wall plate.

Step 3.2: Attach TV to Arm Assembly

Attach TV to Arm Assembly

Connect the TV with attached brackets to the arm assembly.

Manage Cables

Route and secure cables through the arm assembly to prevent pinching and maintain tidiness.

TV Adjustments

Tilt Adjustment

Adjust the side tension knob to control the TV's tilt resistance.

Level Adjustment

Loosen, adjust, and retighten screws to ensure the TV is perfectly level.

Lateral Shift

Wood Stud Applications

Adjust the arm assembly position on the wall plate for optimal TV placement.

Extend / Retract

Removing the TV

Warranty Information

What the Warranty Covers

Details coverage for defects in material and workmanship.

Period of Coverage

Specifies the duration of the limited product warranty.

Getting Warranty Service

Instructions on how to contact SANUS for warranty claims and replacement parts.

Additional Warranty Limits

Outlines limitations, exclusions, and conditions that void the warranty.

State Laws and Warranty

Explains how state laws relate to implied warranties and limitations.

Related product manuals