Do you have a question about the Sanus SLT4 and is the answer not in the manual?
Save TV details for future reference before installing the mount.
Capture an image of the TV product sticker for future reference.
Access a video guide to learn how to install the mount easily.
Utilize the HeightFinder tool for precise drill placement.
Connect with US-based installation experts for assistance.
Verify if your TV's weight is within the mount's load capacity.
Determine your wall type (wood, concrete, steel) for correct mounting.
Ensure all necessary tools are gathered before starting the installation.
Review instructions and safety advice before beginning the mount setup.
Detach the TV's original stand if it is attached.
Attach any purchased accessories that require prior TV removal from the wall.
Lay the TV on a soft surface to protect its screen during installation.
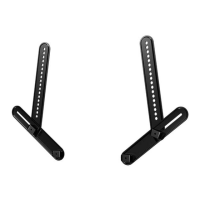
Lists all components and hardware required for attaching the TV bracket.
Determine the correct screw diameter (M4, M6, M8) for your TV's mounting holes.
Assess if spacers are required based on the TV's back panel design.
Center TV brackets over the TV's mounting hole pattern at the same height.
Install brackets using the selected screw/washer/spacer combination.
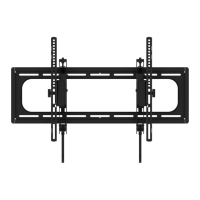
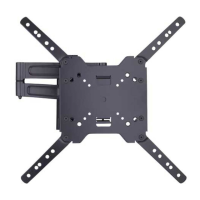
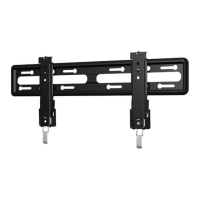
Lists components for wall plate attachment, including lag bolts and template.
Details requirements for installing on concrete or block walls (kit not included).
Details requirements for installing on steel studs (kit not included).
Use a stud finder and awl/drill bit to locate and verify the edges of wall studs.
Mark the center of each verified stud with a pencil for accurate placement.
Place the template on the wall, level it, and mark hole locations over stud centers.
Drill four pilot holes to a specific depth using a 7/32 in. drill bit.
Remove the wall plate template after marking and drilling pilot holes.
Install lag bolts and washers, tightening firmly to secure the wall plate to the studs.
Place the template on the concrete wall, level, and mark hole locations.
Details about the required concrete anchor kit (not included).
Drill four pilot holes to a specified depth using a 3/8 in. drill bit.
Remove the wall plate template after marking and drilling pilot holes.
Insert concrete anchors into the drilled holes, ensuring they are seated flush.
Install lag bolts and washers, tightening firmly to secure the wall plate.
Details about the required steel stud hardware kit.
Use a stud finder and awl/drill bit to locate and verify the edges of steel studs.
Mark the center of each verified steel stud with a pencil.
Place template, level, and mark hole locations over steel stud center lines.
Drill four pilot holes to a specific depth using a 1/2 in. drill bit.
Insert and secure anchors into the drilled holes in steel studs.
Install screws and washers, tightening firmly to secure the wall plate.
Lift and hang the TV onto the mounted wall plate, ensuring correct positioning.
Press the bottom of the TV until it clicks, securing it to the wall plate.
Connect cables to the TV and manage them for a clean setup.
Adjust the level screw to raise or lower sides of the TV for perfect leveling.
Turn the adjustment screw to raise or lower the TV's height.
Adjust the tilt tension knob to control TV tilt angle and stability.
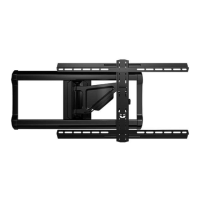
Move the TV in and out from the wall, being mindful of pinch points.
Slide the TV left or right along the wall plate for repositioning (wood studs only).
Safely disconnect cables and unlock the TV from the wall plate for removal.
Diagram showing dimensions for attaching the TV to the brackets.
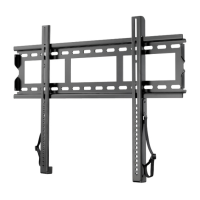
Diagram showing dimensions of the wall plate itself.
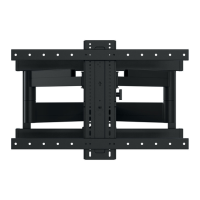
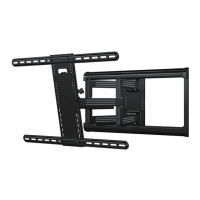
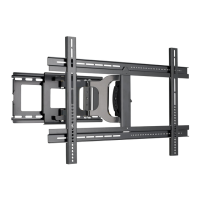
Diagrams illustrating dimensions when the mount is extended.
Diagrams illustrating dimensions when the mount is retracted.
Details what the SANUS warranty covers regarding defects and workmanship.
Specifies the duration of the limited product warranty, starting from the purchase date.
Explains how to claim warranty service and what SANUS will do for defective parts.
Outlines conditions that void the warranty, such as improper installation or misuse.
Provides a phone number for customer support and inquiries.
Offers an email address for customer support and feedback.
Provides a link to leave feedback on the product or service.