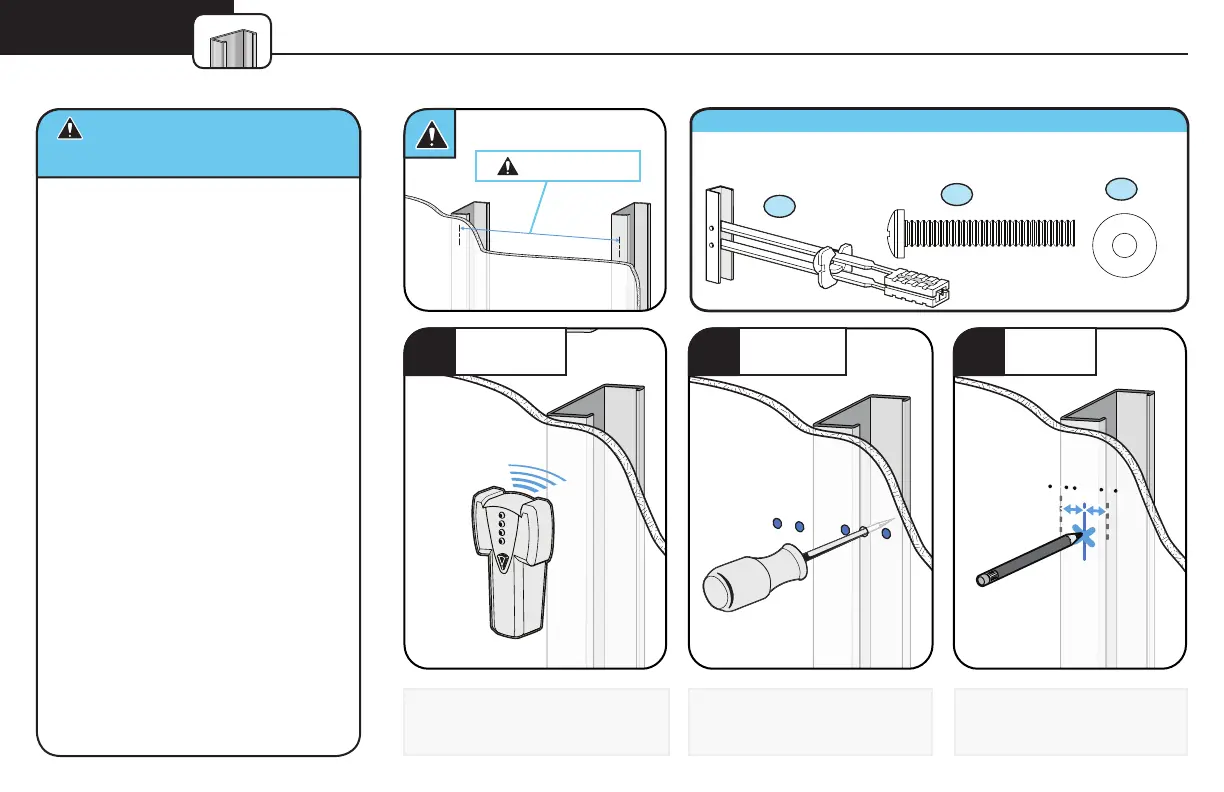
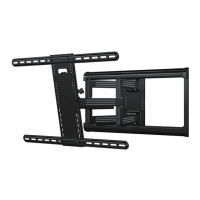
15
Min. 16 in. (40.6 cm)
CAUTION: Avoid potential personal
injury or property damage!
STEP 2C
Locate the studs using a stud
finder.
Find the edges of the studs using
an awl or small drill bit.
Mark the centers of the studs
with a pencil.
1
LOCATE
2
VERIFY
3
MARK
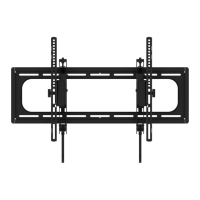
● Studs must be at least 2x4 / 25 ga.
● If back side of wall is unfinished, drywall must
be installed to a minimum of one stud left and
right of the stud(s) being used to install the
mount
● Drywall must be a minimum of 1/2 in. (1.2
cm) thick on each side of the studs, and
a minimum clearance of 1 ⅞ in. (4.7 cm)
behind the wall is required
● This product must be centered on the
studs
● Stud type and structural strength must conform
to the North American Specification for the
Design of Cold-Formed Steel Structural Members
[362 S 125 18, C-Shape, S - Stud Section]
● Drywall must be secured to studs with screws
12 in. (30.4 cm) on center
Steel Stud Installation Kit (NOT INCLUDED)
1/4-20 x 1 ¾ in.
x4
S1
x4
S2
x4
S3
1/4-20 SNAP Toggle BB
.734 x .312 x .065 in.
Contact Customer Service at +31 (0) 495 580 852 to have the additional hardware shipped directly to you.