Easy Use Chart
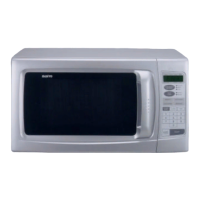
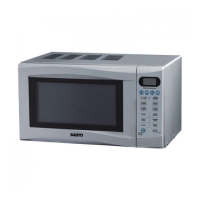
Your new DIGITOUCH control system allows you to use your microwave oven in many ways.
SENSOR REHEAT
SENSOR COOK
NOTE: If you prefer your food to be cooked
more or less than the preset MED setting,
To set:
touch one of 2 DONENESS pads: LOW or
To set:
HIGH
1. Touch STOP/CLEAR.
1. Touch STOP/CLEAR.
2. Touch SENSOR REHEAT.
2. Touch SENSOR COOK.
(See Pages 14 through 15 for more detailed in-
3. Touch number (l-2) to select the appropriate
3. Touch number (l-6) to select the appropriate
structions.)
Sensor Reheat Course.
Sensor Cook Course.
4. Touch START.
4. Touch START.
(See Page 16 for more detailed instructions.)
(See Pages 16 and 17 for more detailed in-
structions.)
TIME OF DAY
TIMER
“QUICK-SET” COOKING
(Hi-power only)
To set:
To set:
To set:
1. Touch STOP/CLEAR.
1. Touch STOP/CLEAR.
1. Touch STOP/CLEAR.
2. Touch the symbol “ @“ (Time of Day).
2. Touch TIME.
2. Touch QUICK-SET.
3. Touch numbers for correct time of day.
3. Touch correct numbers for time.
3. Touch number (single digit, 1-9) for desired
4. Touch the symbol “@” (Time of Day).
4. Touch POWER.
cooking time in minutes.
● This “locks” in the time and starts the clock
5. Touch “O” (power level O).
6. Touch START.
(See Pages 8 and 9 for more detailed in-
running.
structions.)
(See Page 7 for
more instructions.)
“Hl-POWER/’’MULTI-POWER
COOKING
MULTI-STAGE COOKING
AUTOMATIC DEFROST
To set:
To set:
To set:
1. Touch STOP/CLEAR.
1. Touch STOP/CLEAR.
1. Touch STOP/CLEAR.
2. Touch TIME.
2. Touch TIME.
2. Touch AUTO DEFROST.
3. Touch number for desired cooking time.
3. Touch numbers for cooking time.
3. Touch number (l-3) to select the appropriate
4. Touch POWER.
4. Touch POWER.
Auto Defrost Course.
5. Touch number (l-9) for desired cooking
5. Touch number (l-9) for desired cookhg
4. Enter the weight of your food in decimal
power level.
power level.
increments from 0.1 to 2.9 kg.
6. Touch START.
6. Repeat steps 2-5 to set 2nd cooking stage.
5. Touch START.
NOTE: It is not necessary to touch POWER
7. Repeat steps 2-5 to set 3rd cooking stage.
6. At pause, follow the instructions in the Auto
when cooking with the highest power (“HI”).
8. Touch START.
Defrost chart for rearranging, turning food
To set “HI-POWER” Cooking, skip steps 4 and
(See Pages 12 and 13 for more detailed in-
over, etc.
5 above.
structions.)
7. To resume defrosting, touch START.
(See Page 11 for more detailed instructions.)
(See Pages 28 through 31 for more detailed in-
structions.)
DELAY-START COOKING
CHILD SAFETY LOCK-OUT
HOLD WARM
To set:
To set:
To set:
1. Touch STOP/CLEAR.
1. Touch STOP/CLEAR.
2. Touch TIME.
1. Touch STOP/CLEAR.
2. Touch the symbol “~ “ (Time of day).
2. Touch HOLD WARM.
3. Touch numbers for desired delay time.
3. Touch numbers 9999.
3. Set for desired cooking cycle following suita-
4. Touch POWER.
4. Touch START.
ble operating instructions.
5. Touch “O’ (power level O).
To cancel
4. Touch START.
6. Touch TIME.
7. Touch numbers for desired cooking time.
1. Touch STOP/CLEAR.
(See Page 8 for more detailed instructions.)
8. Touch POWER.
2. Touch the symbol “ ~” (Time of day).
9. Touch number (l-9) for desired cooking
3. Touch numbers 7777
4. Touch START.
power level.
10. Touch START.
(See Page 7 for more instructions.)
NOTE: A preset delay time must be no more
than 99 minutes and 99 seconds.
(See Page 13 for more detailed instructions.)
–6–
 Loading...