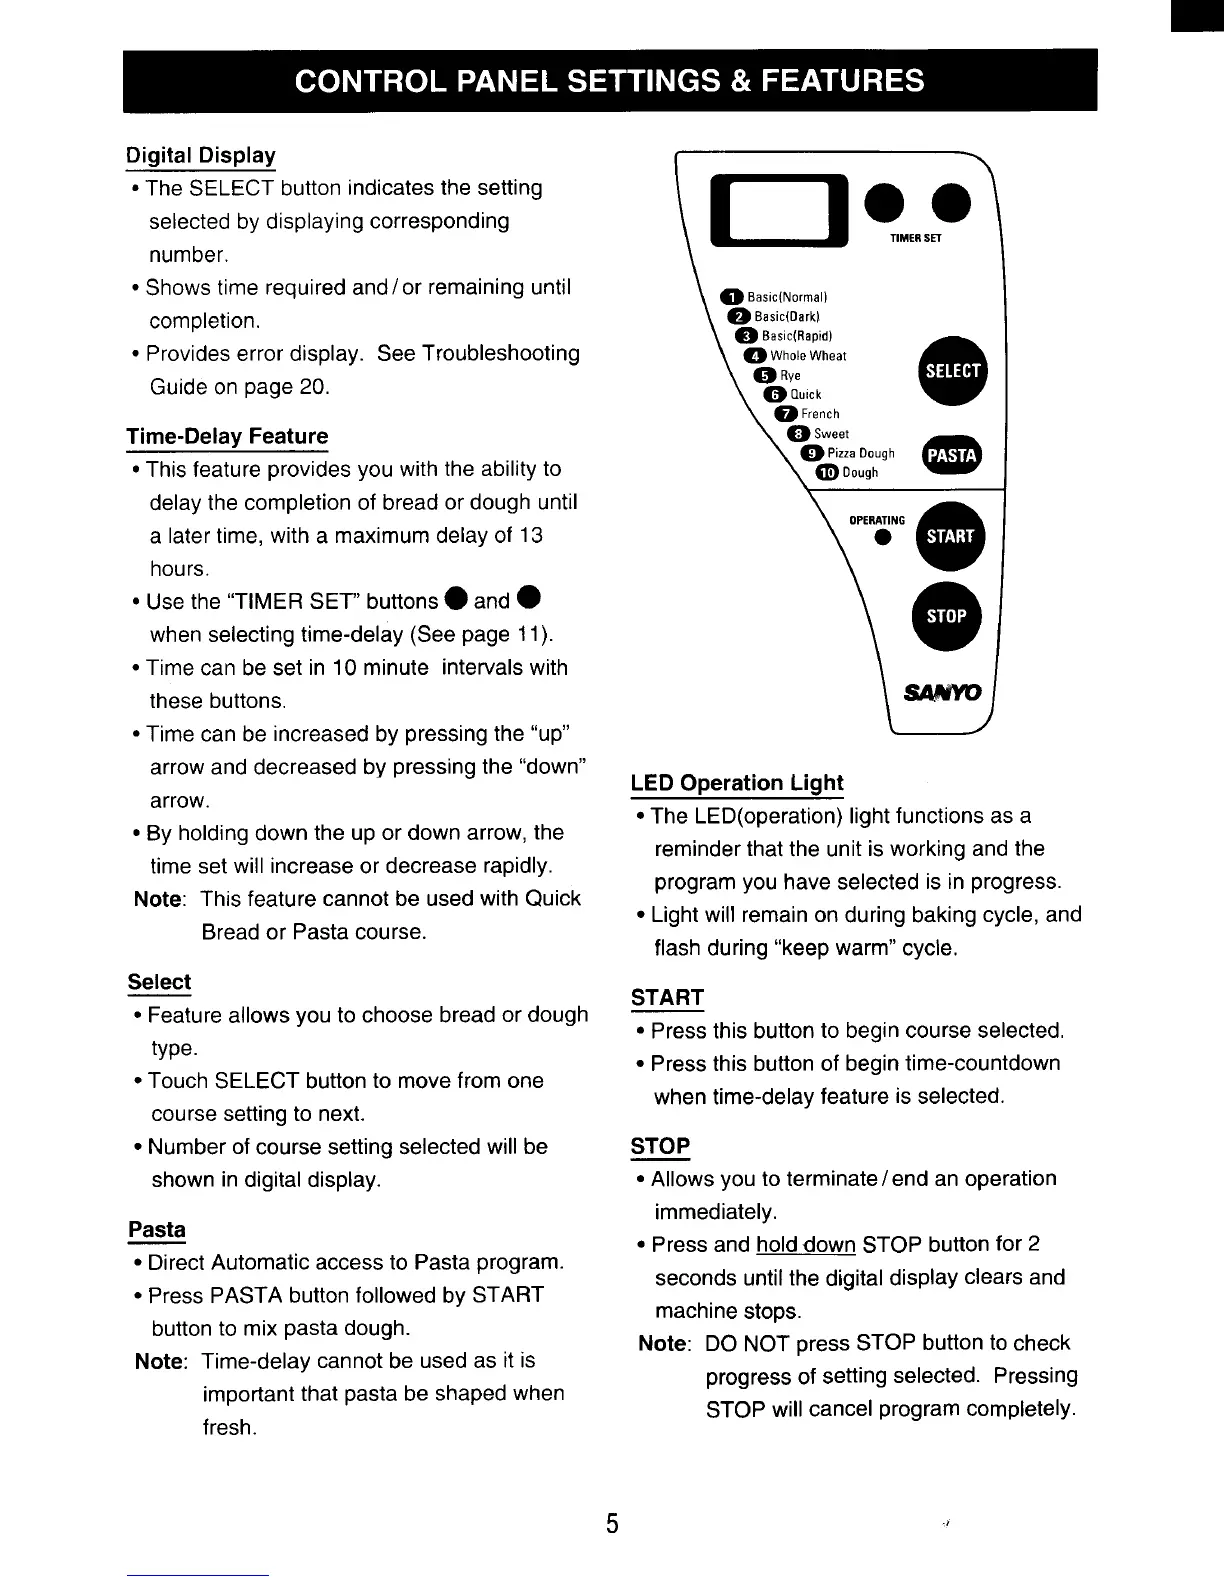
Digital Displav
● The SELECT button indicates the setting
selected by displaying corresponding
number.
● Shows time required and/or remaining until
completion.
● Provides error display. See Troubleshooting
Guide on page 20.
Time-Delay Feature
● This feature provides you with the ability to
delay the completion of bread or dough until
a later time, with a maximum delay of 13
hours.
● Use the “TIMER SET” buttons ● and @
when selecting time-delay (See page 11).
● Time can be set in 10 minute intervals with
these buttons,
● Time can be increased by pressing the “up”
arrow and decreased by pressing the “down”
arrow.
● By holding down the up or down arrow, the
time set will increase or decrease rapidly.
Note: This feature cannot be used with Quick
Bread or Pasta course.
Select
● Feature allows you to choose bread or dough
type.
● Touch SELECT button to move from one
course setting to next.
. Number of course setting selected will be
shown in digital display.
Pasta
● Direct Automatic access to Pasta program.
● Press PASTA button followed by START
button to mix pasta dough.
Note: Time-delay cannot be used as it is
important that pasta be shaped when
fresh.
\l–loMER,o\
\
O Bas,c( Normal)
@ Basic(Dark)
/
@ Baslc(Raptd)
~ Whole Wheat
~ Rye
@ Ou,ck
@
~ French
~ Sweet
m
~Plzza Dough , L i
~ Dough
M
OPERATING
@
● “
e
1’
w
LED Operation Light
● The LED(operation) light functions as a
reminder that the unit is working and the
program you have selected is in progress.
● Light will remain on during baking cycle, and
flash during ‘(keep warm” cycle.
START
● Press this button to begin course selected.
● Press this button of begin time-countdown
when time-delay feature is selected.
STOP
● Allows you to terminate/end an operation
immediately.
● Press and hold down STOP button for 2
seconds until the digital display clears and
machine stops.
Note: DO NOT press STOP button to check
progress of setting selected. Pressing
STOP will cancel program completely.
5
,