– 19 –
13. Lens Adjustment
Preparation:
POWER switch: ON
Adjustment condition:
More than A3 size siemens star chart
Fluorescent light illumination with no flicker
Illumination above the subject should be 400 lux ± 10 %.
Adjustment method:
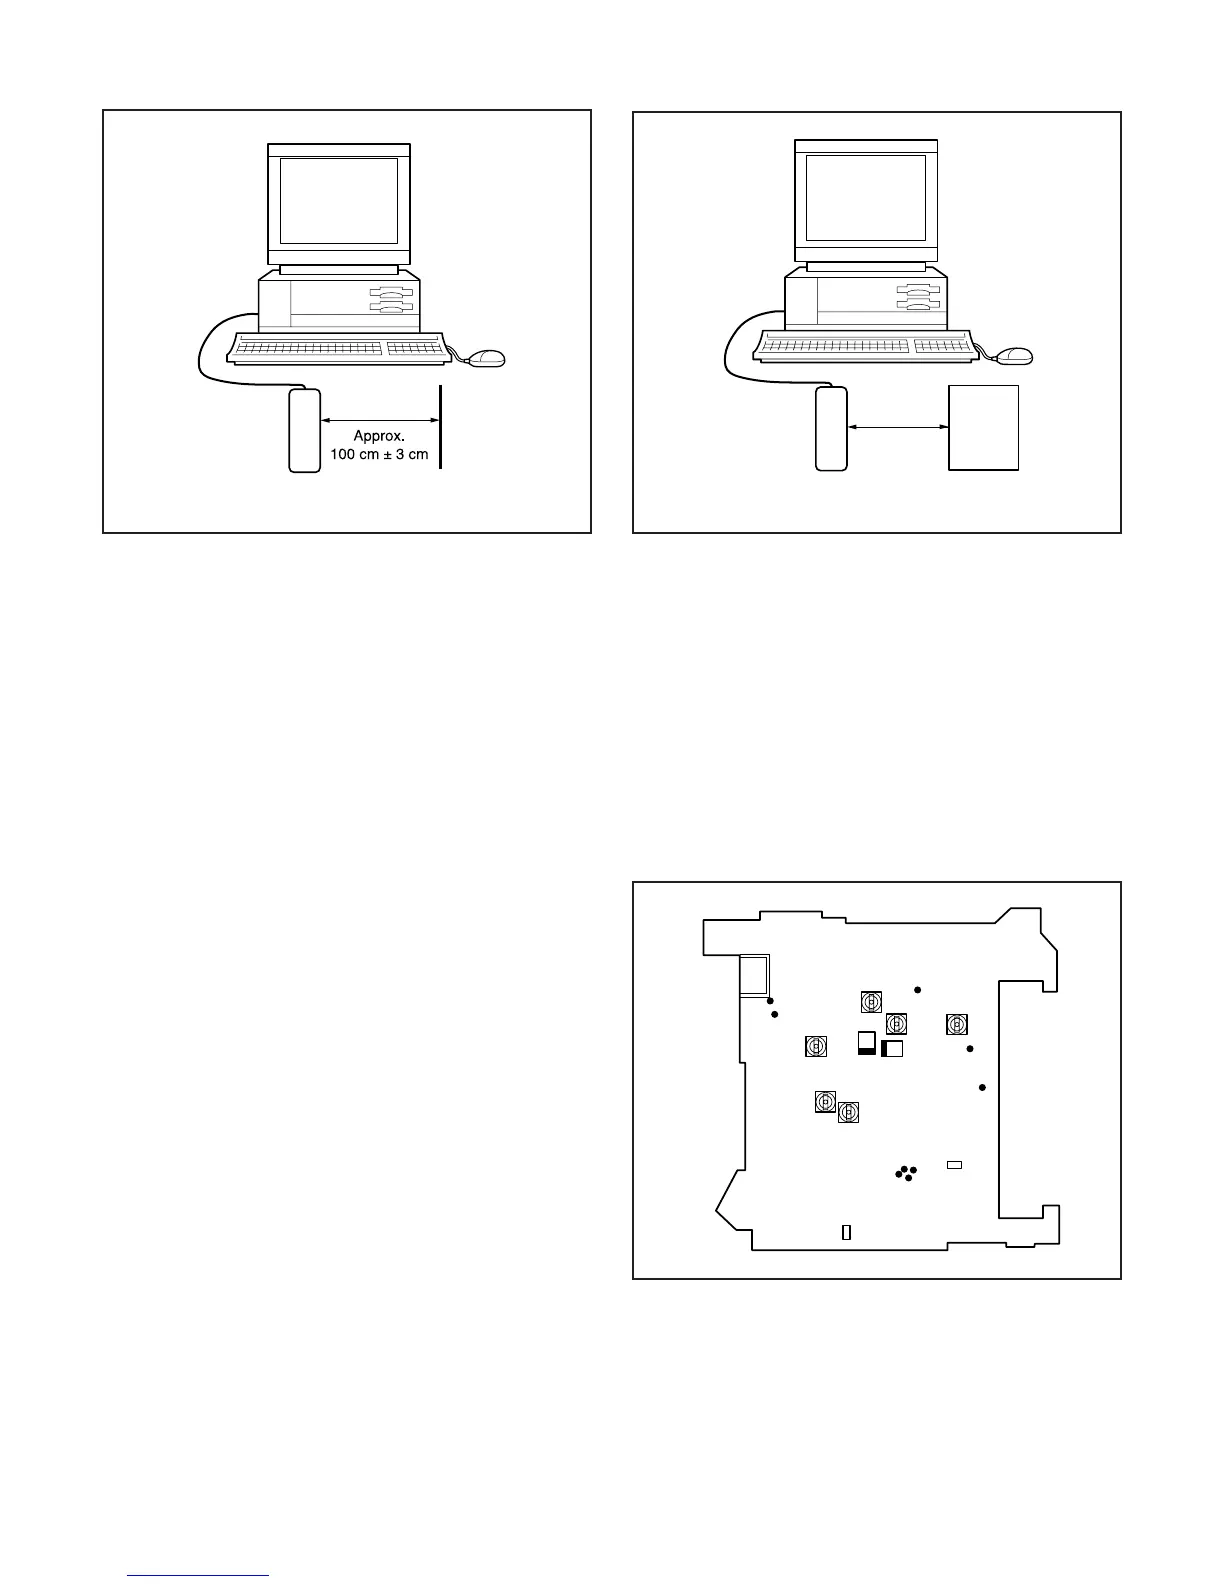
1. Set the siemens star chart 100 cm ± 3 cm so that it be-
comes center of the screen.
2. Double-click on the DscCalDi128c.
3. Click the Focus, and click the Yes.
4. Lens adjustment value will appear on the screen.
5. Click the OK.
14. CCD Defect Detect Adjustment
Preparation:
POWER switch: ON (Set the camera mode.)
Adjustment method:
1. Double-click on the DscCalDi128c.
2. Select “CCD Defect” on the LCD “Test”, and click the “Ye s”.
3. After the adjustment is completed, OK will display.
4. Click the OK.
15. CCD Black Point Defect Detect Adjustment
Preparation:
POWER switch: ON
Adjusting method:
1. When setting the camera in place, set it to an angle so that
nothing appears in any part of the color viewer except the
white section. (Do not enter any light.)
2. Double-click on the DscCalDi128c.
3. Select “CCD Black” on the LCD “Test”, and click the “Ye s ”.
4. After the adjustment is completed, the number of defect will
appear.
16. LCD Panel Adjustment
[CA3 board (Side A)]
16-1. LCD H AFC Adjustment
Preparation:
POWER switch: ON
Adjusting method:
1. Double-click on the DscCalDi128c.
2. Select 0 on the LCD “H AFC”.
3. Apply a trigger using CL407, and adjust LCD “H AFC” so
that the time A from the rising signal at CL407 to the fall-
ing signal at CL404 is 5.00 ± 0.2 msec.
Camera
0 - 18 cm
All white pattern
Color viewer
Camera
Siemens
star chart
CL407
(CSYNC)
VR514
VR511
VR513
VR512
VR921
CL402(G)
CL403(R)
CL401(B)
CL404
(XENB)
CL579
TP921
TP922
C5133(+)
L1702
(input)
VR515
CL572
CL568
CL589
 Loading...