Satellic NV • Airport Plaza • Leonardo Da Vincilaan 19 A Bus 4• B-1831 Diegem • support@satellic.be • www.satellic.be
Customer Support: T 00800-72 83 55 42 or • F +32 2 416 02 99
5
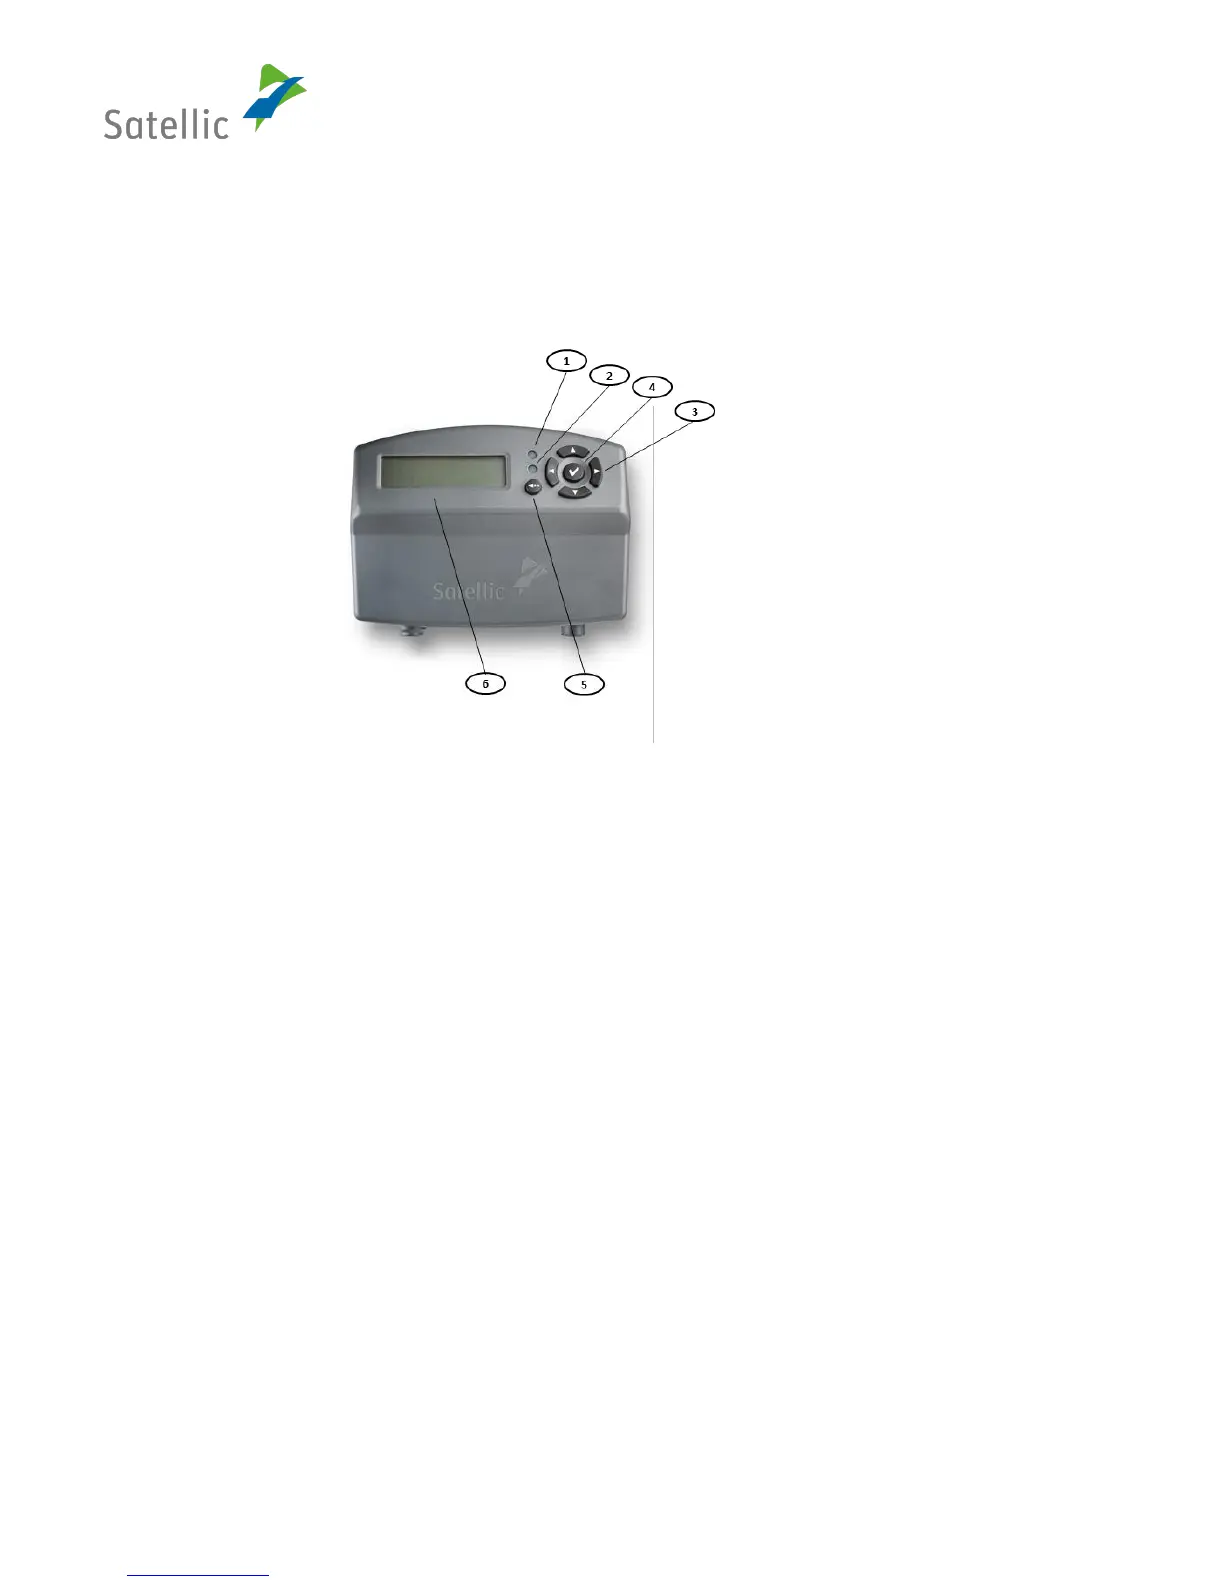
2. Controls
The OBU has six buttons: “button ok” (4), “button up, down, left, right” (3) and “button back” (5). The
red LED (1) and the green LED (2) are optical indicators for the status of the OBU. The “display” (6) is the
main optical indicator for the OBUs status.
Figure 1: General Handling of OBU
(1) Red LED:
The red LED indicates the status of the OBU. The red LED lights up during the booting process or
when problems occur. The OBU does not function in the automatic toll collection when the red LED
is switched on.
(2) Green LED:
The green LED indicates the status of the OBU. The green LED lights up if the booting process is
performed and the OBU works properly. All requirements for automatic toll collection have been
met.
(3) Buttons “up, down, left, right”
These are navigation buttons for moving forward and backward in the menu. In order to enter the
menu screen, the user has to hold the navigation button.
(4) Button “ok”
The “ok” button is used to confirm menu selections. As from OBU software version 5.17, it is not
necessary anymore to push on the “ok” button to start your OBU: if your OBU is connected to the
cigarette lighter socket, it will automatically switch on when you start driving! This applies to all the
OBUs connected to the truck with the standard power cable. Note that fixed installed OBUs were
already switching on automatically since they are directly connected to the ignition of the truck.