RFID User Guide 20 PN: 9001147D
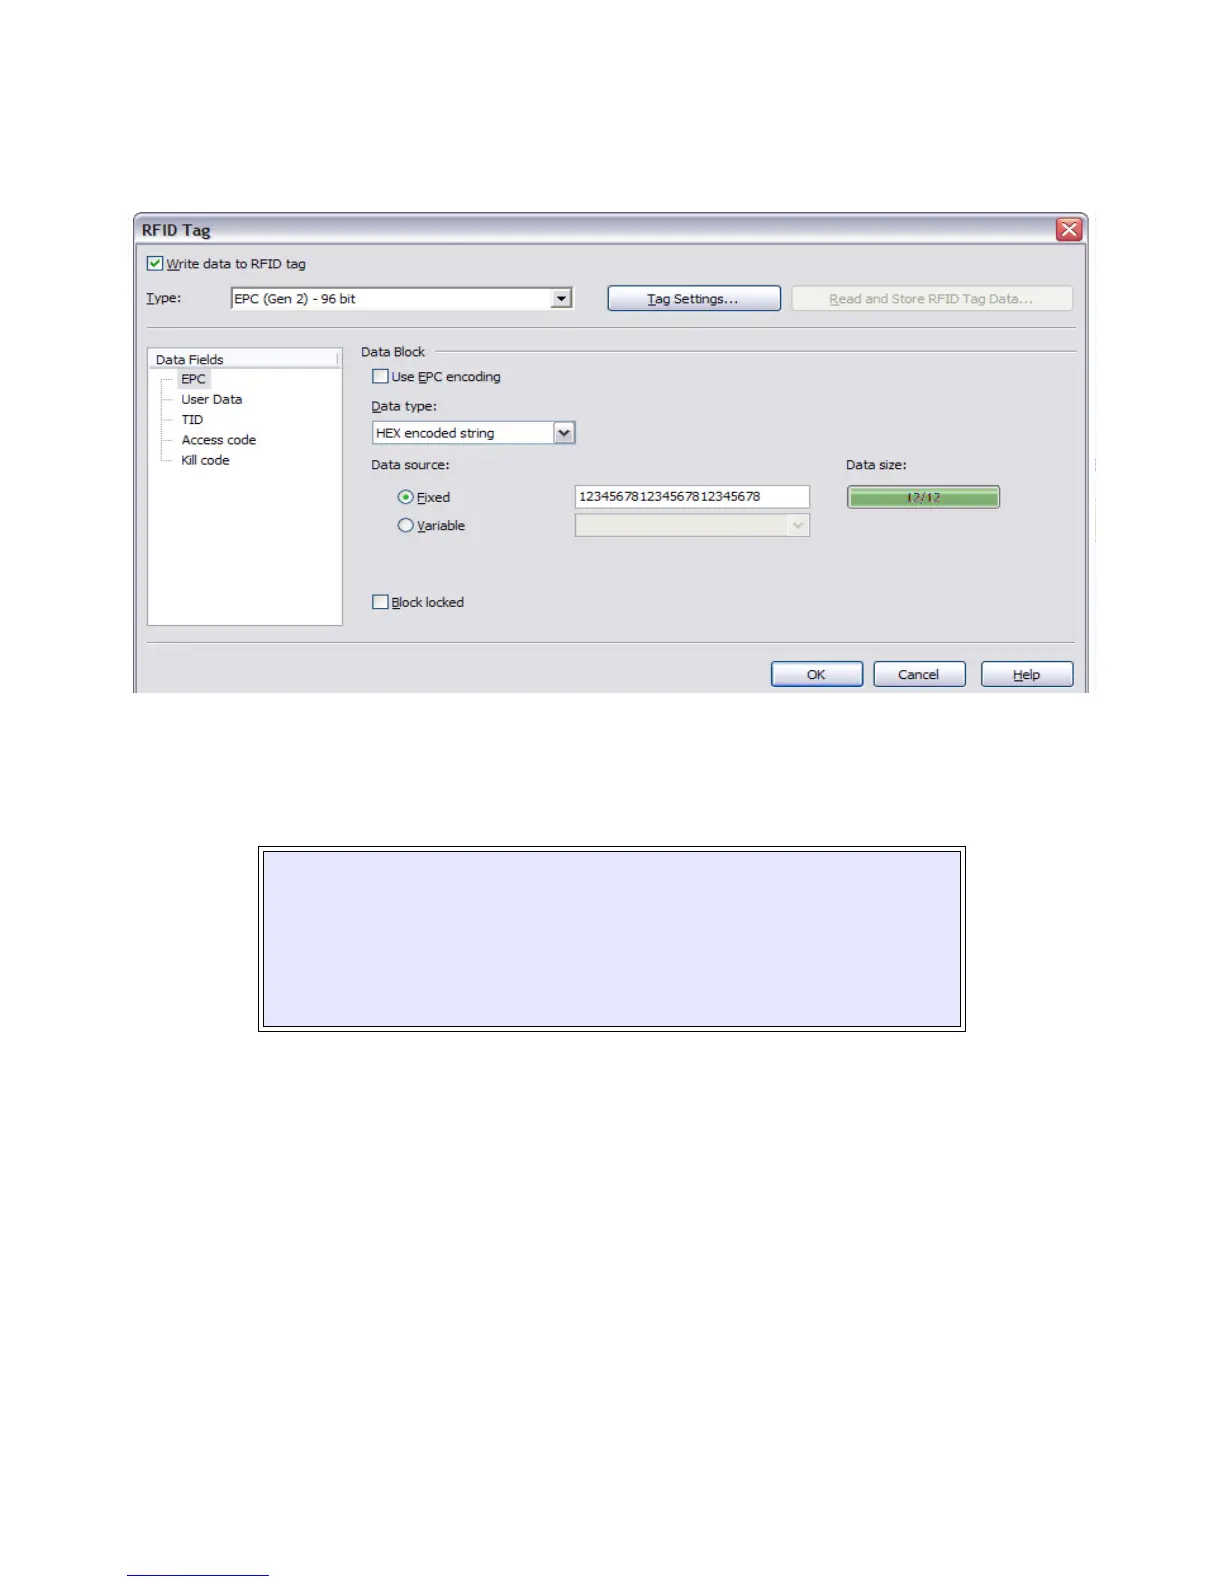
Click on OBJECT of the upper task bar and then select the RA DATA option. The following RFID tag (Screen 3) will
appear.
Figure 14, Screen 3
Click on the scroll-down arrow for “Type” and select the EPC (class 2) 94 bit menu option or type of inlay desired.
Click on the scroll-down arrow for “Data Type” and select either the ASCII or the Hex Encoded String option.
This data may also be substituted with a variable previously created in Label Gallery by selecting the “Variable”
option for the Data Source ratio.
EPC encoding translators may also be used by selecting that relative box on the screen. When checked, select the
type of EPC encoding to be used and then fill in the data values which show up as shown on Screen 4.
NOTE: The ASCII option allows the data to be entered as full ASCII table and the
software changes over to HEX when sending it to the printer. For a 64-bit tag
selection, eight (8) digits must be used and for a 96-bit selection, twelve (12) digits
must be used.
HEX allows the data to be entered using 0 through 9 and A through F. The exact data
is sent to the printer’s chip. For a 64-bit tag selection, sixteen (16) digits must be used
and a 96-bit selection, twenty-four (24) digits must be used.