17
6. ADJUSTEMENT OF THE GAS VALVE
After starting the system, it is not necessary to set the gas valve, it was already done in the factory.
In case of replacement, only a qualified person is allowed to set the new gas valve.
An inappropriate setting can cause an overheating, a non-ignition of the burner or the
emission of carbon monoxide.
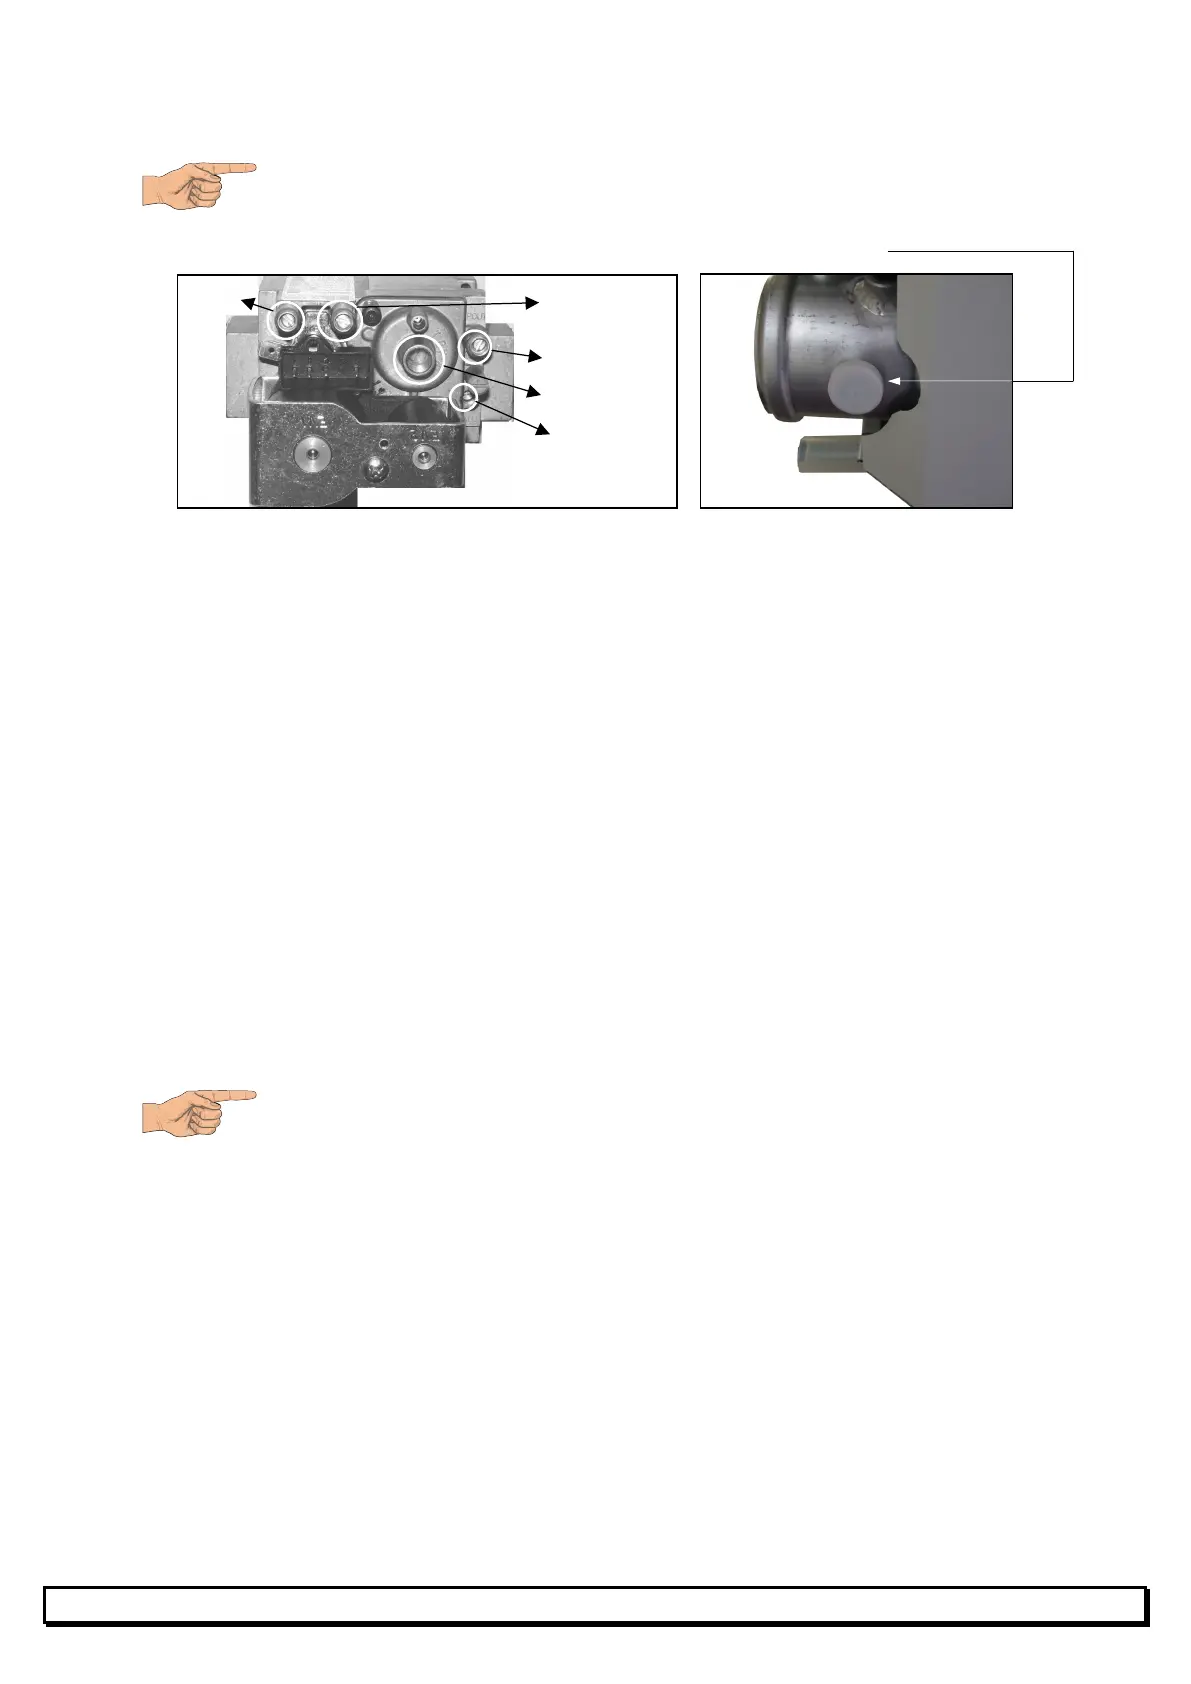
Use a calibrated combustion analyser and place the probe in the provided hole.
Offset adj.
Ratio adj.
P offset
P in
In order to set the gas valve, there are 2 setting screws :
- Ratio screw : for the operation at low capacity
- Offset screw : for the operation at high capacity
Turning on the appliance at its high speed by pressing the servicing button S1 for 10 seconds then
press it again. The display shows alternatively H and b.
Research the appropriate CO
2
values in the technical specifications of the table 5.
1) Check the CO
2
at high speed (High mode).
Decrease the CO
2
by turning the Ratio screw in clockwise (less gas).
Increase the CO
2
by turning the Ratio screw in anticlockwise (more gas).
2) Then check the CO
2
at low speed (Low mode) by pressing twice the S1 button, then press it for
10 seconds.
The CO
2
level at low speed shall be lower than the CO
2
level at high speed.
Decrease the CO
2
by turning the Offset screw in clockwise.
Increase the CO
2
by turning the Offset screw in anticlockwise.
After have set the CO
2
at low speed, go back to high speed and readjust the CO
2
level.
Then go back to low speed to eventually readjust the CO
2
level.
Repeat these steps until the 2 values are correct.
Do never forget to check the CO level (carbon monoxyde) of the appliance !!!
Too much CO means mainly that the mix air/gas is to rich.
The CO value has to be always lower than 100 ppm.
In the case of AMC 78, 97 and 116 models, check respectively at low and high capacity the 2 heating
units and adjust if necessary.
After this control, the 2 units shall heat together.
Offset screw
Ratio screw